
In the Qlik Cloud Analytics hub, you can create, share, and interact with analytic apps. You can also add and interact with other content. This includes data sources, scripts, charts, notes, and links.
The hub is divided into the following sections:
- Getting Started
- Home
- Favorites
- Catalog
- Collections
- Alerts
- Subscriptions
You can access the following from all sections:
- Ask Insight Advisor: Use a chat-based interface for conversational analytics.
- Add new: Add new content and spaces to the hub.
- Notifications: View your web notifications.
- Launcher menu: Navigate to other parts of Qlik Cloud.
- Profile: Manage the settings for your profile, and alerts and subscriptions.
Home
After your first login, you will start in Home when you log into the hub. Here, you can view various collections, including your apps, scripts, charts, and notes. You can easily add, remove, or reorganize collections in your home.
Home section of the hub

Customizing Home
Click Add widgets to customize your personal Home. Choose from favorites, collections, apps, data, charts, notes, ML experiments, automations and scripts. You can also show content that has been recently used, created, or updated.
Click a widget to add or remove it from your home page.
Customize the widgets shown on your home page.

You can also rearrange or remove sections directly on the home page:
-
To move a widget vertically, click and hold
 next to the widget and move it into place.
 -
To remove a widget, hover to the right of the widget and click the More actions menu (
 ) that appears. Then select Remove.
More actions menu on widget.

Administrators can add tenant-wide customized home pages, allowing the promotion of specific content to all users in the tenant. The custom page appears as a tab in Home, next to your Personal page. For more information, see Customizing tenant-wide home pages for the Qlik Cloud Analytics hub.
Favorites
All users have a Favorites section. Your favorites are not shared with other users.
Favorites in the hub

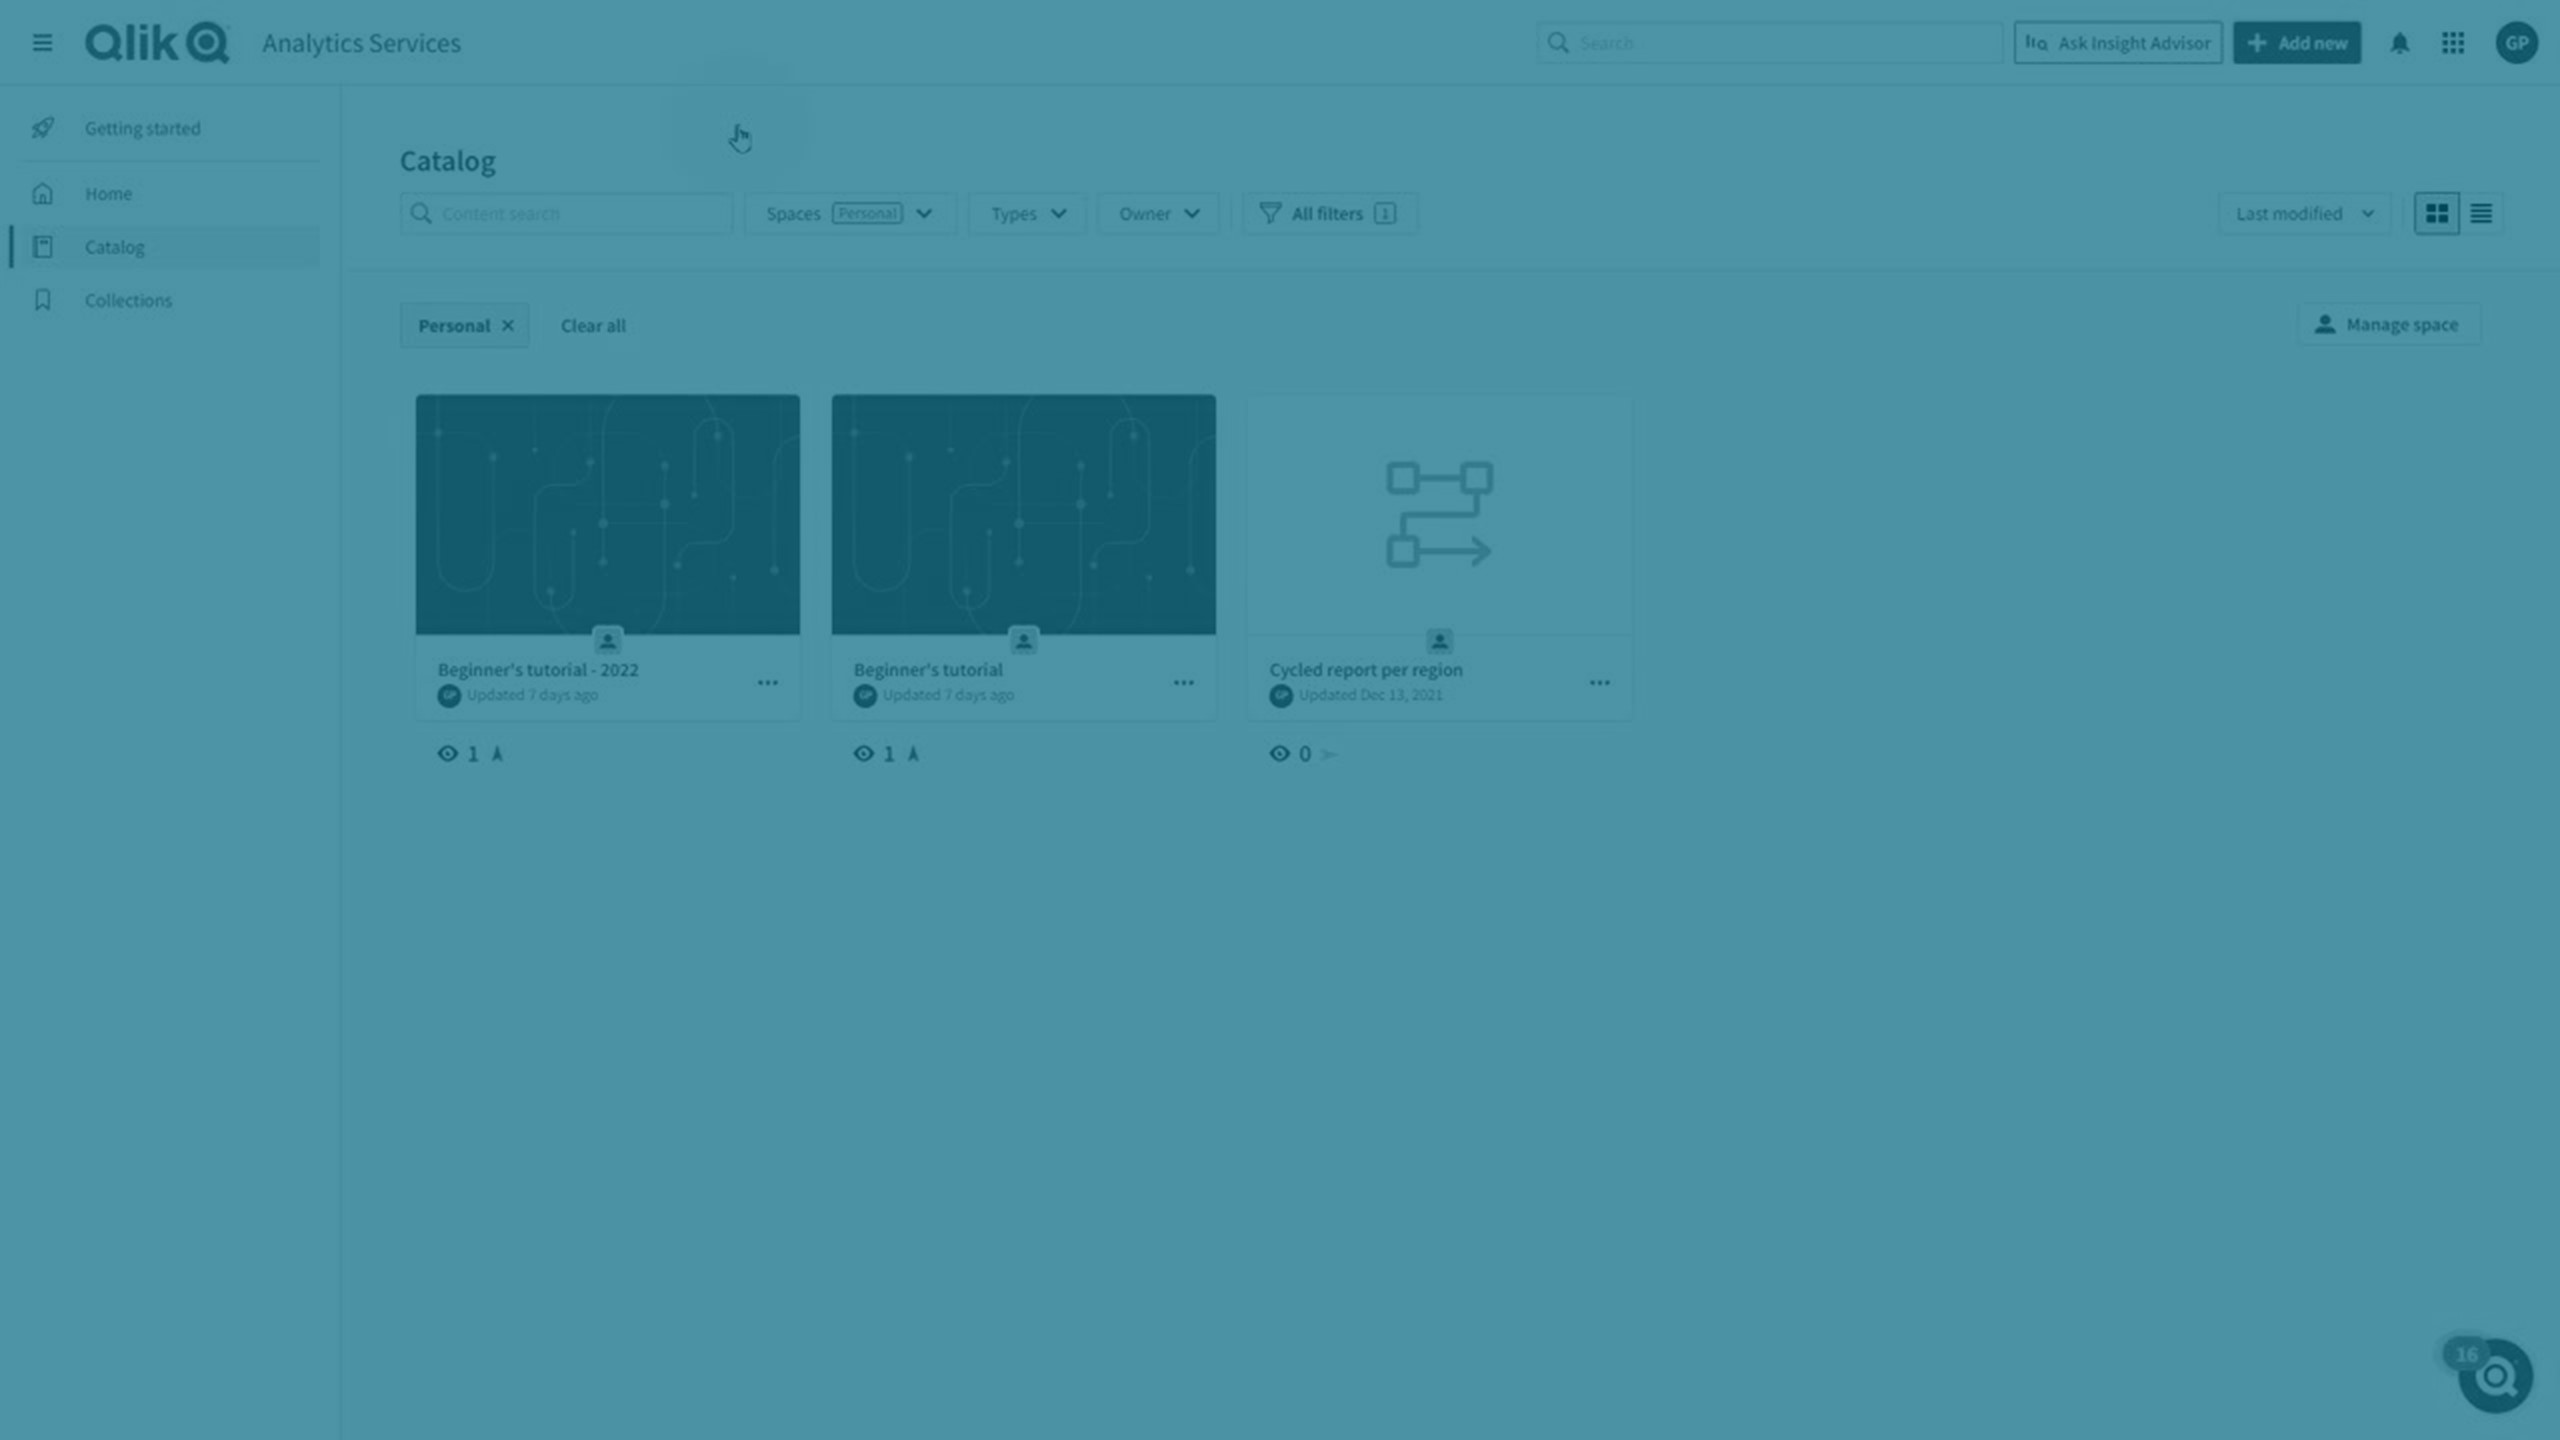
Catalog
In Catalog, you can view the apps and spaces to which you have access, as well as other content. Catalog allows you to filter on spaces, terms, charts, apps, automations, data, scripts, notes, owners, creators, and tags. You can select individual spaces from the spaces drop-down to view content from that space. Select All filters to display the filter pane. When the filter pane is active the All filters box is grayed out. The box displays the number of active filters.
You can view content in either the Tile or List
 view.
view.
Apps and other content can be sorted alphabetically, by creation date, by modification date, or recently used. You can filter content by those you own or by those others own.
To learn more about Catalog, see Understanding your data with catalog tools.
Catalog section of the hub

Collections
Collections enable you to group apps, scripts, charts, notes, automations, experiments, and links.
To add content to a collection, click the Add to collection icon on any content type.
If you are using Qlik Sense Mobile SaaS, you also have a Mobile Content collection. Apps that you have opened in the Qlik Sense Mobile SaaS app are automatically added to Mobile Content.
Collections section of the hub

By default, collections are private. Tenant admins and analytic admins can make collections public to share them with all other members of the tenant. Public collections do not change members' access to content in spaces. Members will only be able to see content in public collections to which they already have access. To make a collection public, click ![]() on the collection, select Make public, and click Make public. To make a public collection private again, click
on the collection, select Make public, and click Make public. To make a public collection private again, click ![]() , select Make private, and click Make private.
, select Make private, and click Make private.
Alerts
In Alerts, you can view a list of all alerts owned by you, as well as alerts to which you have been added as a recipient. The Alerts page contains details about each alert, including its name, owner, associated app, and whether it is being evaluated on a schedule.
You can also access Alerts from the user profile menu in the upper right-hand corner of the application.
Alerts section of the cloud hub

You can filter and sort the alerts on the Alerts page. You can refine your list by alert owner (anyone, you, or others), or search for alerts owned by a specific user. The alerts in the list can be sorted by time of last evaluation, the last time triggered, or alphabetically by name.
Subscriptions
In Subscriptions, you can view and modify subscriptions you own, as well as subscriptions to which you have been added as a recipient. The Subscriptions page contains details about each subscription, including its name, owner, associated app, and schedule.
You can also access Subscriptions from the user profile menu in the upper right-hand corner of the application.
Subscriptions section of the cloud hub

You can filter and sort the subscriptions on the Subscriptions page. You can refine your list by owner (anyone, you, or others), or search for subscriptions owned by a specific user. The subscriptions in the list can be sorted by time last sent, time they are next scheduled to be sent, or alphabetically by name.
For more information about creating and managing subscriptions, see Scheduling reports with subscriptions.
Settings and Management
Settings and Management is available from the profile menu by clicking Profile settings. In Settings and Management, you can:
- View and edit your personal information.
View the roles that are assigned to you.
- Set preferred language and time zone.
- Set the regional settings (such as date formats and decimal formatting) for the apps you create.
- View all the shared and managed spaces to which you belong.
- Manage your devices for Qlik Sense Mobile.
- Download tools such as Qlik DataTransfer are not available in Qlik Cloud Government.
- View and generate API keys.
Apps
In the hub, you can create new apps, duplicate existing apps, or upload apps. You can upload apps exported from the hub or other versions of Qlik Sense. You can keep your apps private or you can share them with other users. To learn more about Qlik Sense apps, see Working with apps.
Each app in the hub displays the app name, owner, and the modification date.
You can view the type of app and tags applied to the app by hovering your cursor over an app. On a touch device, you can view the app type and tags by tapping ![]() on the app. You can click on the app to open it. You can click
on the app. You can click on the app to open it. You can click ![]() to view more options for the app including:
to view more options for the app including:
| Option | Description | Further reading |
|---|---|---|
| Add to collection | You can add the app to one of your collections. | - |
| Rename | You can change the app name, description, and tags. | |
| Move |
You can move the app to a different space. |
Moving apps between spaces |
| Duplicate | You can create a copy of the app. | Creating apps and adding data |
| Reload now | You can reload the app data manually. | Reloading app data |
| Reload schedule |
You can create a schedule to automate reloading app data. |
Scheduling reloading app data |
| Details |
You can view the app type and owner, as well as relevant date information for the app. Additionally, you can view the app size. This page also shows the tags applied to the app and who can access the app. You can also see reload history and performance evaluations related to the app. |
- |
| Notifications | Set notification preferences for this app. You can receive notifications when reloads and performance evaluations succeed or fail. You can also receive notifications if a scheduled reload for an app failed, stopped, or was disabled. You must be assigned to the reload schedule to receive this notification. You will not receive notifications if an app is reloaded in the Data manager or Data load editor. Reload notifications are sent if an app is reloaded in the hub or on a schedule. | Notifications |
| Lineage |
Lineage represents the history of a field or dataset, back through applications and transforms, to the original data source. |
Analyzing lineage for apps, scripts, and datasets |
| Impact analysis |
Impact analysis shows a downstream view of a data element’s dependencies - which databases, apps, scripts, files, or links would directly or indirectly be impacted if the value or structure of that particular field was changed. |
Analyzing impact analysis for apps, scripts, and datasets |
| Evaluate performance | You can run a tailored evaluation as you develop your app and presents simple and understandable metrics such as response times for public sheets and objects. | App performance evaluation |
| Open in new tab | You can open your app in a new tab. | - |
| Open without data | You can open your app without data. This is helpful if you need to troubleshoot your load script. When you open an app without data, visualizations will not work, as they are not connected to the data source. Additionally, the data manager and the data model viewer will not be available. | - |
| Export with data | You can export apps from the hub as .qvf files. | Exporting apps |
| Export without data | You can export the app without any data. This only exports the sheets and stories of the app. | Exporting apps |
| Duplicate and convert to script | You can duplicate the app and convert it to a script. The app's load script is used as the script. | Converting apps to scripts |
| Delete | You can delete the app from the hub. | Deleting apps |
You can also add QlikView apps to the hub. QlikView apps can only be viewed and have different options than Qlik Sense apps in the hub.
Scripts
In the hub, you can create new scripts, duplicate existing scripts, or upload scripts. You can upload scripts exported from the hub. You can keep your scripts private or you can share them with other users. To learn more about scripts, see Working with scripts in the catalog.
Each script in the hub displays the script name, owner, and the modification date.
You can view the type of script and tags applied to the script by hovering your cursor over a script. On a touch device, you can view the script tags by tapping ![]() on the app. You can click on the script to open it. You can click
on the app. You can click on the script to open it. You can click ![]() to view more options for the script including:
to view more options for the script including:
| Option | Description | Further reading |
|---|---|---|
| Add to collection | You can add the script to one of your collections. | - |
| Rename | You can change the script name, description, and tags. | |
| Move |
You can move the script to a different space. |
Editing script details |
| Duplicate | You can create a copy of the script. | Duplicating scripts |
| Reload now | You can reload the script manually. | Reloading scripts |
| Reload schedule |
You can create a schedule to automate reloading the script. |
Reloading scripts |
| Details |
You can view the script owner, as well as relevant date information for the script. Additionally, you can view the script size. This page also shows the tags applied to the script and who can access the script. You can also see reload history and performance evaluations related to the app. |
- |
| Notifications | Set notification preferences for this script. You can receive notifications when reloads and performance evaluations succeed or fail. You can also receive notifications if a scheduled reload for an script failed, stopped, or was disabled. You must be assigned to the reload schedule to receive this notification. You will not receive notifications if a script is reloaded in Script. Reload notifications are sent if a script is reloaded in the hub or on a schedule. | |
| Lineage |
Lineage represents the history of a field or dataset, back through applications and transforms, to the original data source. |
Analyzing lineage for apps, scripts, and datasets |
| Impact analysis | Impact analysis shows a downstream view of a data element’s dependencies - which databases, apps, scripts, files, or links would directly or indirectly be impacted if the value or structure of that particular field was changed. | Analyzing impact analysis for apps, scripts, and datasets |
| Export | You can export scripts from the hub as .qvf files. | Exporting scripts |
| Duplicate and convert to analytics app | You can convert the script to an app. The script will be used as the app's load script. | Converting scripts to apps |
| Open in new tab | You can open your app in a new tab. | - |
| Delete | You can delete the script from the hub. | Deleting scripts |
Charts
You can add visualizations from apps into the hub. This lets you to closely monitor important visualizations without opening apps.
Spaces
Spaces are areas in the hub where apps are stored. Spaces can be personal, shared, or managed.
All users have a personal space where apps they create are stored by default. Personal spaces are private. You can share your personal apps by moving them to a shared space.
Users with the Shared Space Creator role can create shared spaces. Shared spaces are private when first created. Shared spaces allow collaborative development of apps. Spaces also limit access to apps in the space. Access to apps in the space is granted by adding members to the space.
Managed spaces can be created by tenant or analytics administrators, or users with the Managed Space Creator role. Managed spaces are used to provide strictly controlled access to apps that might have sensitive data. Apps are developed in other spaces and then published to the managed space.
You can select spaces to which you have access to from the drop-down in Catalog. You can also create new spaces from the spaces drop-down.
For information on spaces, see Working in spaces.
Navigating spaces
Shared and managed spaces are divided into the following sections:
- Details
- Notification preferences
- Members
- Data sources
- Edit space
You can access these sections by selecting Space details in a shared or managed space.
In a personal space, you can only select Data sources. Select your user profile menu to manage other personal space settings.
Details
You view space information in Details, including description, space owner, and space creator.
The Details section

Notifications
You can manage your subscriptions for content in the space from Notifications. You can subscribe to events or actions in a space by selecting the event or action under the notification type.
Members
Space owners and users with the Can manage role can view all the members of a space in Members. They can do the following:
- Add members
- Change member permissions
- Remove members
Managing permissions in shared spaces
Managing permissions in managed spaces
The Members section of a shared space.

Data
You can view all data files and connections added to the space in Data. If you have the permissions, you can also add data files and data connections to the space.
Adding and managing your analytics data
Users with Can view cannot view the data sources in a space.
The Data section of a shared space

Organizing content in the hub
You can organize content such as apps, charts, automations, experiments and notes using tags and collections.
You can add tags to content to group it with related content. You can only tag your own content, or content in a space in which you have edit permissions. Tags are shared in the hub.
Collections enable you to group content together for ease of access.
Notifications
You can receive notifications in the hub for events that occur in Qlik Cloud. For example, when new apps are added to a space or when an alert is triggered.
You can view them by clicking the Notifications icon. You can manage your tenant-level notifications in Profile settings. You can configure your notifications for an individual space by opening the space in Catalog and clicking Space details > Notifications in Catalog. To configure your notifications for an individual item (for example, an app or a note), click ![]() on the item, and select Notifications.
on the item, and select Notifications.
Notifications can be sent by web in the hub or by email. If you have Qlik Sense Mobile SaaS, web notifications can be pushed to your mobile device.
Searching in the hub
You can search in the hub to find apps and other content. You can filter your results by type.
Searching in the hub

You can view details for search results by selecting an item. Click ![]() on a search result for more options.
on a search result for more options.