
Making preparations
In this step, you will create a new analytics application, and add the data files from the BuildingAnAppFiles folder.

Opening Qlik Cloud
Open Qlik Cloud by entering a web address in your browser, such as https://<your tenant address>. If a login window is opened in your browser, enter your user name and password. The exact address and credentials that you enter depend on how your organization has deployed Qlik Cloud.
Placing tutorial source files in a new application
The BuildingAnAppFiles folder you downloaded contains the data files. Before you start creating visualizations you need to make a new application and add your data.
When you create a new application, put it in your personal space. Your personal space is your own private work area.
Create a new application
Do the following:
- Log in to Qlik Cloud.
-
Go to the Create page of the Analytics activity center and select Analytics app.
- Type a Name for your application. For example: Building an app tutorial.
-
Choose a Space for your new application.
The default option is your Personal space.
- Click Create.
Upload the tutorial source files
You need to upload the data files.
This section shows you to upload different types of files as data sources. Four files are in .xlsx (Excel) format, and one file is in CSV format. To teach you how to process different data sources, the CSV file has embedded field names. Adding a file with embedded field names to your data model requires additional configuration to ensure the field names are included.
Upload the Excel files
Do the following:
-
Open the application you created.
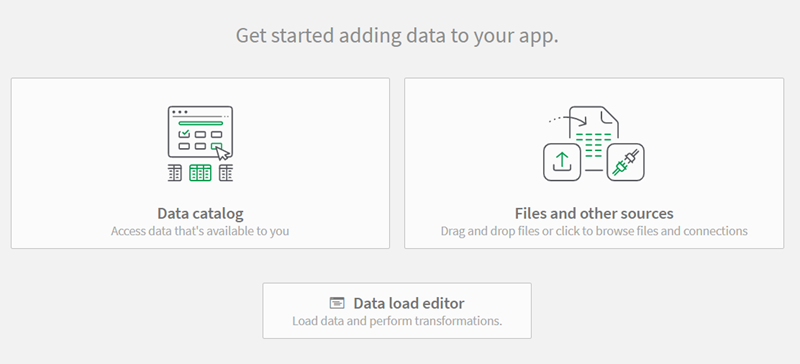
You will see the application overview screen.
-
Select the four .xlsx data files from the BuildingAnAppFiles folder and drag them to the Files and other sources tile. These four files are:
-
Cities.xlsx
-
Customers.xlsx
-
Item master.xlsx
-
Sales.xlsx
-
If you see a dialog box that says "Replace file? This file already exists", then you may have added these files to your personal space previously. Or you may have different data files with the same file names. You can choose to replace the existing files, or cancel the upload.
The data files are added to your personal data files.
Upload the CSV file
Do the following:
- In the top left, click
 Add data. Click Files and other sources.
 - Drag the Sales rep.csv file onto the Drop a file here or click to select a file tile.
- You will see the data table. Make sure that the Field names drop-down is set to Embedded field names.
- Click Next.
If you see a dialog box that says "Replace file? This file already exists", then you may have added these files to your personal space previously. Or you may have different data files with the same file names. You can choose to replace the existing files, or cancel the upload.
Data files in the Data manager

All required files have now been added to your personal data files. They are ready to be associated.
The next step is to associate and load the data.