
Installing Qlik DataTransfer
Qlik DataTransfer is a lightweight Windows application that lets you upload data from on-premises data sources to a Qlik Cloud tenant without firewall tunneling. The service account owner (SAO) or tenant administrator generates an API key from the tenant, which is then used to authenticate Qlik DataTransfer. Once authenticated, you can schedule automatic data reloads or upload data manually.
New users are encouraged to use the File connector via Direct Access gateway and only use Qlik DataTransfer if absolutely necessary. For more information, see Qlik Data Gateway - Direct Access and File (via Direct Access gateway).
Qlik DataTransfer works with the following kinds of data sources:
- Application data
- Connection data
- Folders
For information on data types that are available with Qlik DataTransfer, see Uploading on-premises data with Qlik DataTransfer.
An installation of Qlik DataTransfer can only be associated to a single Qlik Cloud tenant.
Qlik DataTransfer system requirements
| Platforms |
For development and testing purposes only:
Information noteThese operating systems are supported by Qlik Sense. Third-party software may require service packs to be installed.
|
|---|---|
| Processors (CPUs) |
Multi-core x64 compatible processors. We recommend a minimum of 4 cores. |
| Memory |
8 GB minimum The memory requirements for the Qlik Sense products are directly related to the amount of data being analyzed. |
| Disk space | 2 GB minimum |
| Storage |
Sufficient storage is required for the volume of applications and content used in the deployment. |
| PowerShell | 5.1 or higher |
| TLS |
1.2 |
Before you begin
Before you download and run the Qlik DataTransfer installer, make sure you meet the following requirements:
Qlik Cloud and user permissions
- Access to a Qlik Cloud tenant.
-
Professional user entitlement (applies only to user-based subscriptions).
-
Manage API keys permission, assigned through a custom role or the User Default settings. For information, see Managing API keys.
- Access to all spaces where you will upload data from Qlik DataTransfer. For more information, see Managing spaces.
Access and permissions on your Windows machine
- Administrator permission on a Windows machine with access to on-premises data sources.
- A Windows machine that meets the system requirements. For details, see System requirements for Qlik DataTransfer.
-
The policy SSL Configuration Settings set to support only IANA-format ciphers.
-
Permission to execute PowerShell scripts with the RemoteSigned execution policy.
TLS and cipher requirements (Windows Server 2012 R2)
If installing or upgrading to Qlik DataTransfer May 2021 or later on Windows Server 2012 R2:
-
Update the TLS Cipher Suite. Default ciphers in Windows Server 2012 R2 are not supported. Required ciphers:
-
TLS_ECDHE_RSA_WITH_AES_256_GCM_SHA384
-
TLS_ECDHE_RSA_WITH_CHACHA20_POLY1305_SHA256
-
TLS_ECDHE_RSA_WITH_AES_128_GCM_SHA256
-
TLS_ECDHE_RSA_WITH_AES_256_CBC_SHA384
-
TLS_ECDHE_RSA_WITH_AES_128_CBC_SHA256
-
-
For instructions, see Qlik Community: Adding Cipher Suite for Qlik Data Transfer on Windows 2012 R2.
Service account requirements
-
Qlik DataTransfer requires a Windows user account. A dedicated user account with administrator privileges is recommended to run the service.
-
If the dedicated user is an administrator, log in as that user to install Qlik DataTransfer. If not, use an administrator account.
-
On a Windows server with Qlik Sense Enterprise on Windows installed, Qlik DataTransfer must be installed with the Qlik Sense services user used in the Qlik Sense installation.
-
If you change the service log-on account after configuring Qlik DataTransfer, reconfigure the tenant and connections, delete token.json in %ProgramData%/Qlik/DataTransfer/DataUpload/storage, and restart the Qlik DataTransfer service.
Additional recommendations
-
For February 2021 SR1, it is recommended to install Qlik DataTransfer on a separate server from Qlik Sense Enterprise on Windows or QlikView Server. Installing on the same server, Qlik DataTransfer runs using the Local System user account. If you change the service user account, it will stop either Qlik DataTransfer or the Qlik Sense Service Dispatcher.
Confirming the installation user account execution policy
The user account installing Qlik DataTransfer must have permission to execute PowerShell scripts with the RemoteSigned execution policy. If you do not have permission to assign the user account permissions, contact your administrator to give the installation user account these permissions.
Do the following:
-
Open PowerShell in administrator mode.
-
Run Get-ExecutionPolicy. It should be RemoteSigned. If it is Restricted or Disabled, continue to the next step.
-
Run Set-ExecutionPolicy RemoteSigned.
-
Select Y.
Download and run the installer
If you are installing or upgrading Qlik DataTransfer on a Windows server with Qlik Sense Enterprise on Windows installed, Qlik DataTransfer must be installed with the Qlik Sense services user used in the Qlik Sense installation.
Do the following:
-
Download the Qlik DataTransfer.exe file from either:
-
Product Downloads
For more information, see Downloading tools and installation files. -
Qlik Cloud
Click your profile icon in the top right-hand corner, then click Settings. Under Other, click Tools.Qlik Cloud Government noteThis option is not available in Qlik Cloud Government.
-
-
Run the installer and accept the Qlik User License Agreement. The default installation path is %Program Files%\Qlik\DataTransfer. When entering the service credentials , the username must be in the form domain\username.
Information noteIf you enter a username that is more than 20 characters long, it must be in User Principal Name (UPN) format, and must include the full domain name. For example, longusername@full.domain.name.
Information noteIf you have a Qlik Sense Desktop or another Qlik platform installed on the same server, you must shut down them down and stop the Qlik services before you can install Qlik DataTransfer .
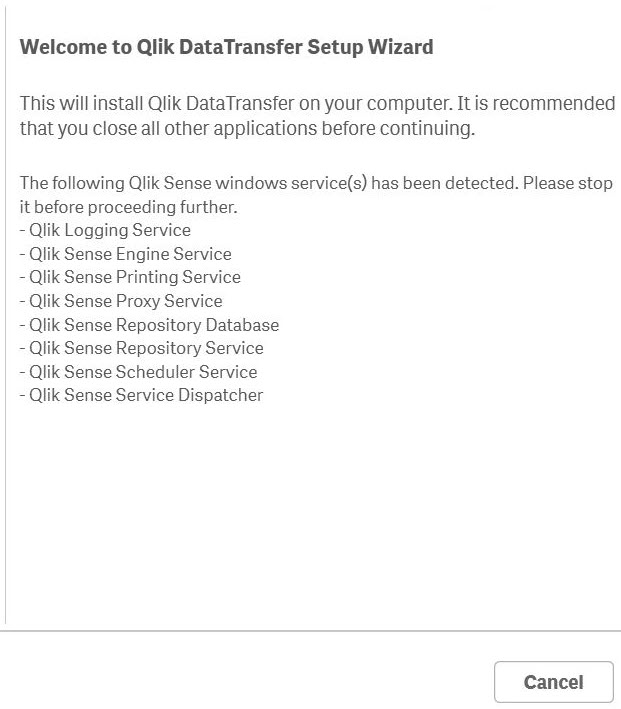
Once installed, restart the Qlik services in the following order:
-
Qlik Sense Service Dispatcher
-
Qlik Logging Service
-
Qlik Sense Repository Service
-
Qlik Sense Proxy Service
-
Qlik Sense Engine Service
-
Qlik Sense Scheduler Service
-
Qlik Sense Printing Service
-
-
On the Service Credentials window, enter username and password for the account that you want use to run the Qlik DataTransfer services.
-
See Configuring Qlik DataTransfer to customize additional settings in the services.config file.
The installer creates a desktop shortcut to launch Qlik DataTransfer application.
Generate an API key
API keys expire. The default expiration times might not be appropriate for your business needs. Before generating an API key, consider changing the maximum token expiration in the Administration activity center settings. For information, see Managing API keys.
Do the following:
- Log in to your Qlik Cloud tenant.
- From your activity center, click your profile icon in the top right-hand corner, then click Settings.
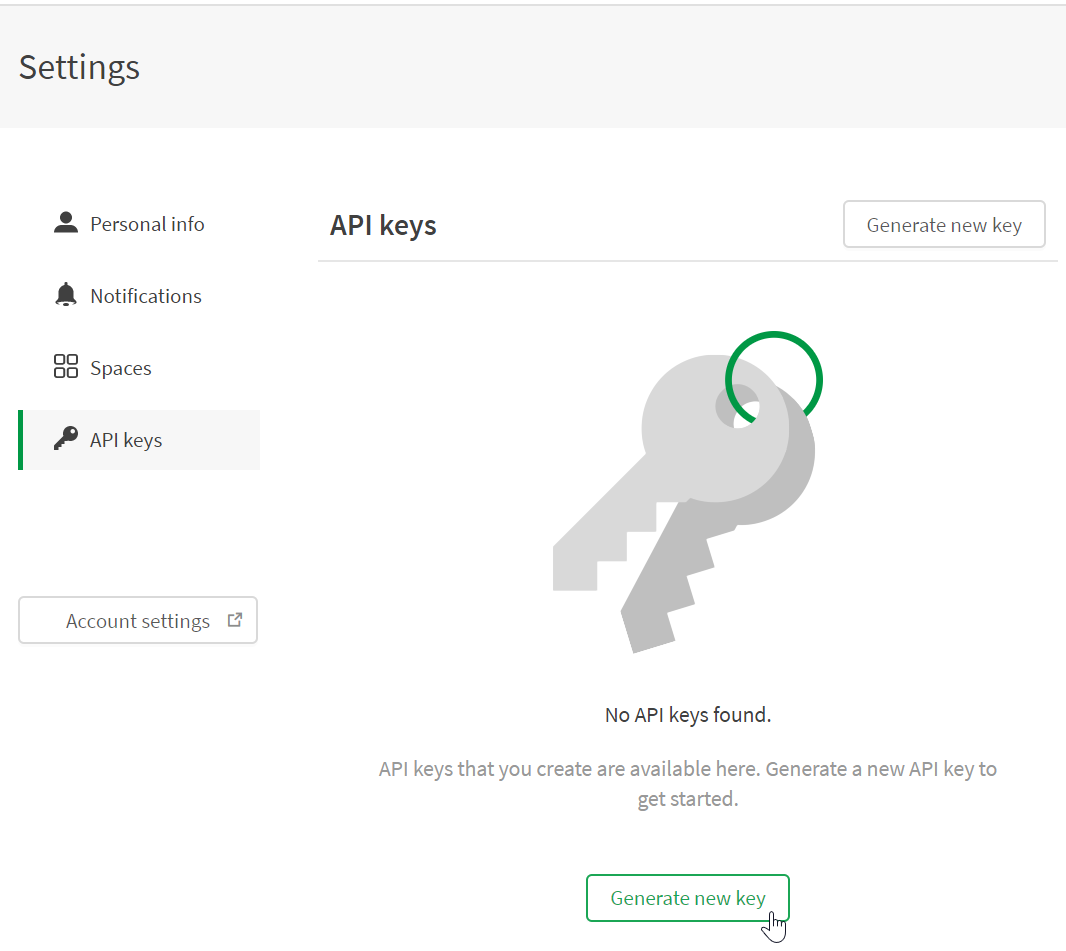
- Select API Keys.
-
Select Generate new key.
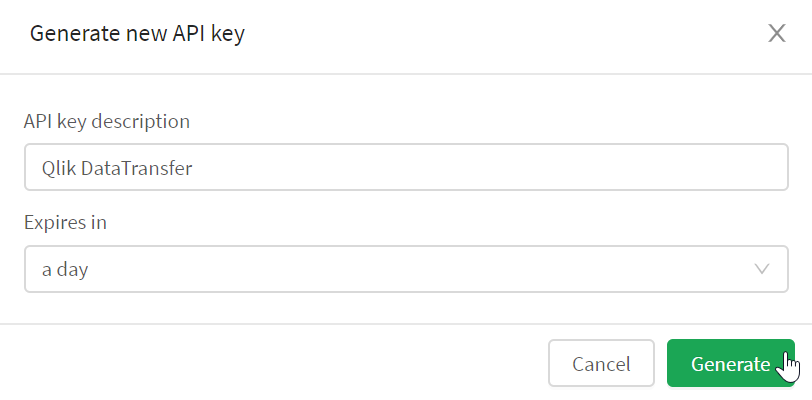
- Enter a name for the API key and select the Expires in time.
-
Click Generate.
-
Click Copy and close to copy the API to your clipboard.
Information noteMake sure to save the API key. You need this key to authenticate Qlik DataTransfer .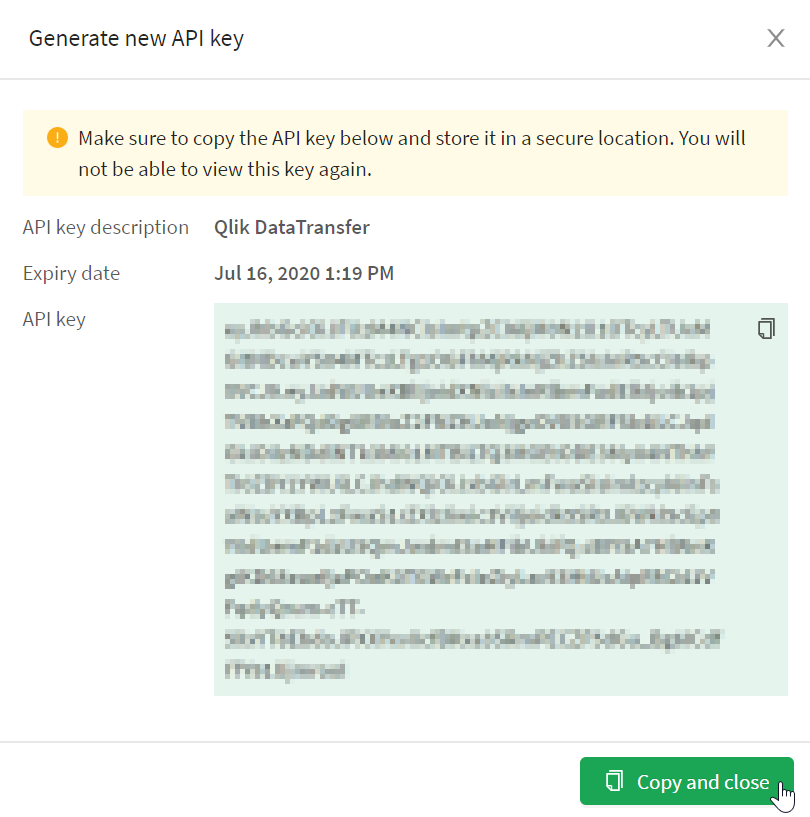
Now that you have an API key, you can create a secure connection between Qlik DataTransfer and your Qlik Cloud tenant. The API key is used to authenticate Qlik DataTransfer when uploading data to the tenant. Since the API has an expiry time, you need to create a new API key and reauthenticate Qlik DataTransfer when this key expires. You do not need to recreate your data connections if the API key expires.
Authenticate Qlik DataTransfer
Do the following:
-
Open Qlik DataTransfer .
The first time you open Qlik DataTransfer , the Setup Qlik DataTransfer authentication screen appears.
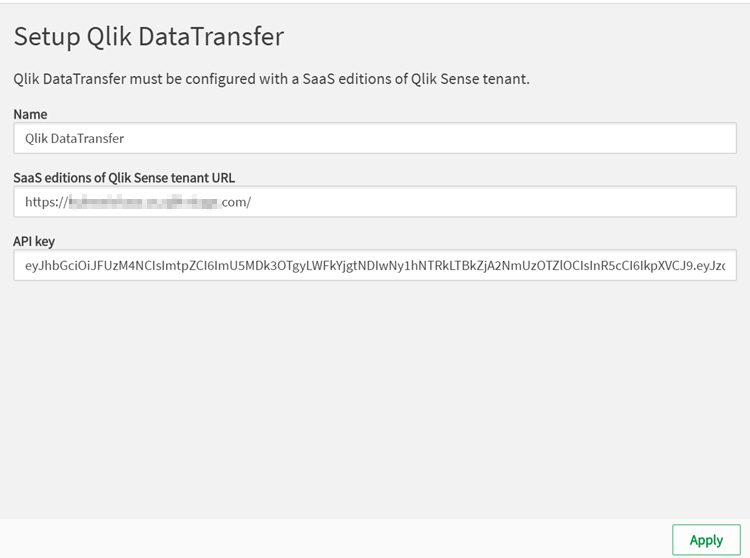
- Enter a name for the connection.
- Enter the URL to the Qlik Cloud tenant.
-
Paste the API key you generated from the tenant.
-
Click Apply to validate the tenant.
-
When your API key expires, or to authenticate Qlik DataTransfer against another tenant, click
 to enter a new API key, then click Confirm.
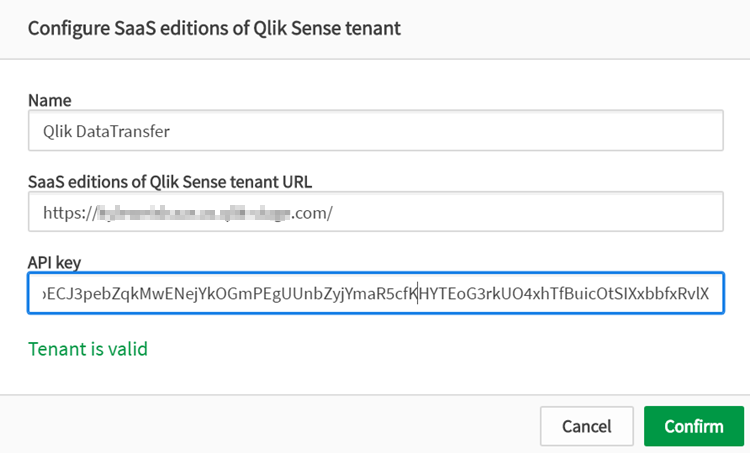
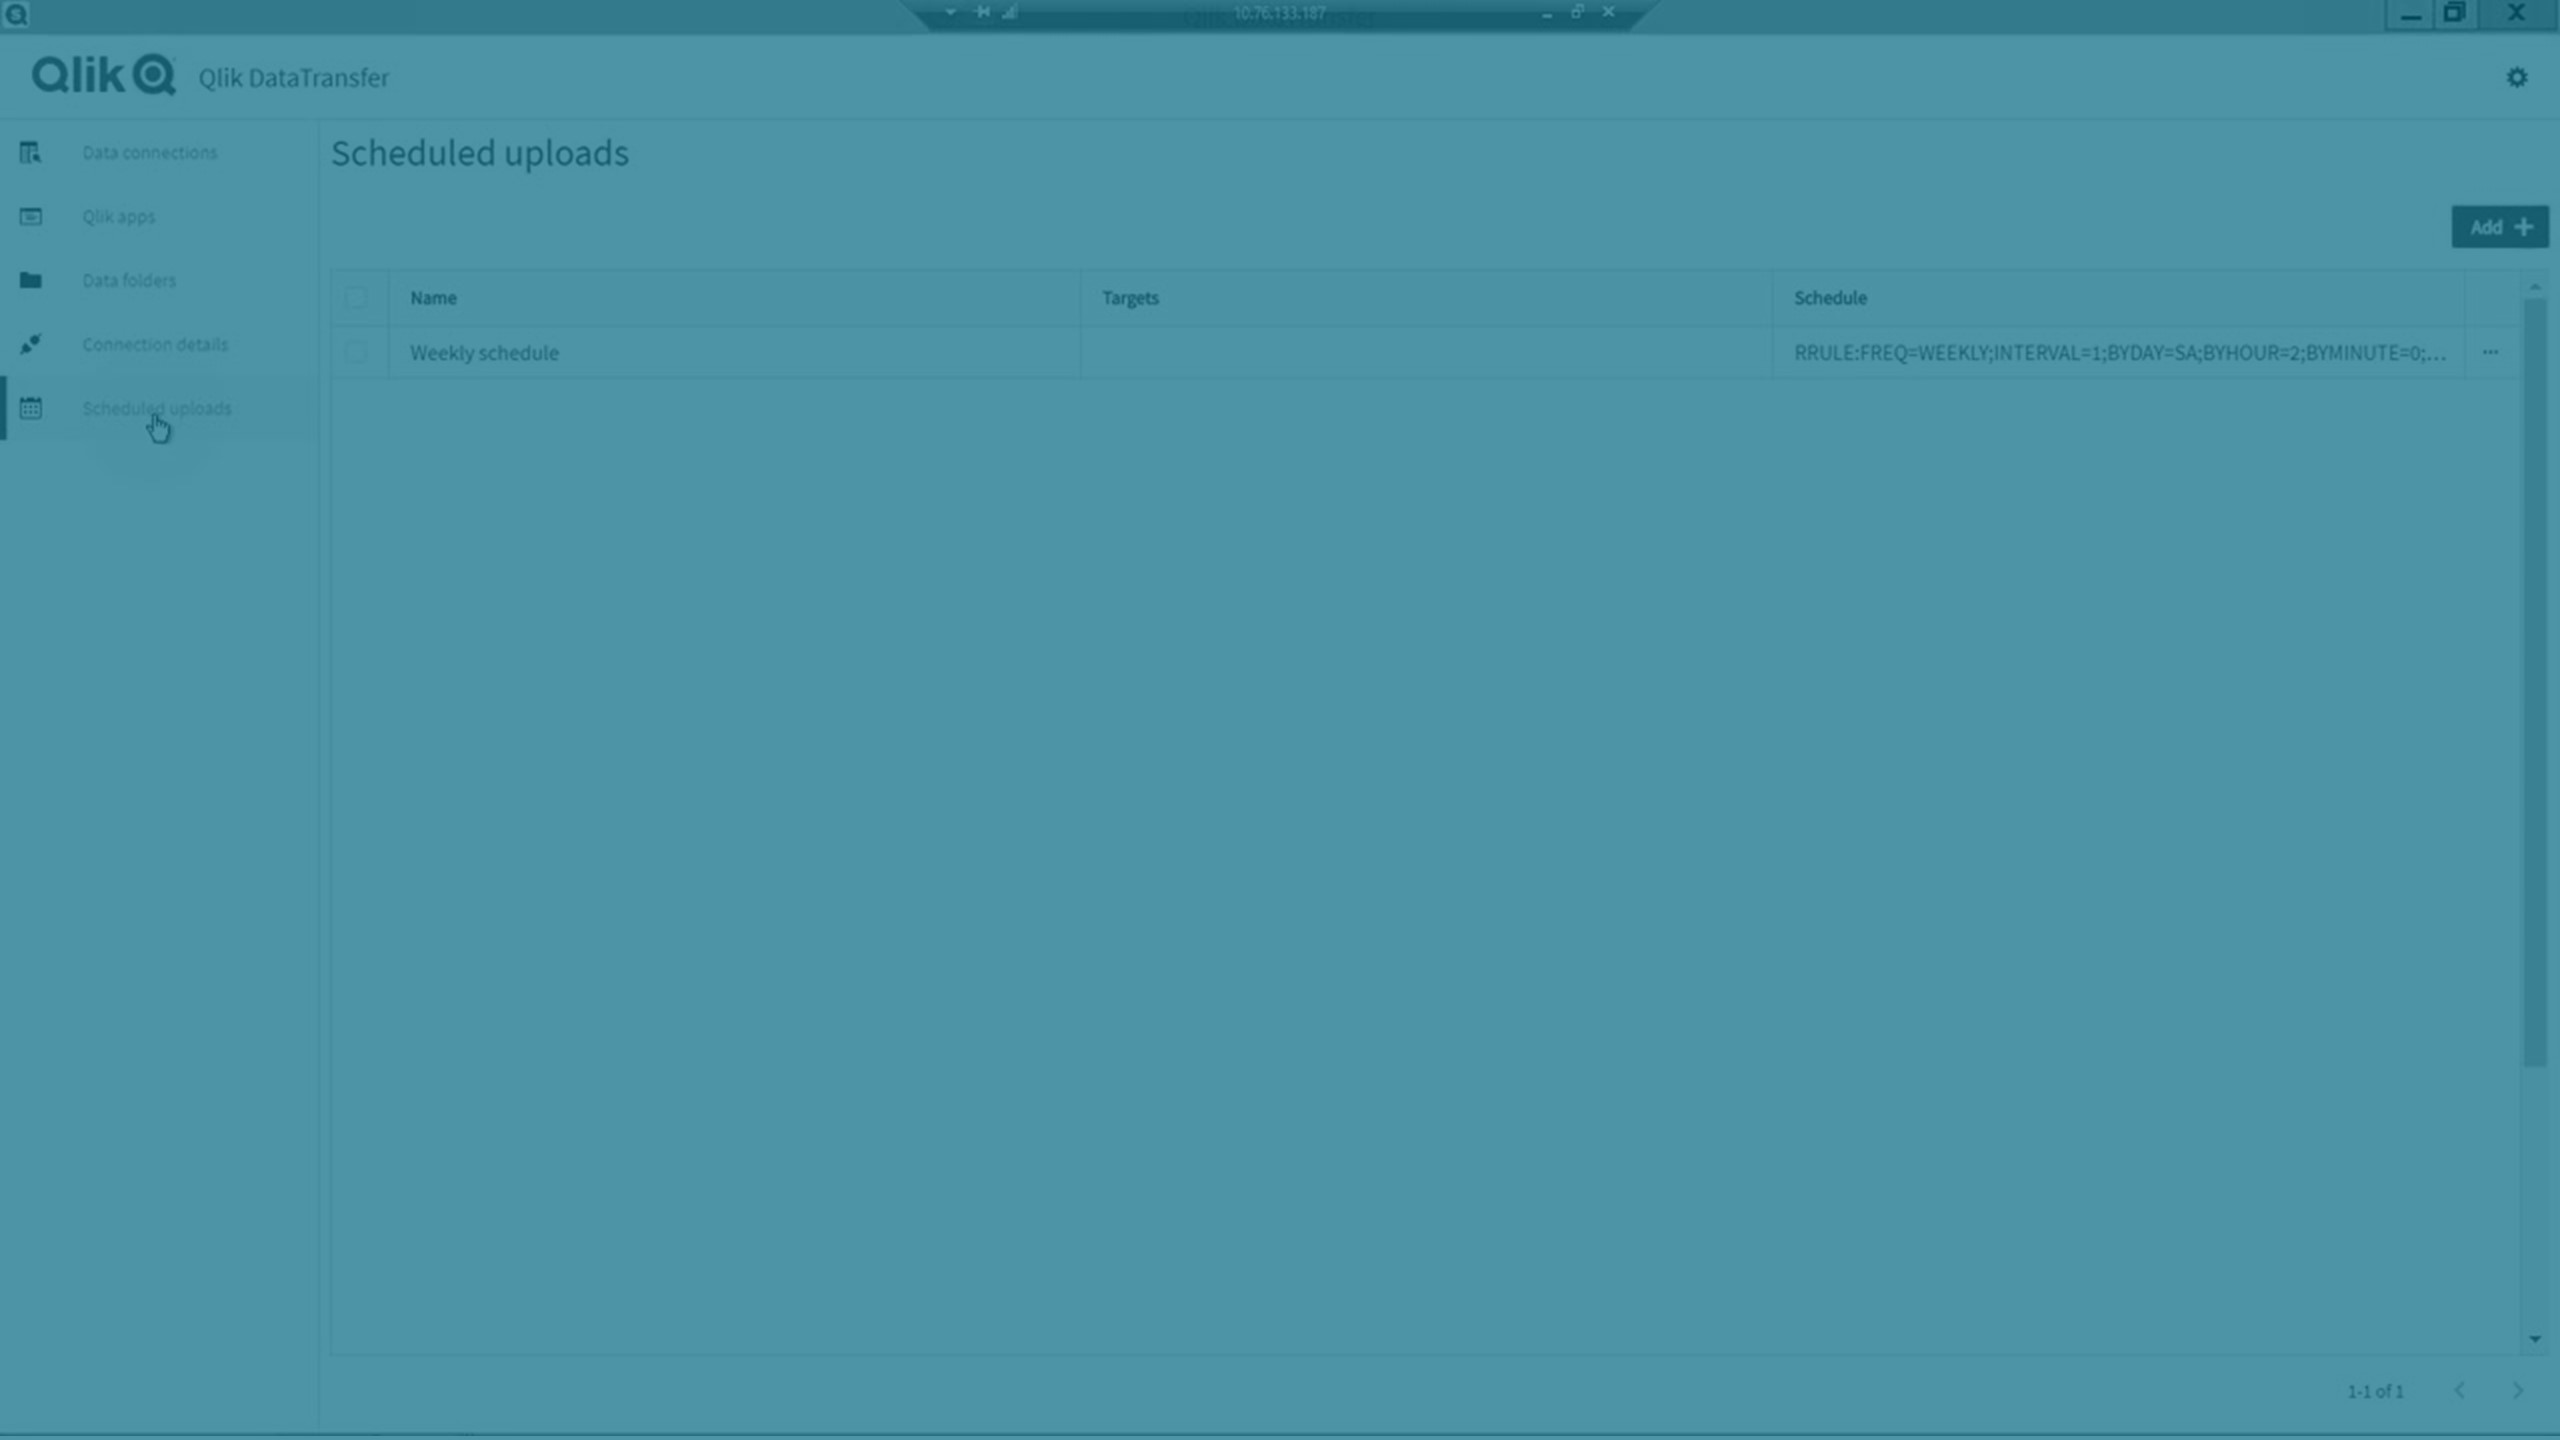
Once Qlik DataTransfer is authenticated, you can upload your on-premises data to your Qlik Cloud tenant. For information on how to use the Qlik DataTransfer , see Uploading on-premises data with Qlik DataTransfer.
Upgrading Qlik DataTransfer
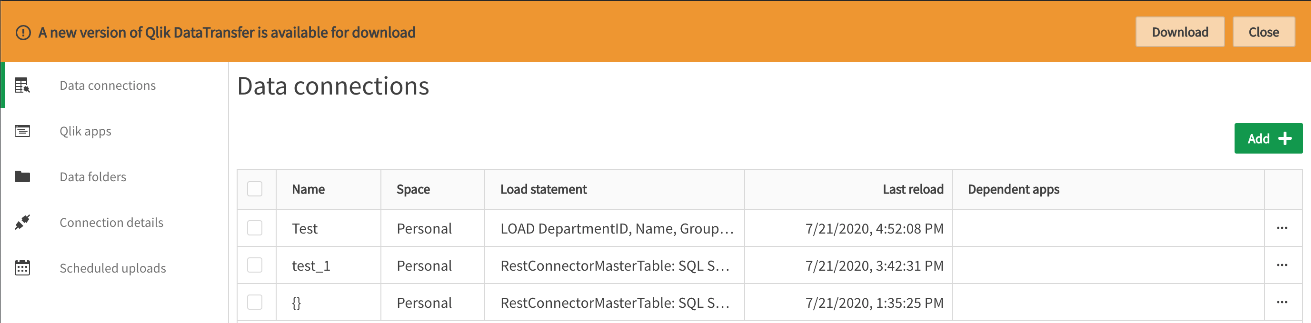
Qlik DataTransfer displays a notification banner when new versions are available. Qlik DataTransfer does not automatically upgrade to newer versions.
If you chose a different location for storing configuration files or chose different ports to run Qlik DataTransfer from the configuration file Service.conf, the upgrade will override it. Back up your Service.conf file prior to the upgrade and copy it to the default configuration folder after the upgrade is completed to keep your settings.
If the Qlik DataTransfer is using the Local System account, it will not prompt you for service user credentials and continue using Local System.
Do the following:
- Download the new version of Qlik DataTransfer from the in-application banner or from Product Downloads.
- Close your current version of Qlik DataTransfer .
-
Run the Qlik DataTransfer installer.
Information noteIf you are upgrading Qlik DataTransfer on a Windows server with Qlik Sense Enterprise on Windows installed, Qlik DataTransfer must be upgraded with the Qlik Sense services user used in the Qlik Sense installation.
-
Click Upgrade.
Uninstalling Qlik DataTransfer
Do the following:
-
Run the Qlik DataTransfer installer.
Information noteIf you have a Qlik platform installed on the same server, you must stop the other Qlik services before you can uninstall Qlik DataTransfer .
- Click Uninstall.
-
Once uninstalled, if applicable, restart the Qlik services in the following order:
-
Qlik Sense Service Dispatcher
-
Qlik Logging Service
-
Qlik Sense Repository Service
-
Qlik Sense Proxy Service
-
Qlik Sense Engine Service
-
Qlik Sense Scheduler Service
-
Qlik Sense Printing Service
-
Decommissioning Qlik DataTransfer
The Qlik Data Gateway - Direct Access allows you to securely access behind-the-firewall data sources, over a strictly outbound, encrypted, and mutually authenticated connection. With the addition of access to on premises data sources via the gateway, Qlik DataTransfer servers are recommended to be decommissioned when possible.
For more information, see Qlik Data Gateway - Direct Access and File (via Direct Access gateway).
Limitations
Qlik DataTransfer has the following limitations:
-
When upgrading from October 2020 or later, the location for storing configuration files and the ports used for running Qlik DataTransfer are changed to the default in the configuration file Service.conf. If you did not use the default location for storing configuration files or default ports for running Qlik DataTransfer, you will lose these settings. To keep your settings, backup Service.conf before the upgrade and redo the settings in Service.conf from the backed up file after the upgade is complete.
-
If you did not use the default location for storing configuration files in Service.conf, you will need to manually delete the files in the folder you selected.
-
If you use proxies, you must add a bypass for Qlik DataTransfer to your firewalls using the Qlik Cloud tenant URL. Without a bypass, Qlik DataTransfer will not be able to connect to Qlik Cloud.
-
Qlik DataTransfer should be installed on a dedicated Window Server as stipulated in Qlik DataTransfer system requirements. Do not install it on the actual data source server or on a server that has Qlik Data Gateway - Direct Access installed on it.