
Uploading on-premises data with Qlik DataTransfer
Qlik DataTransfer uploads data from on-premises data sources to Qlik Cloud. Qlik DataTransfer can provide access to on-premise data sources that are otherwise unavailable to Qlik Sense SaaS. Qlik DataTransfer also can upload data from Qlik Sense Desktop and Qlik Sense Enterprise on Windows applications to Qlik Sense SaaS.
New users are encouraged to use the File connector via Direct Access gateway and only use Qlik DataTransfer if absolutely necessary. For more information, see Qlik Data Gateway - Direct Access and File (via Direct Access gateway).
Qlik DataTransfer enables you to upload data from local data sources to Qlik Sense SaaS. You can upload data manually or schedule automatic data uploads to Qlik Cloud.
Qlik DataTransfer
You can upload data from the following kinds of data sources to spaces:
-
You can select tables and fields from ODBC and REST data sources that are available in your on-premises deployment.
-
Qlik applications
You can transfer data from a Qlik Sense or QlikView application. The application can contain combined and transformed data from multiple data sources.
-
Data folders
You can transfer data from a local folder or a network shared folder. If the folder is watched, and new or updated files are transferred automatically to the Qlik Cloud.
You must have permission to add data sources in the destination space for the uploaded data.
You can select up to 10 dependent applications per data source for data connections and Qlik applications. Dependent applications are automatically reloaded every time data sources are uploaded to your Qlik Cloud. Reloads in Qlik DataTransfer do not count against the reload limits in Qlik Cloud. Reloads of dependent applications in Qlik Cloud do count against the reload limits.
Using Qlik DataTransfer requires the Manage API keys permission. In user-based subscriptions, you also need a Professional user entitlement. For information on installation and configuration, see Installing Qlik DataTransfer.
Data connections
You can upload from on-premise data sources with Qlik connectors in Data connections. For example, you may have connections that are only accessible on-premises, such as ODBC DSN. With Qlik DataTransfer, you can connect to your data connection, load the data, and then upload the data as a QVD file to your Qlik Cloud.
QVD files are temporarily stored in C:\ProgramData\Qlik\DataTransfer\DataUpload\qixdata. After uploading, they are deleted from this location.
Alternatively, the QVD file can be added to a local folder. This option is useful if you want to sync the QVD file with your cloud storage.
You manage your data connections in Data connections. You can add, edit, and delete your data connections. You can also manually upload datasets by selecting the data connection and clicking Upload. You can view details of the last upload by selecting a data connection and selecting Last load details.
Data connections can use new or existing connections. You can create new connections when you add connection data. You can also create and view connections in Connections details.
For more information on configuring specific connectors, see Qlik Connectors. For information on configuring ODBC DSN connections, see ODBC.
By default, the Qlik Connector for use with SAP NetWeaver is not available as a data connection in Qlik DataTransfer. You can add the connector to Qlik DataTransfer, however. For more information, see Adding Qlik Connector for use with SAP NetWeaver to Qlik DataTransfer.
Uploading data connections
- Click Data connections.
- Click Add.
- Enter a name for the connection data.
- Select the destination.
-
Select the destination space or folder.
Information noteThe Personal space destination is the personal space of the API key owner.
-
Optionally, add a prefix.
Prefixes are added to the QVD file name in the destination.
- Do one of the following:
- To add connection data from an existing connection, select the connection.
- To add a new connection, click Create connection, select a connection type, enter the connection parameters, and click Create.
- Select the tables and fields to load.
- Optionally, select the applications to reload whenever this data source is uploaded.
- Click Confirm.
Qlik applications
You can extract and upload data from Qlik Sense and QlikView application files (QVF and QVW). When you upload application data, Qlik DataTransfer runs the application data load script in the QVF. It then extracts all tables using binary load and stores them in a QVD file. For QVW files, Qlik DataTransfer only extracts all tables using binary load and stores them in a or QVW files. The QVD is then uploaded to your Qlik Cloud.
QVD files are temporarily stored in C:\ProgramData\Qlik\DataTransfer\DataUpload\qixdata. After uploading, they are deleted from this location.
Alternatively, the QVD file can be added to a local folder. This option is useful if you want to sync the QVD file with your cloud storage.
Application data is useful when you want to perform data transformations and loading procedures before data is added to the application. For example, it can be more efficient for application performance to perform an incremental load on your data in an application in Qlik Sense Desktop and then use Qlik DataTransfer to upload the resulting data to Qlik Cloud.
You can use application datasets to make data sources that are inaccessible to Qlik Sense SaaS accessible by loading them in a local Qlik Sense application. For example, Qlik Sense Desktop applications can connect to OLE DB data sources.Qlik DataTransfer can upload the OLE DB data from a desktop application and upload it to Qlik Cloud.
You manage your application data in Qlik apps. You can add, edit, and delete your application data. You can also manually upload datasets by selecting the application data and clicking Upload. You can view details of the last data upload by selecting an application dataset and selecting Last load details.
Qlik DataTransfer can only refresh data before uploading in QVF files authored in Qlik Sense Desktop. Qlik DataTransfer does not refresh the data in the application before uploading for QVF files authored in Qlik Sense Enterprise on Windows and downloaded from Qlik Sense SaaS. If you want data refreshed in a downloaded Qlik Sense application before upload, connections and data sources must be added to the application in Qlik Sense Desktop.
Uploading application data
Do the following:
- Click Qlik apps.
- Click Add.
- Enter a name for the application data.
- Select the destination.
-
Select the destination space or folder.
Information noteThe Personal space destination is the personal space of the API key owner.
-
Optionally, add a prefix.
Prefixes are added to the QVD file name in the destination.
- Click Next.
-
Enter the file path to your Qlik application file and click Confirm.
By default, Qlik Sense Desktop applications are stored in C:\Users\%USERPROFILE%\Documents\Qlik\Sense\Apps.
Qlik Sense Enterprise on Windows applications are stored in the shared persistence storage folders configured during installation.
By default, QlikView applications are stored in C:\ProgramData\QlikTech\Documents
- Optionally, select the applications to reload whenever this data source is uploaded.
- Click Confirm.
Data folders
You can select folders containing data files to upload to Qlik Cloud. Qlik DataTransfer watches selected folders. When the data in these files change or new files are added to the folder, Qlik DataTransfer automatically uploads the updated files to Qlik Cloud.
Qlik DataTransfer supports shared network folders, but not mapped network folders. For example, \\share\data would be supported. If \\share was mapped to Z:\, Z:\data would not be supported.
Data folders do not support scheduled uploads. Qlik DataTransfer will upload data when files are added or changed in the data folder.
Qlik DataTransfer watches and uploads files in the selected folder and its sub folders. By default, files are prefixed with the folder names when they are uploaded to Qlik Cloud. For example, if the watched folder is My Folder. This folder contains the file Sample.csv in the subfolder My SubFolder. The uploaded file name in Qlik Cloud is My Folder_My Subfolder_Sample.csv. You can add a custom prefix or choose to have no prefixes.
You manage your data folders in Data folders. You can add folders, and edit or delete your selected folders. You can also manually upload data folder files by selecting the data folder and clicking Upload.
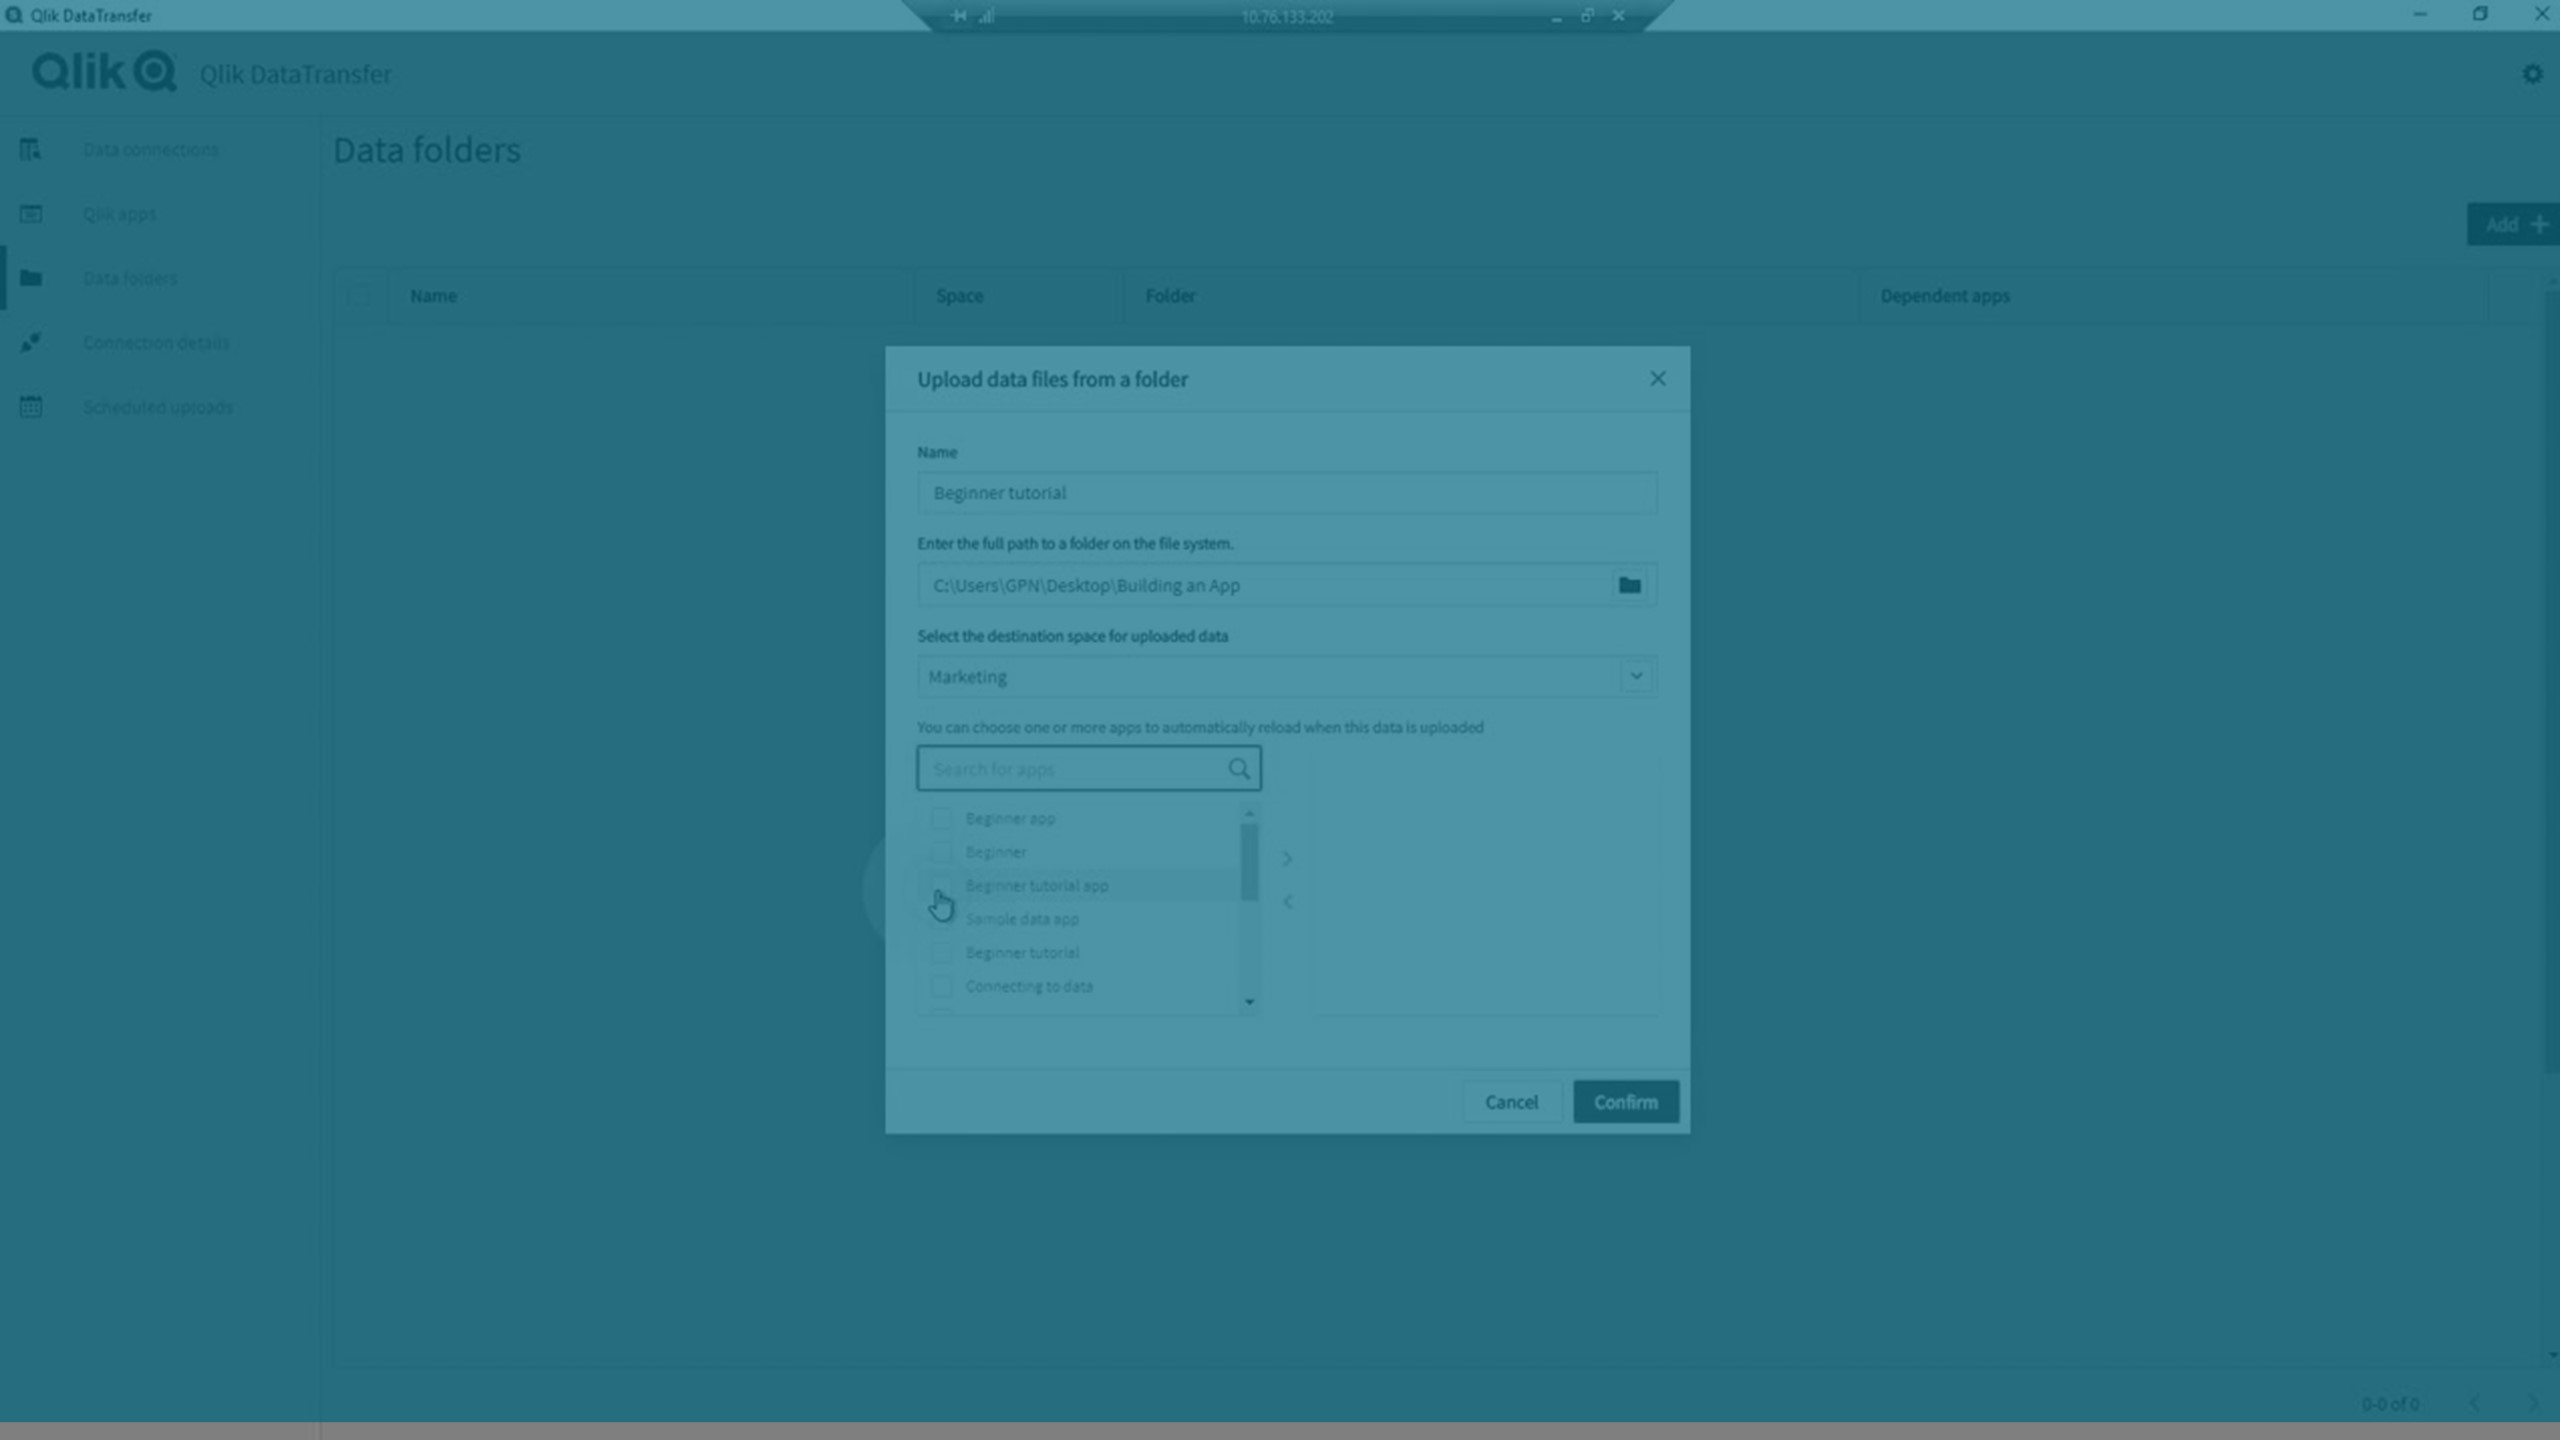
Uploading data folders
Do the following:
- In Qlik DataTransfer, select Data folders.
- Click Add.
- Enter a name.
- Enter the full path to the folder on the file system.
-
Select the destination space.
Information noteThe Personal space destination is the personal space of the API key owner.
- Optionally, select the applications to reload when this data source is uploaded.
-
Select the prefix type.
Prefixes are added to the file names in the destination. By default, when files are uploaded to Qlik Cloud, they are prefixed with the folder names.
- Click Confirm.
Scheduling uploads
You can schedule automatic uploads of your application and connection datasets on regular intervals. If you have selected any dependent applications for your data sources, they will automatically reload after the scheduled upload.
You can view details of the last upload by selecting a task and clicking Last execution details. You can view details of the last data upload by selecting an application dataset and selecting Last load details. Logs are available from C:\ProgramData\Qlik\DataTransfer\Log.
Do the following:
- In Qlik DataTransfer, select Scheduled uploads.
- Click Add.
- Enter a name.
- Select a data source to upload.
- Select the repeating interval and specify the date and time.
- Click Save.
Limitations
Qlik DataTransfer has the following limitations:
-
Maximum allowed file size is controlled by the Qlik Cloud platform, and is adhered to by Qlik DataTransfer.
- You can upload a maximum of 200 tables or files per dataset. If your dataset has more than 200 tables or files, only the first 200 are uploaded. For example, if you select more than 200 tables in a data connection or Qlik application, or if you add a data folder with more than 200 files.
-
Qlik DataTransfer estimates the time to complete a file upload. This is the time-to-live (TTL). Each file upload must complete within the lesser of the calculated TTL or 3 days.
- Qlik DataTransfer does not support connections to files in Essbase or Dropbox.
- Files removed from a data folder must be manually removed from the spaces to which they were uploaded.
-
Qlik DataTransfer can only reload data in a QVF file if it has been created with Qlik Sense Desktop. If Qlik DataTransfer is installed on a server, you must copy your QVF files to your server. All data sources that are used in the QVF file must be accessible to the QVF load script when it is run on the server by Qlik DataTransfer.
-
QlikView applications are not automatically reloaded by Qlik DataTransfer when data sources in applications are updated with new data. QlikView applications must be manually reloaded and saved for Qlik DataTransfer to upload data to Qlik Cloud.