
Fork processor
Duplicates the data into two identical outputs.
The Fork processor can be used to duplicate the input flow and output up to ten identical output flows that can be processed in a different way according to your needs.
Usage
The Fork processor requires one input flow and at least two output flows.
Properties
The Fork processor does not require any configuration.
To rename the processor or edit its description, point your mouse over the name or description to change in the Properties panel and click the ![]() Edit icon.
Edit icon.
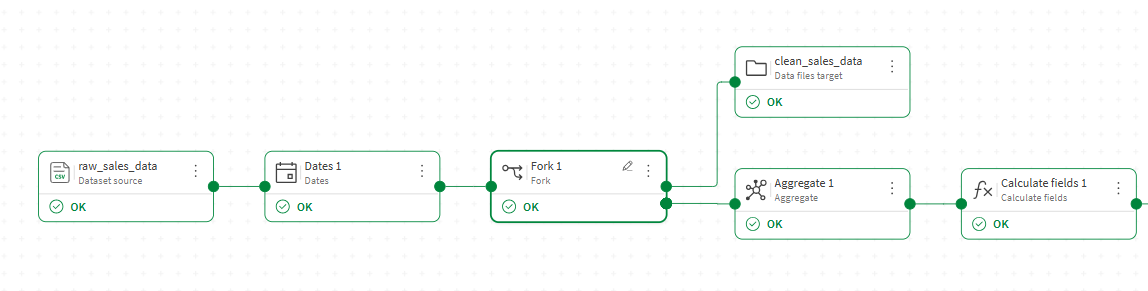
Example: Exporting an intermediary state of the data flow
In this example, you have a flow that cleans and normalizes raw sales data. You want to save the cleaned data at an intermediary step as a file, while the rest of the flow continues through further processors such as an aggregation.
-
In the data flow editor, add a Fork processor after the last processor that produces the intermediary state you want to export.
-
Connect one output of the Fork processor to a target node and configure it to save the intermediary data as a file, for example clean_sales_data.qvd.
-
Connect the second output to the next processor in your main flow, for example an Aggregate processor, and continue adding processors and a target to complete the flow.
-
Click Run flow.
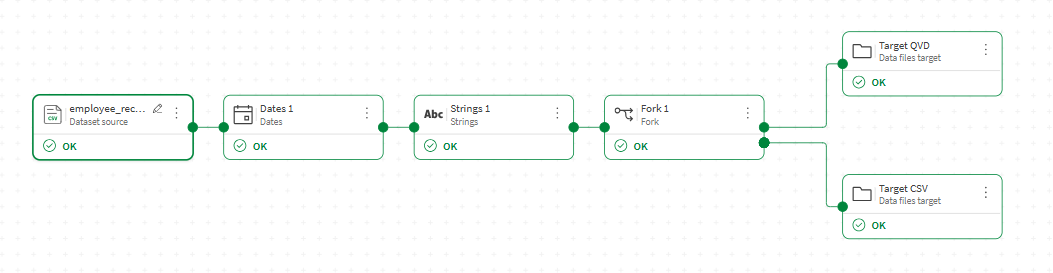
Example: Exporting a data flow to two different output formats
In this example, you want to export the same dataset as a .qvd file for use in Qlik analytics apps, and as a .csv file to share with external stakeholders.
-
In the data flow editor, add a Fork processor after the last processor in your flow.
-
Connect one output of the Fork processor to a Data Files target. Configure it to export as a .qvd file.
-
Connect the second output to another Data Files target. Configure it to export as a .csv file.
-
Click Run flow.