
Columns functions
Last updated: 10/23/2026These functions are available from the functions list, as well as the menu in the header of a given column. If it is the latter, click  and select the function to apply.
Create new column
Creates a new column in the table.
Properties
| Property | Configuration |
|---|---|
| New column name |
Enter the name you want to give the new column. If you do not specify a name, the default name of the new column will be new_column_name |
| Anchor column |
From the drop-down list, select the column next to which the new column will be created. |
| Right of anchor | Use this toggle to select if you want to create the new column on the left or right of the anchor column. Leave the toggle selected to create it on the right, unselect it to create it on the left. |
| Fill column with |
From the drop-down list, select if you want the cells of new column to contain predefined values or a specific one.
|
Create calculated column
Add a new column based on a Qlik script expression.
Properties
| Property | Configuration |
|---|---|
| New column name |
Enter the name for the new calculated column. |
| Anchor column |
Select the column used as the position reference for the new calculated column from the drop-down list. |
| Right of anchor |
Use this toggle to select if you want to create the new column on the left or right of the anchor column. Leave the toggle selected to create it on the right, unselect it to create it on the left. |
| Expression |
Enter a Qlik script expression to calculate the values in the new column. |
| Open editor |
Open the powerful expression editor to easily insert column names and functions, open documentation, and check the validity of the expression. |
Using the expression editor
Clicking the Open editor button in the configuration panel opens the Expression editor, a powerful script editor to help you create your calculated columns. Easily insert column names or functions, open documentation and check the validity of your expressions.
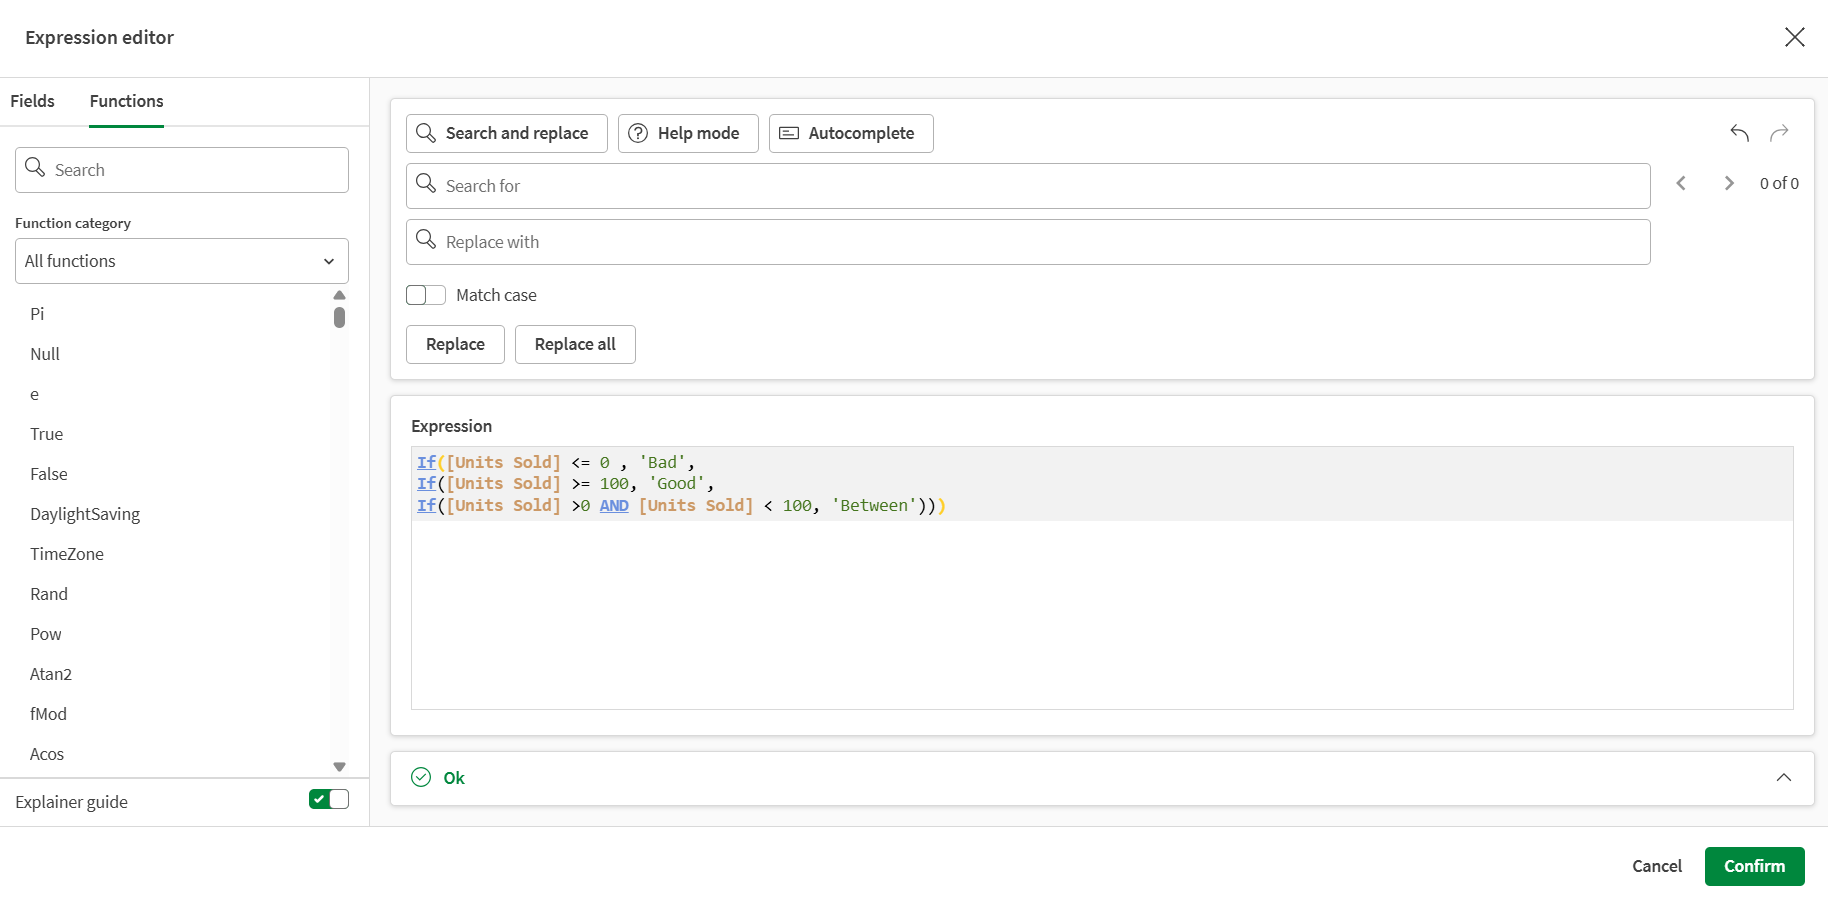
In the left panel, you can view the columns currently in your table and browse a wide range of Qlik script functions. This panel is organized in two tabs:
-
Fields, where the columns available in the table are listed. Point your mouse over any of the column names and click + to directly insert it in the expression.
-
Functions, where you can browse Qlik functions. You can use the search field to look for a specific function, or use the Function category drop-down to filter them.
Point your mouse over any of the functions and click + to directly insert it in the expression.
-
If you select the Explainer guide toggle, a short description and a link to the documentation will be displayed when clicking a function.
In the top panel, you can enable or disable three tools to help and guide you while writing script, as well as undo and redo buttons to fix potential mistakes.
-
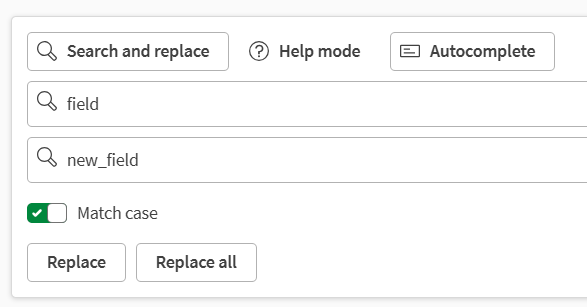
Search and replace, to automatically look for specific values and replace them if needed.
-
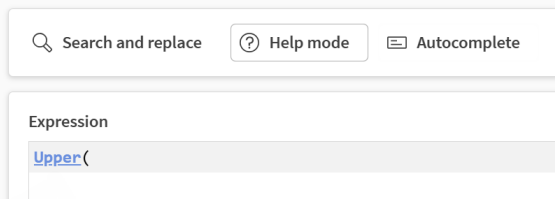
Help mode, to turn any function you write in the script into clickable links that will take you to the documentation.
-
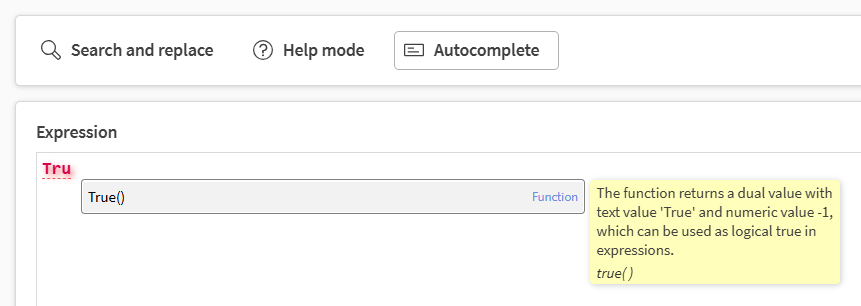
Autocomplete, to display suggestions as you type, with a short description and example of a function.
The bottom panel describes any potential error with your script, such as incorrect column names or invalid expressions.
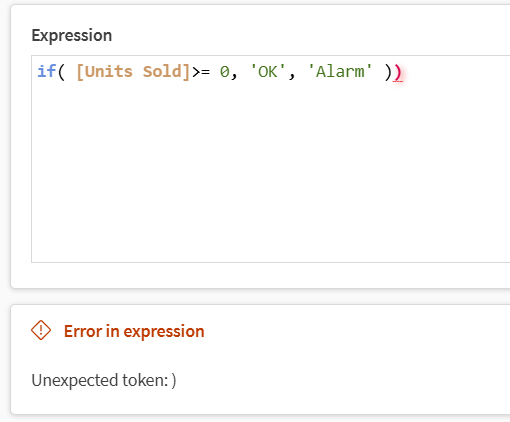
When the status panel shows a green Ok, your expression is valid. Click Confirm to use this expression for your calculated column and return to the table. You can then apply the function configuration.
Examples
| Use case | Expression | Result |
|---|---|---|
| Apply a percentage increase to numeric values | [Sales] * 1.25 | Multiplies the values in the Sales column by 1.25. |
| Flag records that match specific criteria | IF([Country] = 'France', 'Yes', 'No') | Creates a column with "Yes" for rows where the Country column is equal to France, and "No" for the other rows. |
| Using if/then/else conditions | |
Creates a column with "Freezing" for rows where the Temperature column is less than or equal to 0, "Boiling" for rows where the Temperature column is greater than or equal to 100, and "Between" for rows where the Temperature column is between 0 and 100. |
When writing expressions, reference fields with square brackets, for example [Sales].
Delete column
Deletes a column from the table.
Properties
| Property | Configuration |
|---|---|
| Columns to process |
Select the column or columns you want to remove. If you want to delete more than one column, use the drop-down list to select which columns, and click Apply. |
Duplicate column
Duplicates a column and its content.
Properties
| Property | Configuration |
|---|---|
| Columns to process |
Select the column or columns you want to duplicate. If you want to duplicate more than one column, use the drop-down list to select which columns, and click Apply. |
| New column name |
Enter the name you want to give the new column. If you do not specify a name, the default name of the new column will be <column_name>_copy. |
Rename column
Renames a column.
Properties
| Property | Configuration |
|---|---|
| Column to rename |
Use the drop down list to select the column to rename. |
| New column name |
Enter the new name you want to give the column. The default name of the new column will be <column_name>_renamed. |
Reorder column
Moves a column to a new place in the table.
Properties
| Property | Configuration |
|---|---|
| Column |
Use the drop down list to select the column to move. |
| Anchor column |
From the drop-down list, select the column next to which the selected column will be moved. |
| Right of anchor | Use this toggle to select if you want to move the selected column on the left or right of the anchor column. Leave the toggle selected to move it to the right, unselect it to move to the left. |