
Creating a distribution list for your report
Before creating a report task, you must define the distribution list for the Qlik Sense application that is the basis for your report. The distribution list contains all recipients, and groups of recipients, who can be receivers of an application's report tasks.
Use the distribution list to configure the individuals to which reports are sent. When you configure a report task, you select the recipients and groups from your distribution list that will receive the output of that particular report task.
The distribution list provides the following details:
-
All recipients of reports generated from the application, including their names, email addresses, which filters apply to them, and which groups they belong to.
-
All groups (collections of one or more recipients) who can receive reports generated from the application.
If you upload a source file as the distribution list, it is shown in the Recipients and Groups tabs within the Reporting section of the application.
The Recipients and Groups tabs

Only one source file can be added to an application. If you need to make changes to the source file, edit the file (or data source) you originally uploaded and re-upload it. If you are instead using data connections to define the distribution list, make edits to the script as needed. Note that when you do so, equivalent changes must be made to the report task configuration and filters, as needed.
Who can receive reports?
Using in-application reporting with Qlik Cloud Analytics, you can send email reports to both internal and external recipients.
Output and section access
The table below describes each type of recipient and what can they expect to see in their reports. This table outlines the behavior for applications with and without section access. For more information about in-application reporting and section access, see In-application reporting and section access.
| Recipient type | Description | Behavior |
|---|---|---|
| Internal |
A user in the Qlik Cloud tenant, identified by matching email address (matching is case insensitive). To learn how to add a user to the Qlik Cloud tenant, see:
|
Unless the application uses section access, the data included in this recipient's report will be based on the access that the report task owner has to the application. |
| External | A user who is not in the Qlik Cloud tenant. | Data included in report is always based on the access of the report task owner, regardless of whether the application uses section access or not. |
Microsoft SharePoint report distribution
If you are instead distributing reports via a distribution folder (Microsoft SharePoint), anyone who has access to the location specified in the corresponding connection can access the reports. The identification of internal recipients works the same as for email output.
Report delivery via Microsoft SharePoint distribution folder is not available if the application uses section access.
When sending reports via distribution folder, you must still define a distribution list for the application to generate report output. The distribution list still helps determine how many versions of the report output are generated when the report tasks runs (typically, one file for each individual recipient filter). For more information about storing reports to a distribution folder, see Delivering reports to a distribution folder.
The distribution list, recipient filters, and task output
The distribution list controls the report filters that are applied to each recipient individually. When you add the distribution list to the application, a separate recipient is created for each filter you apply to them. When configuring a report task, you add each recipient as a user-filter pairing corresponding to a single filter.
For example, if you apply filters A and B to a recipient named User1, two recipients are added to the application – User1 with filter A, and User1 with filter B.
For more information about how to configure your report task to generate the required output, see:
Considerations for ownership of tasks for scheduled reloads
Distribution lists work through automatic or manual modifications to the load script of an application. Creating or modifying an application's distribution list, whether by uploading a source file in the Reporting section or by manually editing the load script, makes you the new owner of all tasks that have been created for scheduled reloads of that application.
For more information, see Ownership of tasks.
Adding the distribution list
Add the distribution list using one of the following two methods:
-
Upload a source file
-
Define the recipients and groups manually in the load script
Each method is explained in the sections below.
Adding the distribution list by uploading a source file
You can define a distribution list by uploading a source file containing the required information. This file must contain specific formatting and structure. The easiest way to create the source file is to download the example file and modify it with your recipient and group information.
Uploading a source file as the distribution list replaces the existing source file, if any. Only one source file can be applied to an application. If you upload a source file, this file replaces the source file that was previously uploaded to the application, if any. This can cause existing report tasks to fail if there are mismatches between the old and new files.
When you add a distribution list by uploading a source file, a new section (Distribution List) is automatically generated in the application’s load script, and the application reloads. This script section lists the recipients and groups for the application. The details in the distribution file then become accessible in the application's data model.
When you upload a source file as the distribution list, the file is also added as a data file to the space containing the application. The Distribution List script section references this file as an item within the space.
Considerations
Consider the following details that are important to know before you upload a source file:
-
The new Distribution List script section is added as the last section in the script. As a result, any script formatting issues on the last section before Distribution List will result in reload failure. For example, this could be something like not having a semicolon at the end of the last table to load.
-
Do not modify the SubField function expressions in the auto-generated Distribution List script section. These expressions are required to support comma-separated values for your filters and groups.
SubField([Filters],',') AS [DL_DISTRIBUTION_FILTERS], SubField([Groups],',') AS [DL_DISTRIBUTION_GROUP_NAMES] -
Since uploading the source file works by loading data into your application, it also counts towards the purchased data load volume defined in the Qlik Cloud subscription (only applicable for capacity-based subscriptions). See Qlik Cloud capacity-based subscriptions.
Downloading the example file
The example source file is an Excel workbook you can modify before uploading it to the application.
Do the following:
-
Open the Recipients or Groups tab in the Reporting section of an application.
-
Click Add recipients and groups.
-
Select
 Download example.
Downloading the example distribution list file

After you download the example file, you can modify it to add the recipients and groups for the application.
Adding recipients
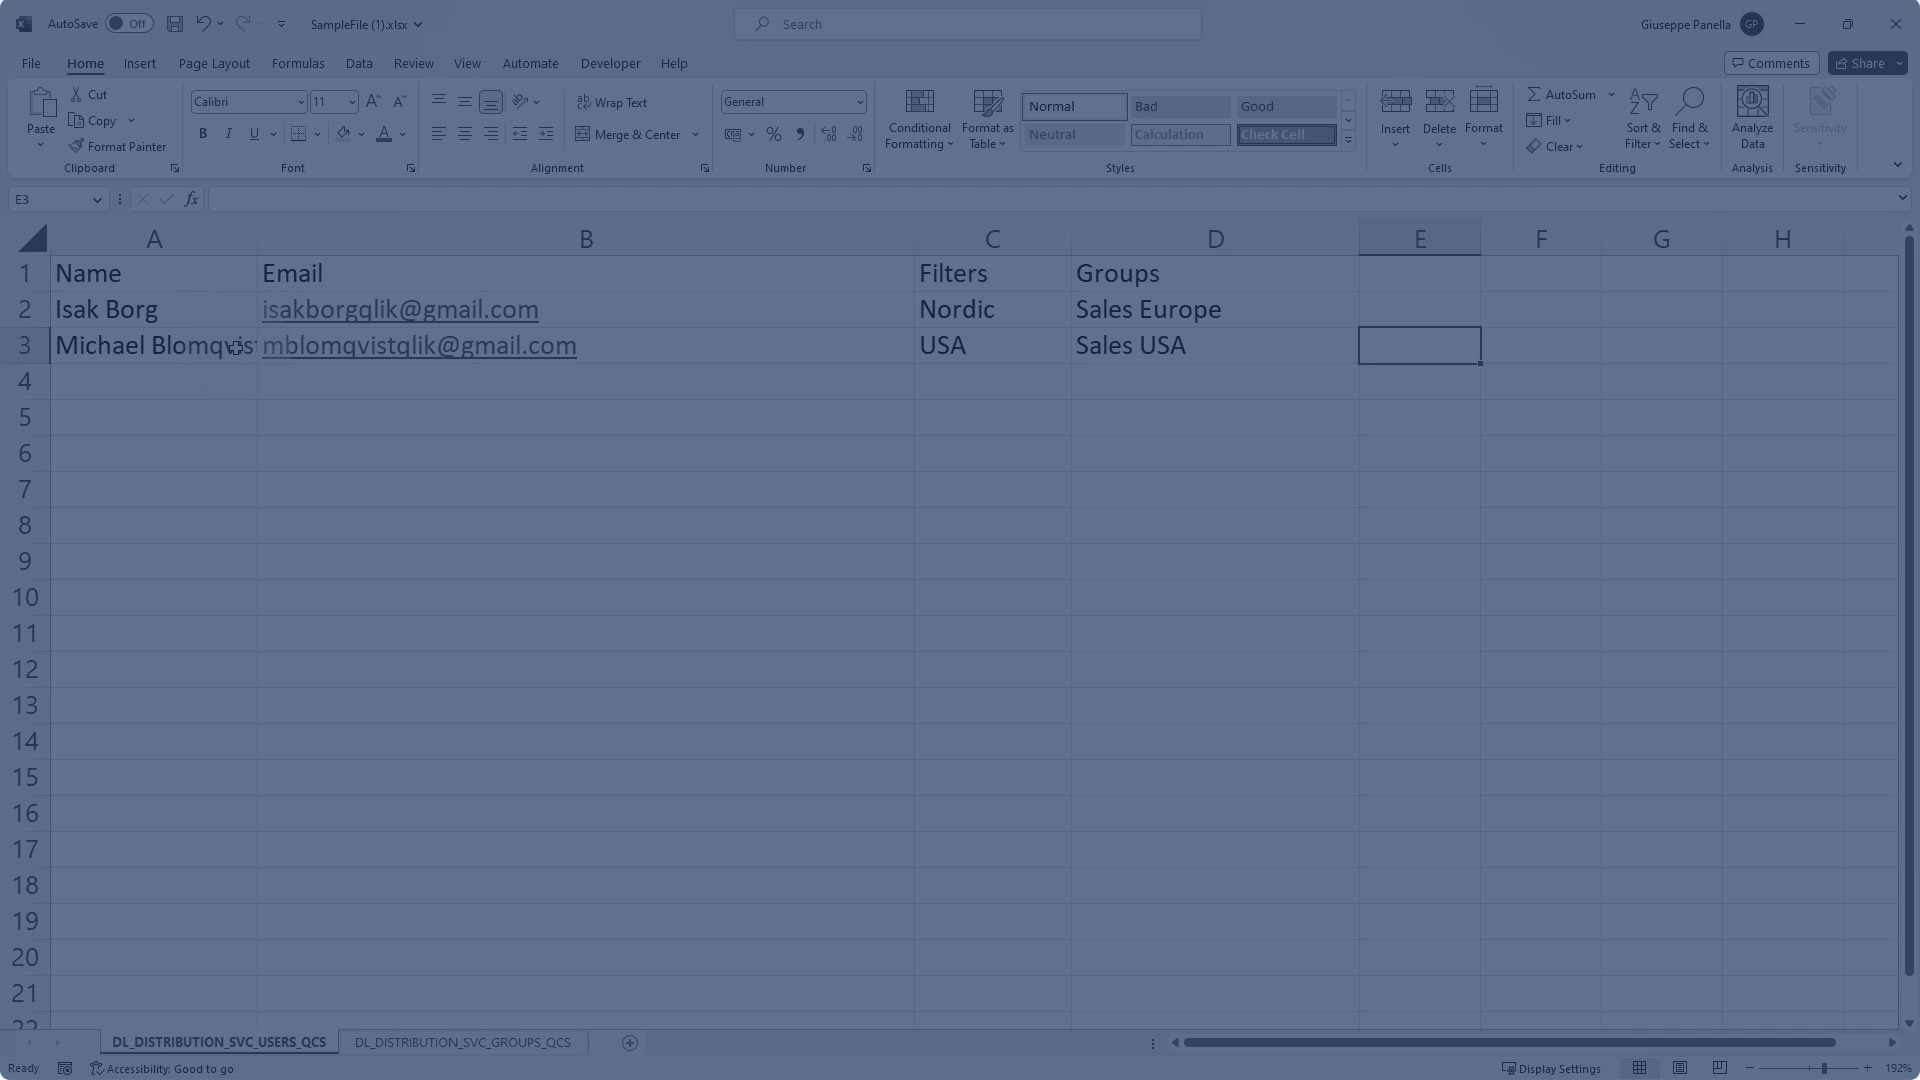
Open the example file you just downloaded and make sure you have the following worksheet opened:
DL_DISTRIBUTION_SVC_USERS_QCS
Next, you can replace the data within the sheet to add your own recipients. Do not change or remove the first row showing the column headers.
Do the following:
-
In the Name column, add the recipient's name.
-
In the Email column, add the recipient’s email address. Note that this column is automatically formatted to be a hyperlink with an email address destination.
-
In the Filters column, add the filter groups that correspond to those added in the Filters tab in the application’s Reporting section. Separate filter groups with commas.
-
In the Groups column, add the groups to which the recipient belongs. Separate each group with a comma.
Adding groups
In the source file, groups are defined in the sheet with this title:
DL_DISTRIBUTION_SVC_GROUPS_QCS
Open this worksheet and replace the data to create the groups in the distribution list. Do not change or remove the first row showing the column headers.
Do the following:
-
In the Name column, add the name of the group.
-
In the Description column, add a description of the group.
Uploading the distribution list file
After you’ve created the source file, upload it into the Recipients or Groups tabs in the Reporting section of the application. When you do this, the application reloads, and the recipients and groups populate in their respective sections.
Do the following:
-
Open the Recipients or Groups tab.
-
Click Add recipients and groups.
-
Select Upload new version (.xlsx).
Uploading the source file

Defining the distribution list manually in the load script
Adding a distribution list through a file upload indirectly modifies the application's load script. Alternatively, use the load script directly to add recipients and groups. This is a suitable option for advanced users, and especially helps if you would like to use data source connections to provide the recipient and group information.
For example, if your recipients and groups are defined in an external source file, or are located in a database or human resource system (for example, Workday), this option allows the recipients and groups in the application to dynamically update based on the connected source.
Requirements
For the fields in the script to be recognized as belonging to the application’s distribution list, you must apply tags to each required field that corresponds to the required element of the distribution list. See the table below for more information.
| Field requiring tag | Required tag | Example |
|---|---|---|
| Recipient name | DL_DISTRIBUTION_SVC__recipientName | tag field [GetSheetValues.Name] with 'DL_DISTRIBUTION_SVC__recipientName' |
| Recipient email address | DL_DISTRIBUTION_SVC__recipientEmail | tag field [GetSheetValues.Email] with 'DL_DISTRIBUTION_SVC__recipientEmail' |
| Recipient filters | DL_DISTRIBUTION_SVC__recipientFilters | tag field [GetSheetValues.Filters] with 'DL_DISTRIBUTION_SVC__recipientFilters' |
| Group name | DL_DISTRIBUTION_SVC__groupsName | tag field [GetSheetValues.Groups] with 'DL_DISTRIBUTION_SVC__groupsName' |
| Group description | DL_DISTRIBUTION_SVC__groupDescription | tag field [GetSheetValues.GroupDescription] with 'DL_DISTRIBUTION_SVC__groupDescription' |
Example script
Here is an example of a script section connecting to recipients and groups:
Deleting a distribution list
If needed, you can remove all recipients and groups from the application.
Do the following:
-
Open the Recipients or Groups tab.
-
Click
 next to any recipient or group and select
  Delete all.
In-application reporting and section access
If the application uses section access, report generation works differently. For more information, see In-application reporting and section access.
Distribution lists in managed spaces
For applications in managed spaces, the distribution list cannot be edited from the Reporting section of the application. Before publishing an application to a managed space, upload a mock distribution list file, or refer to the required remote sources manually in the script. It is recommended to use space-aware syntax in the load script. In other words, the references to the data sources should point to the current space in which the application is located. Depending on how you add the distribution list, this syntax might be used automatically.
The data sources providing the distribution list must contain the same parameter names (names of connections, files, and fields) as the distribution list sources used in the source application's load script.
You upload the actual data sources for the distribution list to the managed space.
For more information, refer to the following guides:
Permissions for distribution lists
To manage the distribution list of an application, you need:
-
Permissions assigned to you by a tenant administrator. For more information, an administrator can refer to Setting permissions for metered reporting features.
-
For more information about space permissions for reporting, see Qlik Reporting Service permissions.
Space permissions
Managing the distribution list within a Qlik Sense application requires specific space roles. The requirements depend on the type of space in which your application is located.
Requirements for applications in shared spaces
The following requirements apply for applications in shared spaces:
-
To view the distribution list in the Reporting section of the application, you need Can edit access to the space.
-
To edit, re-upload, and delete the distribution list, you must have Can edit data in applications access in the space.
For more information, see Managing permissions in shared spaces.
Requirements for applications in managed spaces
The distribution list is not directly configurable in a managed space. The load script references the data sources that will be used to load the distribution list. To add these data sources to the space, you must have the required permissions for adding and managing data sources in a managed space. For further information, see Managing permissions in managed spaces.
For more information about in-application reporting in managed spaces, see In-application reporting in managed spaces.
Requirements for an application in your personal space
You must have the Private Analytics Content Creator user role in the tenant to have full control over the distribution list.
Distribution list limitations
-
You cannot use commas in the fields containing names of recipients and groups, as well as email addresses of recipients. This limitation applies both to uploading the distribution list as a file, as well as defining it manually in the load script.
-
You can add a maximum of 1000 recipients and 1000 groups to the distribution list of an application. The number of total recipients, whether in groups or not, cannot be higher than 1000.