
Replication settings
You can configure settings for the data replication task.
-
Open the replication task and click Settings in the toolbar.
The Settings: <Task-Name> dialog opens. The available settings are described below.
General
In this tab, you can change the replication mode, the staging settings (when available), the mode for applying changes to the target, and publication settings.
Replication mode
The following replication modes are available:
-
Full load: Loads the data from the selected source tables to the target platform and creates the target tables if necessary. The full load occurs automatically when the task is started, but can also be performed manually should the need arise. Manual full load would be required, for example, if you need to replicate updates to Views (which are not captured during CDC) or if you are replicating from a data source that does not support CDC.
Information noteWhen using a SaaS application connector, this option will always be enabled as full load is required. -
Apply changes: Keeps the target tables up-to-date with any changes made to the source tables.
-
Store changes: Stores the changes to the source tables in Change Tables (one per source table).
For more information, see Store changes.
When working with Data Movement gateway, except when using SaaS application sources, changes are captured from the source in near real-time. When working without Data Movement gateway (for example, with a Qlik Talend Cloud Starter subscription or when selecting None) or when using SaaS application sources, changes are captured according to the scheduler settings. For more information, see Scheduling tasks.
If you select Store changes or Apply changes, and your data source:
-
Is not a SaaS application
-
Contains datasets that support CDC and datasets that support Full load only (such as views)
Two data pipelines will be created. One pipeline will be created for tables that support CDC, and another pipeline will be created for datasets that support Full load only.
Loading method
When replicating to Snowflake, you can choose one of the following loading methods:
-
Bulk loading (the default)
If you select Bulk Loading, you will be able to tune the loading parameters in the Data uploading tab.
-
Snowpipe Streaming
Information noteSnowpipe Streaming will only be available for selection if the following conditions are met:
- The Store changes replication mode is enabled, without Apply changes.
- The Authentication Mechanism in the Snowflake connector is set to Key Pair.
- If you are using Data Movement gateway, version 2024.11.45 or later is required.
If you select Snowpipe Streaming, make sure you are familiar with the limitations and considerations when using this method. Additionally, if you select Snowpipe Streaming and then enable the Apply changes replication mode or disable Store changes, the loading method will be automatically switched back to Bulk loading.
The main reasons to choose Snowpipe Streaming over Bulk loading are:
-
Less costly: As Snowpipe Streaming does not use the Snowflake warehouse, operating costs should be significantly cheaper, although this will depend on your specific use case.
-
Reduced latency: As the data is streamed directly to the target tables (as opposed to via staging), replication from the data source to the target should be faster.
Connecting to a staging area
When replicating to the data warehouses listed below, you need to set a staging area. Data is processed and prepared in the staging area before being transferred to the warehouse.
Either select an existing staging area or click Create new to define a new staging area and follow the instructions in Connecting to cloud storage.
To edit the connection settings, click Edit. To test the connection (recommended), click Test connection.
For information on which staging areas are supported with which data warehouses, see the Supported as a staging area column inTarget platform use cases and supported versions.
Apply changes mode
Changes are applied to the target tables using one of the following methods:
- Batch optimized: This is the default. When this option is selected, changes are applied in batches. A preprocessing action occurs to group the transactions into batches in the most efficient way.
- Transactional: Select this option to apply each transaction individually, in the order it is committed. In this case, strict referential integrity is ensured for all tables.
Publication settings
-
Publish to catalog
Select this option to publish this version of the data to Catalog as a dataset. The Catalog content will be updated the next time you prepare this task.
For more information about Catalog, see Understanding your data with catalog tools.
Proxy settings when using Data Movement gateway
-
When using Data Movement gateway, connect via proxy to
When using Data Movement gateway, you can connect to the target platform and the staging platform (area) via a proxy.
For more information about configuring Data Movement gateway to use a proxy server, see Setting the Qlik Cloud tenant and a proxy server.
-
Target platform
Information noteAvailable when using Snowflake and Databricks. -
Staging platform
Information noteAvailable when using Google BigQuery, Amazon Redshift, Microsoft Fabric, and Databricks.
-
Data uploading
This tab will only be shown when replicating to a data warehouse or Kafka target. Additionally, the settings in this tab will differ according to the selected target.
Relevant for all data warehouse targets
Maximum file size
The maximum size a file can reach before it is closed. Smaller files might be uploaded faster (depending on the network) and improve performance when used in conjunction with the parallel execution option. However, it is generally considered bad practice to clutter the database with small files.
Relevant for Snowflake target only
In the General tab, you can select whether to load the data to Snowflake using Bulk Loading or Snowpipe Streaming. When Snowpipe Streaming is selected, the Data uploading tab will not be shown. When Bulk Loading is selected, the following settings will be available:
-
Maximum file size (MB): Relevant for the initial Full Load and CDC. The maximum size a file can reach before it is loaded to the target. If you encounter performance issues, try adjusting this parameter.
-
Number of file to load in a batch: Relevant for the initial Full Load only. The number of files to load in a single batch. If you encounter performance issues, try adjusting this parameter.
For a description of the Bulk Loading and Snowpipe Streaming loading methods, see General.
Relevant for Kafka target only
Message properties
Compression
Optionally select one of the available compression methods (Snappy or Gzip). The default is None.
Data message publishing
Choose one of the following Publish the data to options:
- Specific topic: Publishes the data to a single topic. Either type a topic name or use the browse button to select the desired topic.
-
Separate topic for each table: Publishes the data to multiple topics corresponding to the source table names.
The target topic name consists of the source schema name and the source table name, separated by a period (for example, dbo.Employees). The format of the target topic name is important as you will need to prepare these topics in advance.
If the topics do not exist, configure the brokers with auto.create.topics.enable=true to enable the data task to create the topics during runtime. Otherwise, the task will fail.
For information on overriding this setting at dataset level, see Overriding task settings for individual datasets when publishing to Kafka
Message key
Select one the available options.
-
Primary key columns: For each message, the message key will contain the value of the primary key column.
When By message key is selected as the Partition strategy, messages consisting of the same primary key value will be written to the same partition.
-
Schema and table name: For each message, the message key will contain a combination of schema and table name (for example, dbo+Employees).
When By message key is selected as the Partition strategy, messages consisting of the same schema and table name will be written to the same partition.
- None: Creates messages without a message key.
For information on overriding this setting at dataset level, see Overriding task settings for individual datasets when publishing to Kafka
Partition strategy
Select either Random or By message key. If you select Random, each message will be written to a randomly selected partition. If you select By message key, messages will be written to partitions based on the selected Message key (described above).
Metadata message publishing
Subject name strategy
The first strategy (Schema and table name) is a proprietary Qlik strategy while the other three are standard Confluent subject name strategies.
Select one of the available subject name strategies.
- Schema and table name (default)
- Topic name
- Record name
- Topic and record name
For more information on Confluent's subject name strategies, see Subject name strategy
Subject compatibility mode
Select one of the following compatibility modes from the Subject compatibility mode drop-down list:
-
Use Schema Registry defaults: Retrieves the Compatibility Level from the Schema Registry server configuration.
-
Backward - Latest schema only: New schemas can read corresponding data and data produced by the latest registered schema only.
-
Backward Transitive - All previous schemas: New schemas can read data produced by all previously registered schemas.
-
Forward - Latest schema only: Latest registered schema can read data produced by the new schema.
-
Forward Transitive - All previous schemas: All previously registered schemas can read data produced by the new schema.
-
Full - Latest schema only: New schema is backward and forward compatible with latest registered schema.
-
Full Transitive - All previous schemas: New schema is backward and forward compatible with all previously registered schemas.
-
None
- Depending on the selected Subject name strategy, some of the compatibility modes might not be available.
-
When publishing messages to a Schema Registry, the default subject compatibility mode for all newly created Control Table subjects will be None, regardless of the selected Subject compatibility mode.
If you want the selected Subject compatibility mode to apply to Control Tables as well, set the setNonCompatibilityForControlTables internal parameter in the Kafka target connector to false.
Use a proxy to connect to Confluent Schema Registry
This option is only supported when publishing to the Confluent Schema Registry.
Toggle on if your Data Movement gateway is configured to use a proxy server.
Message attributes
You can specify custom message attributes that will override the default message attributes. This is useful if the consumer application needs to process the message in a particular format.
Custom message attributes can be defined at both task and table level. When the attributes are defined at both task and table level, the message attributes defined for the table will take precedence over those defined for the task.
For information on overriding the message attributes at dataset level, see Overriding task settings for individual datasets when publishing to Kafka
Hierarchical structured messages are not supported.
General rules and usage guidelines
When defining a custom message, it is import to consider the rules and usage guidelines listed below.
Section names
The following naming rules apply:
- Section names must start with the characters a-z, A-Z, or _ (an underscore) and can then be followed by any of the following characters: a-z, A-Z, 0-9, _
- With the exception of the Record name and Key name sections (that do not end with a slash), removing the slash from section names will flatten the hierarchy of the associated section (see Slashes below).
- All section names except Record name and Key name can be deleted (see Deletion below)
-
The Data name and Include record Before-data section names cannot both be deleted
-
The Data name and Include record Before-data section names cannot be the same
Some of the section names in the UI end with a slash (e.g. beforeData/). The purpose of the slash is to maintain a hierarchy of the different sections within the message. If the slash is removed, the following will occur:
- The hierarchical structure of that section will be flattened, resulting in the section name being removed from the message
- The section name will be prefixed to the actual metadata, either directly or using a separator character (e.g. an underscore) that you appended to the name
Example of a data message when headers/ is specified with a slash:
		"message":{
		        "data":{
			      "COL1": "159",
			      "COL2": "159"
                       },
                       "beforeData": null,
		        "headers": {
			"operation": "INSERT",
			"changeSequence": "2018100811484900000000233",
Example of a data message when headers_ is specified with an underscore instead of a slash:
		"message":{
		        "data":{
			      "COL1": "159",
			      "COL2": "159"
                       },
                       "beforeData": null,
                       "headers_operation": "INSERT",
			"headers_changeSequence": "2018100811484900000000233",
Deleting a section name from the message will flatten the hierarchical structure of that section. This will result in all of that section's data appearing immediately below the content of the preceding section.
Example of a data message with the headers section name:
	        "message":{
		        "data":{
			      "COL1": "159",
			      "COL2": "159"
                       },
		        "headers": {
			"operation": "INSERT",
			"changeSequence": "2018100811484900000000233",
Example of a data message without the headers section name:
	        "message":{
		        "data":{
			      "COL1": "159",
			      "COL2": "159"
                       },
                       "beforeData": null,
                       "operation": "INSERT",
			"changeSequence": "2018100811484900000000233",
Variables
You can add variables to names by clicking the ![]() button at the end of the row. The following variables are available:
button at the end of the row. The following variables are available:
- SERVER_NAME - The host name of the Data Movement gateway server
- TARGET_TABLE_NAME - The name of the table
- TARGET_TABLE_OWNER - The table owner
- TASK_NAME - The name of the data task
The TARGET_TABLE_OWNER variable is not available for the Record name and Key name options (described in the table below).
Defining custom message attributes
To define a custom message format, toggle on Use custom settings and configure the options as described in the table below.
To revert to the default message attributes, toggle off Use custom settings.
| Option | Description |
|---|---|
|
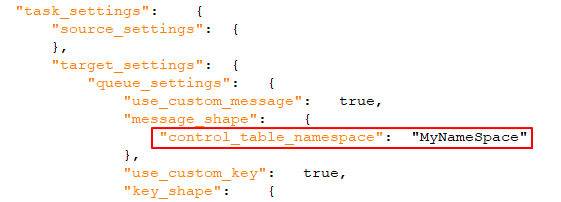
When toggled on (the default), a unique identifier will be included in the message. This should be a string, separated by periods. Note that the namespace will be included in both the message and the message key. Example: mycompany.queue.msg Default name: com.attunity.queue.msg.{{TASK_NAME}}.{{TARGET_TABLE_OWNER}}.{{TARGET_TABLE_NAME}} Default name for control tables: com.attunity.queue.msg.{{TARGET_TABLE_NAME}} Information note
The default Control Table Namespace cannot be changed via the UI. You can, however, change the default Control Table Namespace as follows:
|
|
|
Record name |
The name of the record (message). Default name: DataRecord |
|
Data name |
All of the data columns included in the record. Default name: data/ |
|
Include headers |
When toggled on (the default), header columns will be included in the message. Header columns provide additional information about the source operations. For more information, see Include the following headers below. |
|
Include headers namespace |
When toggled on (the default), a unique identifier for the header columns section will be included in the message. This should be a string, separated by periods. Example: headers.queue.msg Default name: com.attunity.queue.msg |
|
Headers name |
The name of the section containing the Qlik column headers. Default name: headers/ |
|
For a description of the available header columns, refer to Data Messages in the Qlik Help. Default: All columns are included by default, except the External Schema ID column. |
|
|
Include record Before-data |
When toggled on (the default), both pre and post UPDATE data will be included in UPDATE messages. To include only the post UPDATE data in messages, toggle off the option. Default name: beforeData/ |
|
Key name |
The name of the section containing the message key. Default name: keyRecord This option is only applicable when:
|
Additional settings
-
Message maximum size
In the Message maximum size field, specify the maximum size of messages that the broker(s) are configured to receive (message.max.bytes). The data task will not send messages larger than the maximum size.
Metadata
Basic
-
Target table schema
The schema on the target to which the source tables will be replicated if you do not want to use the source table schema (or if there is no schema in the source database).
Information noteWhen replicating to an Oracle target, the default target table schema is "system". Note also that if you leave this field empty (in which case the source schema will be used), you must make sure that the source schema already exists on the target. Otherwise, the task will fail.Information noteThe maximum permitted length for the schema name is 128 characters.
JSON column mapping
Map compatible source JSON columns to JSON columns on the target
-
If you are using Data Movement gateway to access your data source, version 2024.11.70 or later is required.
When this option is selected, JSON columns on the source will automatically be mapped to JSON columns on the target.
The state and visibility of this option is determined by the following factors:
-
New tasks: This option will be enabled by default if both the source and the target support the JSON data type.
-
Existing tasks: This option will be disabled by default, even if both the source and the target support the JSON data type. This is in order to preserve backward compatibility with downstream processes - such as transformations - that expect the target data to be in STRING format (which is the legacy behavior). You can either leave the option disabled or you can edit the downstream processes to be compatible with JSON format, and then enable this option.
-
New and existing tasks: If only the source supports the JSON data type, this option will not be visible. If JSON support is added to the target at a later stage, the option will become visible but remain disabled. This is in order to preserve backward compatibility with downstream processes - such as transformations - that expect the target data to be in STRING format (which is the legacy behavior).
LOB settings
The available LOB settings differ according to the selected replication target. As data warehouse targets do not support unlimited LOB column sizes, this option will not be available when replicating to a data warehouse.
LOB settings for targets that are not data warehouses
- Do not include LOB columns: Select this if you do not want source LOB columns to be replicated.
-
Limit LOB column size to (KB): This is the default. Select this option if you only need to replicate small LOBs or if the target platform does not support unlimited LOB size. The maximum permitted value for this field is 102400 KB (100 MB).
When replicating small LOBs, this option is more efficient than the Do not limit LOB column size option since the LOBs are replicated "inline" as opposed to via "lookup" from the source. During Change Processing, small LOBs are usually replicated via "lookup" from the source.
The limit applies to the number of LOB bytes that is read from the source endpoint. For BLOB columns, the target BLOB size will be exactly according to the specified limit. For CLOB and NCLOB columns, the target LOB size could differ from the specified limit if the source and target LOB do not have the same character set. In this case, the data task will perform character set conversion, which might result in a discrepancy between the source and target LOB sizes.
As the value of the Limit LOB size to is in bytes, the size should be calculated according to the following formulas:
- BLOB: The length of the largest LOB.
- NCLOB: The length of the longest TEXT in characters multiplied by two (as each character is handled as a double-byte). If the data includes 4-byte characters, multiply it by four.
- CLOB: The length of the longest TEXT in characters (as each character is handled as a UTF8 character). If the data includes 4-byte characters, multiply it by two.
Information note- Any LOBs larger than the specified size will be truncated.
- During Change Processing from Oracle source, inline BLOBs are replicated inline.
- Changes to this setting will only affect existing tables after they are reloaded.
-
Do not limit LOB column size: When this option is selected, LOB columns will be replicated, regardless of size.
Information noteReplicating LOB columns may impact performance. This is especially true in the case of the large LOB columns which require the replication task to perform a lookup from the source table in order to retrieve the source LOB value.-
Optimize when LOB size is less than: Select this option when you need to replicate both small and large LOBs, and most of the LOBs are small.
Information noteThis option is supported with the following sources and targets only:
-
Sources: Oracle, Microsoft SQL server, MySQL, PostgreSQL, and IBM DB2 for LUW
-
Targets: Oracle, Microsoft SQL Server, MySQL, PostgreSQL.
When this option is selected, during Full Load, the small LOBs will be replicated "inline" (which is more efficient), and the large LOBs will be replicated by performing a lookup from the source table. During Change Processing, however, both small and large LOBs will be replicated by performing a lookup from the source table.
Information noteWhen this option is selected, the replication task will check all of the LOB sizes to determine which ones to transfer "inline". LOBs larger than the specified size will be replicated using Full LOB mode.
Therefore, if you know that most of the LOBs are larger than the specified setting, it is preferable to use the Replicate unlimited LOB columns option instead.
-
-
Chunk size (KB): Optionally, change the size of the LOB chunks to use when replicating the data to the target. The default chunk size should suffice in most cases, but if you encounter performance issues, adjusting the size may improve performance.
Information noteWith some databases, data type validation occurs when the data is inserted or updated. In such cases, replication of structured data types (e.g. XML, JSON, GEOGRAPHY, etc.) may fail if the data is bigger than the specified chunk size.
-
Lob settings for supported data warehouse targets
-
Include LOB columns and limit column size to (KB):
You can choose to include LOB columns in the task, and set the maximum LOB size. LOBs that are larger than the maximum size will be truncated.
Advanced
Control table settings
-
Control tables schema: Specify the target schema for the control tables if you do not want them to be created in the source schema (the default), or in the target schema.
Information noteThe maximum permitted length for the schema name is 128 characters. - Create target control tables in tablespace: When the replication target is Oracle, specify the tablespace where you want the target control tables to be created. If you do not enter any information in this field, the tables will be created in the default tablespace in the target database.
- Create indexes for target control tables in tablespace: When the replication target is Oracle, specify the tablespace where you want the control table indexes to be created. If you do not enter any information in this field, the indexes will be created in the same tablespace as the control tables.
- Replication history timeslot (minutes): The length of each time slot in the Replication history control table. The default is 5 minutes.
Control table selection
Select the control tables you want to be created on the target platform:
| Logical name | Name in target |
|---|---|
| Apply exceptions | attrep_apply_exceptions |
| Replication status | attrep_status |
| Suspended tables | attrep_suspended_tables |
| Replication history | attrep_history |
| DDL history |
attrep_ddl_history The DDL History table is supported with the following target platforms only:
|
For more information on control tables, see Control tables.
Full load
Basic
These settings will be applied during the data task preparation stage and any time a table is reloaded.
If target table already exists: Select one of the following to determine how the data should be loaded to the target tables:
The option to drop or truncate the target tables is relevant only if such operations are supported by the source endpoint.
-
Drop and create table: The target table is dropped and a new table is created in its place.
Information noteThe replication task Control Tables will not be dropped. However, any suspended tables that are dropped will also be deleted from the attrep_suspended_tables Control Table if the associated task is reloaded.
-
TRUNCATE before loading: Data is truncated without affecting the target table metadata. Note that when this option is selected, enabling the Create primary key or unique index after full load completes option will have no effect.
Information noteNot supported when Microsoft Fabric is the target platform. - Ignore: Existing data and metadata of the target table will not be affected. New data will be added to the table.
Advanced
Performance tuning
If data replication is excessively slow, adjusting the following parameters might improve performance.
- Maximum number of tables: Enter the maximum number of tables to load into the target at once. The default value is 5.
-
Transaction consistency timeout (seconds): Enter the number of seconds that the replication task should wait for open transactions to close, before beginning the Full Load operation. The default value is 600 (10 minutes). The replication task will begin the full load after the timeout value is reached even if there are open transactions.
Information noteTo replicate transactions that were open when Full Load started but were only committed after the timeout value was reached, you need to reload the target tables. - Commit rate during full load: The maximum number of events that can be transferred together. The default value is 10000.
After full load completes
You can set the task to stop automatically after Full Load completes. This is useful if you need to perform DBA operations on the target tables before the task’s Apply Changes (i.e. CDC) phase begins.
During Full Load, any DML operations executed on the source tables are cached. When Full Load completes, the cached changes are automatically applied to the target tables (as long as the Before/After cached changes are applied options described below are disabled).
-
Create primary key or unique index: Select this option if you want to delay primary key or unique index creation on the target until after full load completes.
Information noteThis settings is not available for tasks using a SaaS application connector. - Stop the task:
Information note
These settings are not available when replicating to data warehouse targets
-
Before cached changes are applied: Select to stop the task after Full Load completes.
-
After cached changes are applied: Select to stop the task as soon as data is consistent across all tables in the task.
Information noteWhen configuring the task to be stopped after Full Load completes, note the following:
- The task does not stop the moment Full Load completes. It will be stopped only after the first batch of changes has been captured (as this is what triggers the task to stop). This might take a while depending on how frequently the source database is updated. After the task stops, the changes will not be applied to the target until the task is resumed.
- Choosing Before cached changes are applied might impact performance, as the cached changes will only be applied to tables (even those that have already completed Full Load) after the last table completes Full Load.
- When this option is selected and a DDL is executed on one of the source tables during the Full Load process (in a Full Load and Apply Changes task), the replication task will reload the table. This effectively means that any DML operations executed on the source tables will be replicated to the target before the task stops.
-
For initial load
| Use cached data |
This option lets you use cached data that was read when generating metadata with Full data scan selected. This creates less overhead regarding API use and quotas, as the data is already read from the source. Any changes since the initial data scan can be picked up by Change data capture (CDC). |
| Load data from source |
This option performs a new load from the data source. This option is useful if:
|
Apply changes
These settings are only available when the Apply changes replication mode is enabled.
Basic
Select type of DDL changes to apply to the target
The following options determine whether DDL operations performed on the corresponding source table will also be performed on the target table.
-
Drop table: Select to drop the target table when the source table is dropped.
Information noteNot supported when Kafka is the target platform. -
Truncate table: Select to truncate the target table when the source table is truncated.
Information noteNot supported when Microsoft Fabric is the target platform. -
Alter table: Select to alter the target table when the source table is altered.
Information noteRenaming a table is not supported when Kafka is the target platform.
Change processing tuning
-
Apply batched changes to multiple tables concurrently: Selecting this option might improve performance when applying changes from multiple source tables.
Information noteThis option is only supported when:
- The Apply changes mode is set to Batch optimized. For more information, see Replication settings.
- The replication targets are not MySQL, PostgreSQL, Oracle, and Google BigQuery.
-
Maximum number of tables: The maximum number of tables to apply batched changes to concurrently. The default is five, the maximum is 50, and the minimum is two.
When the Apply batched changes to multiple tables concurrently option is enabled, the following limitations apply:
-
The task error handling policy defaults will be unchanged for Environmental and Table errors, but the defaults for Data errors and Apply Conflicts errors will be as follows:
- Data errors:
- Data truncation errors: Log record to the exceptions table
- Other data errors: Suspend table
- Apply Conflicts errors:
- Deletes: Ignore record
Inserts: UPDATE the existing target record
Information noteThis is not relevant for a Snowflake target (as Snowflake does not support Primary Keys).- Updates: Ignore record
- Escalation action:
- The Escalation action for both Data errors and Apply Conflicts is not supported.
- The attrep_apply_exception Control Table is not supported.
- For data errors:
- The Log record to the exceptions table option is only available for data truncation errors.
- There is no Ignore option.
- For Apply Conflicts:
- The Log record to exceptions table option is not available.
The Ignore option is only available for the No record found for applying an UPDATE apply conflict.
- Data errors:
See also: Error handling.
-
-
Limit the number of changes applied per change processing statement to: To limit the number of changes applied in a single change processing statement, select this check box and then optionally change the default value. The default value is 10,000.
Information noteThis option is supported with the following targets only: MySQL, PostgreSQL, Oracle, and Google BigQuery.
Advanced
Store changes
These settings are only available when the Store changes replication mode is enabled.
Basic
DDL options
Select one of the following options to determine how to handle DDL operations on the source tables:
- Apply to change table: DDL operations to the source tables (such as a column being added) will be applied to the corresponding Change Tables only.
- Ignore: All DDL operations to source tables will be ignored.
Advanced
On update
Select Store before and after image to store both the pre-UPDATE data and the post-UPDATE data. When not selected, only the post-UPDATE data will be stored.
Change table creation
The following section describes the options that are available when storing changes in Change Tables.
- Suffix: Specify a string to use as the suffix for all Change Tables. The default value is __ct. The Change Table names are the name of the target table with the suffix appended. So for example, using the default value, the name of the Change Table will be HR__ct.
- Header column prefix: Specify a string to use as the prefix for all of the Change Table header columns. The default value is header__. For example, when using the default value, the header column stream_position will be called header__stream_position.
For more information on Change Tables, see Using Change Tables.
If change table exists when full load starts: Select one of the following to determine how to load the Change Tables when Full Load replication starts:
- Drop and create change table: The table is dropped and a new table is created in its place.
-
Delete old changes and store new changes in existing change table: Data is truncated and added without affecting the table metadata.
Information noteNot supported when Microsoft Fabric is the target platform. - Keep old changes and store new changes in existing change table: Data and metadata of the existing Change table are not affected.
Table header columns
The Change Table header columns provide information about Change Processing operations such as the type of operation (e.g. INSERT), the commit time, and so on. If you do not need all of this information, you can configure the moving task to create the Change Tables with selected header columns (or none at all), thereby reducing their footprint in the target database..
For a description of the header columns, see Change Tables.
Error handling
Basic
Apply conflicts
Duplicate key when applying INSERT: Select what action to take when there is a conflict with an INSERT operation.
-
Ignore: The task continues and the error is ignored.
-
UPDATE the existing target record: The target record with the same primary key as the INSERTED source record is updated.
- Log record to the exceptions table (default): The task continues and the error is written to the exceptions table.
-
Suspend table: The task continues but data from the table with the error record is moved into an error state and its data is not replicated.
- Stop task: The task is stopped and manual intervention is required.
No record found for applying an UPDATE: Select what action to take when there is a conflict with an UPDATE operation.
- Ignore: The task continues and the error is ignored.
-
INSERT the missing target record: The missing target record will be inserted into the target table. When the source endpoint is Oracle, selecting this option requires supplemental logging to be enabled for all the source table columns.
- Log record to the exceptions table (default): The task continues and the error is written to the exceptions table.
-
Suspend table: The task continues but data from the table with the error record is moved into an error state and its data is not replicated.
- Stop task: The task is stopped and manual intervention is required.
Advanced
Data error handling is supported in Apply Changes replication mode only (not Full Load).
Data errors
For data truncation errors: Select what you want to happen when a truncation occurs in one or more specific records. You can select one of the following from the list:
- Ignore: The task continues and the error is ignored.
- Log record to the exceptions table (default): The task continues and the error is written to the exceptions table.
- Suspend table: The task continues, but data from the table with the error record is moved into an error state and its data is not replicated
- Stop task: The task is stopped and manual intervention is required.
For other data errors: Select what you want to happen when an error occurs in one or more specific records. You can select one of the following from the list:
- Ignore: The task continues and the error is ignored.
- Log record to the exceptions table (default): The task continues and the error is written to the exceptions table.
- Suspend table: The task continues, but data from the table with the error record is moved into an error state and its data is not replicated
- Stop task: The task is stopped and manual intervention is required.
Escalate error handling when other data errors reach (per table): Select this check box to escalate error handling when the number of non-truncation data errors (per table) reaches the specified amount. Valid values are 1-10,000.
Escalation action: Choose what should happen when error handling is escalated. Note that the available actions are dependent on the action selected from the For other data errors drop-down list described above.
-
Suspend table (default): The task continues, but data from the table with the error record is moved into an error state and its data is not moved.
Information noteThe behavior differs according to the Change Processing Mode:
-
In Transactional apply mode, the last changes will not be moved.
-
In Batch optimized apply mode, a situation is possible where data will not be moved at all or only partially moved.
-
- Stop task: The task is stopped and manual intervention is required.
- Log record to the exceptions table: The task continues and the record is written to the exceptions table.
Table errors
When encountering a table error: Select one of the following from the drop-down list:
- Suspend table (default): The task continues but data from the table with the error record is moved into an error state and its data is not replicated
- Stop task: The task is stopped and manual intervention is required.
Escalate error handling when table errors reach (per table): Select this check box to escalate error handling when the number of table errors (per table) reaches the specified amount. Valid values are 1-10,000.
Escalation action: The escalation policy for table errors is set to Stop task and cannot be changed.
Apply conflicts
No record found for applying a DELETE: Select what action is taken when there is a conflict with a DELETE operation.
- Ignore: The task continues and the error is ignored.
- Log record to the exceptions table: The task continues and the record is written to the exceptions table.
- Suspend table: The task continues but data from the table with the error record is moved into an error state and its data is not replicated.
- Stop task: The task is stopped and manual intervention is required.
Escalate error handling when apply conflicts reach (per table): Select this check box to escalate error handling when the number of apply conflicts (per table) reaches the specified amount. Valid values are 1-10,000.
Escalation action: Choose what should happen when error handling is escalated:
- Log record to the exceptions table (default): The task continues and the error is written to the exceptions table.
-
Suspend table: The task continues, but data from the table with the error record is moved into an error state and its data is not replicated.
Information noteThe behavior differs according to the Change Processing Mode:
-
In Transactional apply mode, the last changes will not be replicated
-
In Batch optimized apply mode, a situation is possible where there will be no replication of data or data replication will be partial.
-
-
Stop task: The task is stopped and manual intervention is required.
Environmental errors
-
Maximum retry count: Select this option and then specify the maximum number of attempts to retry a task when a recoverable environmental error occurs. After the task has been retried the specified number of times, the task is stopped and manual intervention is required.
To never retry a task, clear the check box or specify "0".
To retry a task an infinite number of times, specify "-1"
-
Interval between retry attempts (seconds): Use the counter to select or type the number of seconds that the system waits between attempts to retry a task.
Valid values are 0-2,000.
-
- Increase retry interval for long outages: Select this check box to increase the retry interval for long outages. When this option is enabled, the interval between each retry attempt is doubled, until the Maximum retry interval is reached (and continues retrying according to the specified maximum interval).
- Maximum retry interval (seconds): Use the counter to select or type the number of seconds to wait between attempts to retry a task when the Increase retry interval for long outages option is enabled. Valid values are 0-2,000.
Change processing tuning
Transaction offload tuning
-
Offload transaction in progress to disk if:
The replication task usually keeps transaction data in memory until it is fully committed to the source and/or target. However, transactions that are larger than the allocated memory or that are not committed within the specified time limit will be offloaded to disk.
- Transaction memory size exceeds (MB): The maximum size that all transactions can occupy in memory before being offloaded to disk. The default value is 1024.
- Transaction duration exceeds (seconds): The maximum time that each transaction can stay in memory before being offloaded to disk. The duration is calculated from the time that the replication task started capturing the transaction. The default value is 60.
Batch tuning
The settings in this tab are determined by the Apply changes mode.
Setting that are only available when the "Apply mode" is "Batch optimized"
- Apply batched changes in intervals:
-
Larger than: The minimum amount of time to wait between each application of batch changes. The default value is 1.
Increasing the Longer than value decreases the frequency with which changes are applied to the target while increasing the size of the batches. This can improve performance when applying changes to target databases that are optimized for processing large batches.
- Less than: The maximum amount of time to wait between each application of batch changes (before declaring a timeout). In other words, the maximum acceptable latency. The default value is 30. This value determines the maximum amount of time to wait before applying the changes, after the Longer than value has been reached.
-
Force apply a batch when processing memory exceeds (MB): The maximum amount of memory to use for pre-processing in Batch optimized apply mode. The default value is 500.
For maximum batch size, set this value to the highest amount of memory you can allocate to the replication task. This can improve performance when applying changes to target databases that are optimized for processing large batches.
Setting that are only available when the "Apply mode" is "Transactional"
The following settings are only applicable when working in "Transactional" apply mode. Note that "Transactional" is the only available apply mode (and therefore not selectable) when replicating to Snowflake, and the Loading method is Snowpipe Streaming.
-
Minimum number of changes per transaction: The minimum number of changes to include in each transaction. The default value is 1000.
Information noteThe changes will be applied to the target either when the number of changes is equal to or greater than the Minimum number of changes per transaction value OR when the Maximum time to batch transactions before applying (seconds) value described below is reached - whichever occurs first. Because the frequency of changes applied to the target is controlled by these two parameters, changes to the source records may not immediately be reflected in the target records.
- Maximum time to batch transactions before applying (seconds): The maximum time to collect transactions in batches before declaring a timeout. The default value is 1.
Interval
-
Read changes every (Minutes)
The interval between reading changes from the source in minutes. The valid range is 1 to 1440.
Information noteThis option is only for tasks using:
- Data Movement gateway
- The Apply changes or Store changes update method
Check for changes
-
According to the delta extraction interval: When this option is selected, the data task checks for changes according to the Delta extraction interval.
Information noteThe interval will start after each "round". A round can be defined as the time it takes for the data task to read the changes from the source tables, and send them to the target (as a single transaction). The length of a round varies according to the number of tables and changes. So if you specify an interval of 10 minutes and a round takes 4 minutes, then the actual time between checking for changes will be 14 minutes.-
Delta extraction interval: The frequency with which deltas will be extracted from your system. The default is every 60 seconds.
-
-
As scheduled: When this option is selected, the data task will extract the delta once and then stop. It will then continue to run as scheduled.
Information noteThis option is only relevant if the interval between the CDC cycles is 24 hours or more.For information on scheduling:
-
"Replicate data tasks" in a replication project, see Scheduling tasks
-
Miscellaneous tuning
Statements cache size (number of statements)
The maximum number of prepared statements to store on the server for later execution (when applying changes to the target). The default is 50. The maximum is 200.
DELETE and INSERT when updating a primary key column
This option is only available when the Store changes replication mode is enabled, and requires full supplemental logging to be enabled in the source database.
Send tombstone on DELETE
When this option is selected, only the message key will be populated; the message itself will be null, indicating that the item has been deleted. This can help consumers detect that a DELETE operation has been performed.
Store task recovery data in target database
Select this option to store task-specific recovery information in the target database. When this option is selected, The replication task creates a table named attrep_txn_state in the target database. This table contains transaction data that can be used to recover a task in the event that the files in the Data Movement gateway Data folder are corrupted or if the storage device containing the Data folder has failed.
Apply changes using SQL MERGE
When this option is not selected, the replication task will execute separate bulk INSERT, UPDATE and DELETE statements for each of the different change types in the Net Changes table.
While this method is highly efficient, enabling the Apply changes using SQL MERGE option is even more efficient when working with endpoints that support this option.
This is due to the following reasons:
- It reduces the number of SQL statements run per table from three to one. Most UPDATE operations in large, immutable, file-based cloud databases (such as Google Cloud BigQuery), involve rewriting of affected files. With such operations, the reduction of per-table SQL statements from three to one is very significant.
- The target database only needs to scan the Net Changes table once, significantly reducing I/O.
Optimize inserts
When Apply changes using SQL MERGE is selected together with the Optimize inserts option and the changes consist of INSERTs only, the replication task will perform INSERTs instead of using SQL MERGE. Note that while this will usually improve performance and thereby reduce costs, it might also result in duplicate records in the target database.
- The Apply changes using SQL MERGE and Optimize inserts options are available for tasks configured with the following target endpoints only:
- Google Cloud BigQuery
- Databricks
- Snowflake
- The Apply changes using SQL MERGE and Optimize inserts options are not supported with the following source endpoints:
- Salesforce
- Oracle
-
When the Apply changes using SQL MERGE option is enabled:
- Non-fatal data errors or data errors that cannot be recovered will be handled as table errors.
- The Apply Conflicts error handling policy will be non-editable with the following settings.
- No record found for applying DELETE: Ignore record
Duplicate key when applying INSERT: UPDATE the existing target record
Information noteIf the Optimize inserts option is also selected, the Duplicate key when applying INSERT option will be set to Allow duplicates in targets.- No record found for applying an UPDATE: INSERT the missing target record
- Escalation action: Log record to exception table
- The following For other data errors Data error handling policy options will not be available:
- Ignore record
- Log record to the exceptions table
- The actual SQL MERGE operation will only be performed on the final target tables. INSERT operations will be performed on the intermediary Change tables (when the Apply changes or Store changes replication modes are enabled).
Transactional apply
When replicating to data warehouse targets or when working without Data Movement gateway, these options are not relevant as the Apply mode is always Batch optimized, with one exception.
The exception to this is when replicating to Snowflake and the Loading method is set to Snowpipe streaming.
The following settings are only available when working in transactional apply mode. When replicating to databases, the Apply mode can be set to either Batch optimized or Transactional. However, when replicating to Snowflake target and the Loading method is set to Snowpipe streaming, the apply mode is always transactional and therefore cannot be set.
-
Minimum number of changes per transaction: The minimum number of changes to include in each transaction. The default value is 1000.
Information noteThe replication task applies the changes to the target either when the number of changes is equal to or greater than the Minimum number of changes per transaction value OR when the batch timeout value is reached (see below) - whichever occurs first. Because the frequency of changes applied to the target is controlled by these two parameters, changes to the source records may not immediately be reflected in the target records. - Maximum time to batch transactions before applying (seconds): The maximum time to collect transactions in batches before declaring a timeout. The default value is 1.
Automatic schema evolution
Select how to handle the following types of DDL changes in the schema. When you have changed schema evolution settings, you must prepare the task again. The table below describes which actions are available for the supported DDL changes.
| DDL change | Apply to target | Ignore | Suspend table | Stop task |
|---|---|---|---|---|
| Add column | Yes | Yes | Yes | Yes |
| Change column data type | Yes | Yes | Yes | Yes |
| Rename column | Yes | No | Yes | Yes |
|
Rename table Information noteNot supported when Kafka is the target platform.
|
No | No | Yes | Yes |
| Drop column | Yes | Yes | Yes | Yes |
|
Drop table Information noteNot supported when Kafka is the target platform.
|
Yes | Yes | Yes | Yes |
| Create table
If you used a Selection rule to add datasets that match a pattern, new tables that meet the pattern will be detected and added. |
Yes | Yes | No | No |
Character substitution
You can substitute or delete source characters in the target database and/or you can substitute or delete source characters that are not supported by a selected character set.
-
All characters must be specified as Unicode code points.
- Character substitution will also be performed on the Control tables.
-
Invalid values will be indicated by a red triangle in the top right of the table cell. Hovering your mouse cursor over the triangle will show the error message.
-
Any table-level or global transformations defined for the task will be performed after the character substitution has been completed.
-
Substitutions actions defined in the Substitute or Delete Source Characters table are performed before the substitution action defined in the Substitute or Delete Source Characters Unsupported by the Selected Character Set table.
- Character substitution does not support LOB data types.
Substituting or deleting source characters
Use the Substitute or delete source characters table to define replacements for specific source characters. This may be useful, for example, when the Unicode representation of a character is different on the source and target platforms. For example, on Linux, the minus character in the Shift_JIS character set is represented as U+2212, but on Windows it is represented as U+FF0D.
| To | Do This |
|---|---|
|
Define substitution actions. |
|
|
Edit the specified source or target character |
Click |
|
Delete entries from the table |
Click |
Substituting or deleting source characters unsupported by the selected character set
Use the Unsupported source characters by character set table to define a single replacement character for all characters not supported by the selected character set.
| To | Do This |
|---|---|
|
Define or edit a substitution action. |
|
|
Disable the substitution action. |
Select the blank entry from the Character Set drop-down list. |
More options
These options are not exposed in the UI as they are only relevant to specific versions or environments. Consequently, do not set these options unless explicitly instructed to do so by Qlik Support or product documentation.
To set an option, simply copy the option into the Add feature name field and click Add. Then set the value or enable the option according to the instructions you received.
Loading dataset segments in parallel
During full load, you can accelerate the loading of large datasets by splitting the dataset into segments, which will be loaded in parallel. Tables can be split by data ranges, all partitions, all subpartitions, or specific partitions.
For more information, see Replicating dataset segments in parallel.
Scheduling tasks
In some cases, you might need to schedule your task to propagate changes from the data source to the target platform.
For more information, see Scheduling tasks.