Procedure
Procedure
-
In the Repository view, expand the Metadata node and the directory in which the file is
saved. Then drag this file into the design workspace.
The dialog box below appears.

-
Select tFileInputDelimited and then click
OK to close the dialog box.
The component is displayed in the workspace. The file used in this scenario is called SampleAddresses..
- Drag the following components from the Palette into the design workspace: two tMap components, tUniservRTConvertName, and tFileOutputDelimited..
-
Connect tMap with tUniservRTConvertName first.
Accept the schema from tUniservRTConvertName by clicking Yes on the prompt window.

-
Connect the other components via Row >
Main.

-
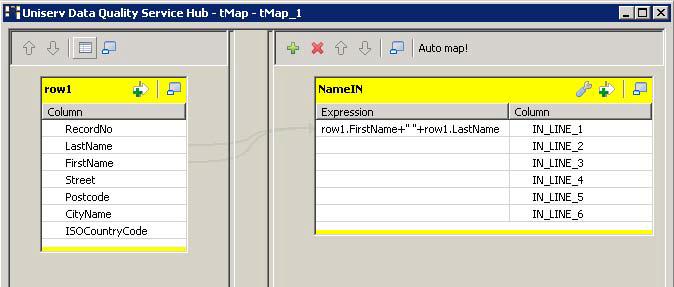
Double-click tMap_1 to open the schema
mapping window. On the left is the structure of the input file, on the right is
the schema of tUniservRTConvertName. At the
bottom lies the Schema Editor, where you can
find the attributes of the individual columns and edit them.

- Assign the columns of the input source to the respective columns of tUniservRTConvertName. For this purpose, select a column of the input source and drag it onto the appropriate column on the right side. If fields from the input file are to be passed on to the output file, like the address fields or IDs, you have to define additional fields.
- Click OK to close the dialog box.
-
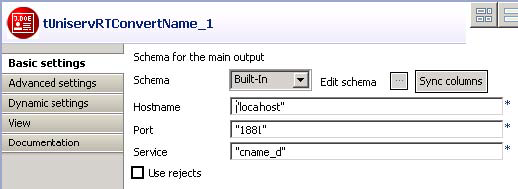
Double-click tUniservRTConvertName to open
its Basic Settings view.

- Fill in the server information and specify the country-specific service.
-
Double-click tMap_3 to open the mapping
window. On the left is the schema of tUniservRTConvertName and on the right is the schema of the
output file.

- Click OK to close the window.
- Double-click tFileOutputDelimited and enter the details for the output file.
Did this page help you?
If you find any issues with this page or its content – a typo, a missing step, or a technical error – please let us know!
