Setting the schema and selecting an address provider
Procedure
-
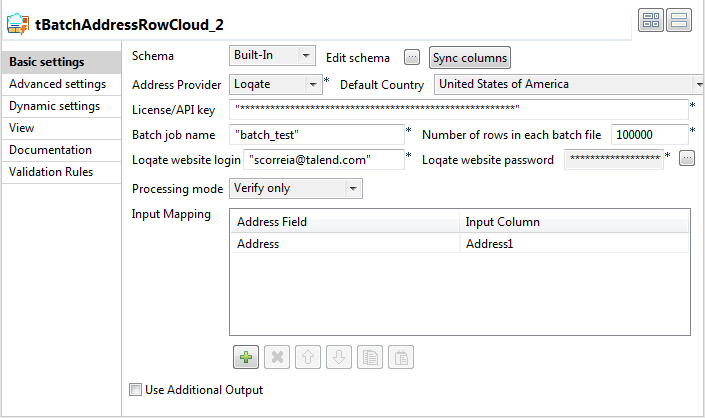
Double-click tBatchAddressRowCloud to
display the Basic settings view and define
the component properties.

- If required, click Sync columns to retrieve the schema defined in the input component.
-
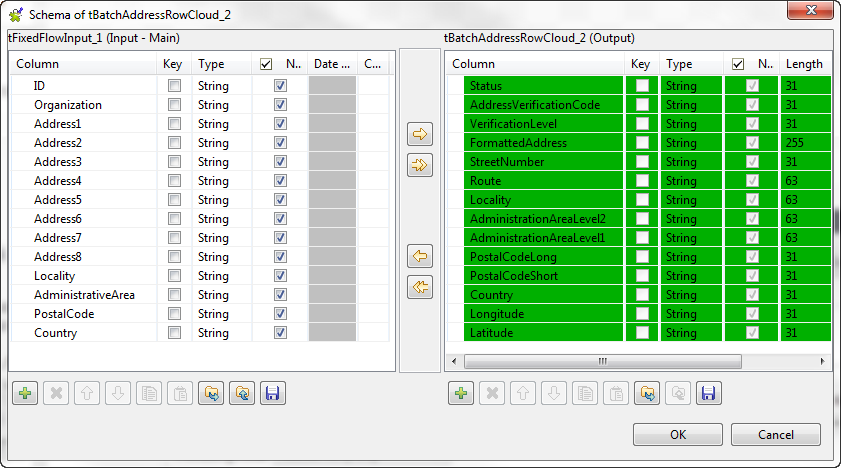
Click the Edit schema button to open the
schema dialog box.
tBatchAddressRowCloud proposes several predefined read-only address columns as shown in the below capture.
 The STATUS column returns the status of processing input addresses. For further information about process status, see Process status in tLoqateAddressRow .The AddressVerificationCode column returns the verification code for the processed address. For further information about what values this code is made up of and the implications of each segment, see Address verification codes in tLoqateAddressRow .The VerificationLevel output column provides you with a verification status of the processed addresses. For further information, see Address verification levels in tAddressRowCloud.
 -
Move any of the input columns to the output schema if you want to show
them in the verification results, click OK
and accept to propagate the changes.
You can also add columns directly in the output schema to retrieve additional address information from the provider repository.
-
Select from the Address Provider list the
provider of the reference data against which you want to validate and format
input addresses, Loqate in this
example.
You can also validate addresses against MelissaData online service.
- In the License/API key field, enter the license key provided by Loqate.
-
In the Batch job name field, enter
between quotation marks a name of your choice to give to the batch files
that will be generated and saved on the Loqate server.
Set the number of address records you want to group in each batch file in the Number of rows in each batch file field.
- Enter the login and password provided by Loqate in the Loqate website login and Loqate website password respectively.
-
From the Processing Mode list,
select:
Option
To... Verify and Geocode (selected by default)
standardize and correct addresses and enrich them with latitude and longitude.
Combining address verification and geocoding will cost extra credits. For further information, see the Loqate pricing.
Verify only standardize and correct addresses without enriching them with latitude and longitude.
Did this page help you?
If you find any issues with this page or its content – a typo, a missing step, or a technical error – please let us know!
