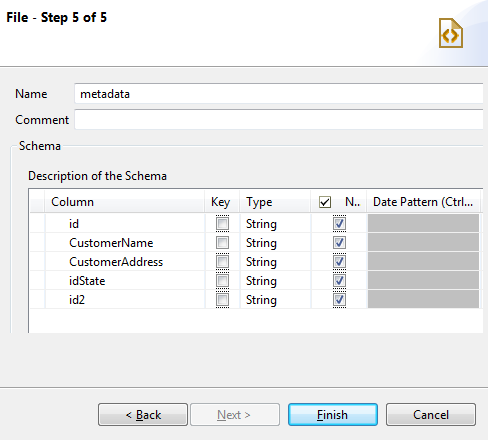
Finalizing the end schema of your output file
About this task
Step 5 of the wizard displays the end schema generated and allows you to further define the schema.

Procedure
-
If needed, rename the metadata in the Name field
(metadata, by default), add a
Comment, and make further modifications, for example:
-
Redefine the columns by editing the relevant fields.
-
Add or delete a column using the [+] and x buttons.
-
Change the order of the columns using the
and
buttons.
-
- If the XML file which the schema is based on has been changed, click the Guess button to generate the schema again. Note that if you have customized the schema, the Guess feature does not retain these changes.
- Click Finish. The new file connection, along with its schema, is displayed under the relevant File XML metadata node in the Repository tree view.
Results
Now you can drag and drop the file connection or any schema of it from the Repository tree view onto the design workspace as a new tAdvancedFileOutputXML component or onto an existing component to reuse the metadata.
To modify an existing file connection, right-click it from the Repository tree view, and select Edit file xml to open the file metadata setup wizard.
To add a new schema to an existing file connection, right-click the connection from the Repository tree view and select Retrieve Schema from the contextual menu.
To edit an existing file schema, right-click the schema from the Repository tree view and select Edit Schema from the contextual menu.
