Creating a connection to a Hive database
- Big Data
- Big Data Platform
- Cloud Big Data
- Cloud Big Data Platform
- Cloud Data Fabric
- Data Fabric
- Qlik Cloud Enterprise Edition
- Qlik Talend Cloud Enterprise Edition
- Qlik Talend Cloud Premium Edition
- Real-Time Big Data Platform
Procedure
- Expand the Hadoop cluster node under the Metadata node of the Repository tree, right-click the Hadoop connection to be used and select Create Hive from the contextual menu.
- In the connection wizard that opens up, fill in the generic properties of the connection you need create, such as Name, Purpose and Description. The Status field is a customized field that you can define in File > Edit project properties.
-
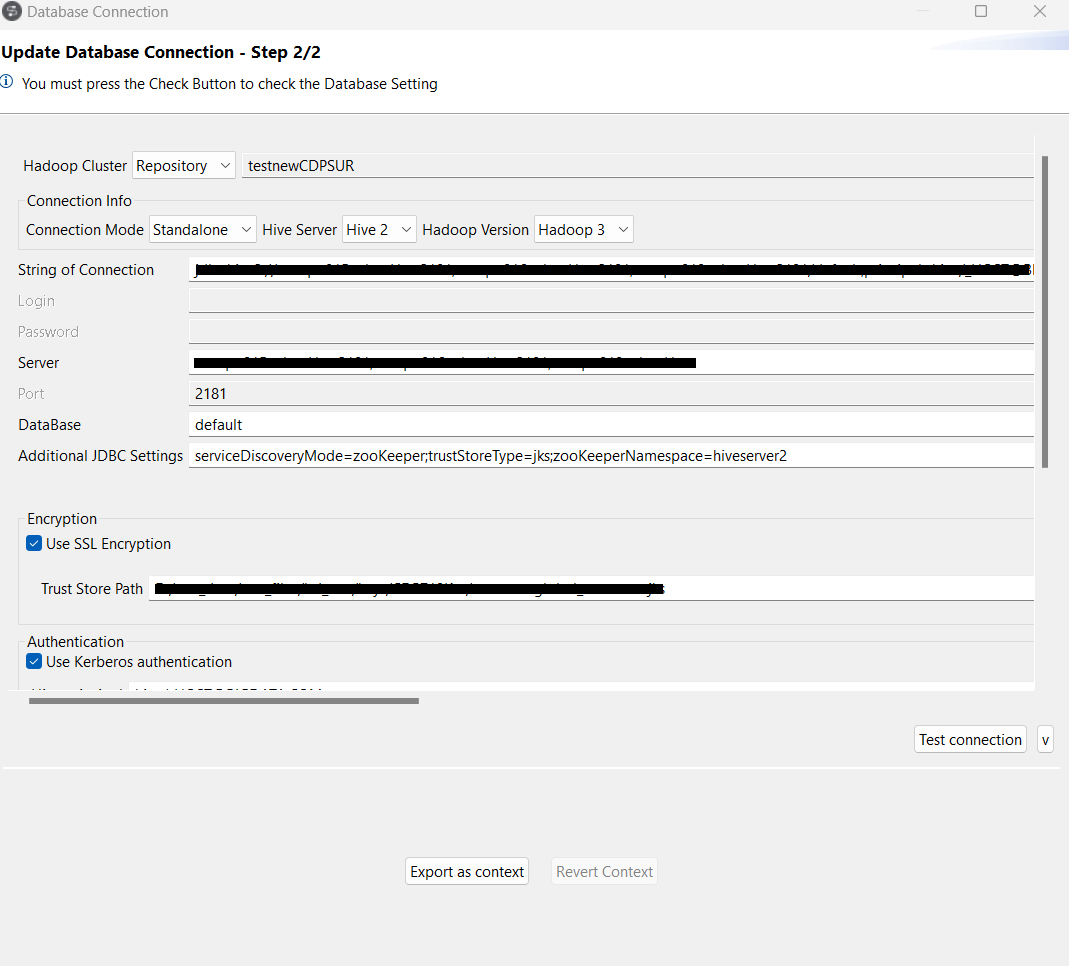
Click Next to proceed to the next step, which requires you
to fill in the Hive connection details. Among them, DB Type,
Hadoop cluster, Server,
NameNode URL and JobTracker URL are
automatically pre-filled with the properties inherited from the Hadoop connection you
selected in the previous steps.
Note that if you choose None from the Hadoop cluster list, you are actually switching to a manual mode in which the inherited properties are abandoned and instead you have to configure every property yourself, with the result that the created Hive connection appears under the Db connection node only.
 The properties to be set vary depending on the Hadoop distribution you connect to.
 - In the Connection info area, select the model of the Hive database you want to connect to.
-
Fill in the fields that appear depending on the Hive model you have selected.
When you leave the Database field empty, selecting the Standalone model enables the connection to the default Hive database only.
-
If you are accessing a Hadoop distribution running with Kerberos security,
select the Use Kerberos authentication check box. Then
enter the Kerberos principal name in the Hive principal
field activated.
If you need to use a keytab file to log in, select the Use a keytab to authenticate check box, enter the principal to be used in the Principal field and in the Keytab field, browse to the keytab file to be used.
A keytab file contains pairs of Kerberos principals and encrypted keys. Note that the user that executes a keytab-enabled Job is not necessarily the one a principal designates but must have the right to read the keytab file being used. For example, the username you are using to execute a Job is user1 and the principal to be used is guest; in this situation, ensure that user1 has the right to read the keytab file to be used.
Ensure that Kerberos has been correctly set up by following the procedure explained How to use Kerberos in Talend Studio.
Example

-
In the Hive metastore port field, enter listening port number of the metastore of the Hive system to be used.
If HA metastore has been defined for this Hive system, select the Enable high availability check box and in the field that is displayed, enter the URIs of the multiple remote metastore services, each being separated with a comma(,).
-
If you are a custom distribution supporting Tez but not officially supported by
Talend, you can
select Tez as the framework of your Jobs from the
Execution engine list.
Then when you reuse this connection in a Hive component, you need to configure the access to the Tez libraries via that component Advanced settings view.
-
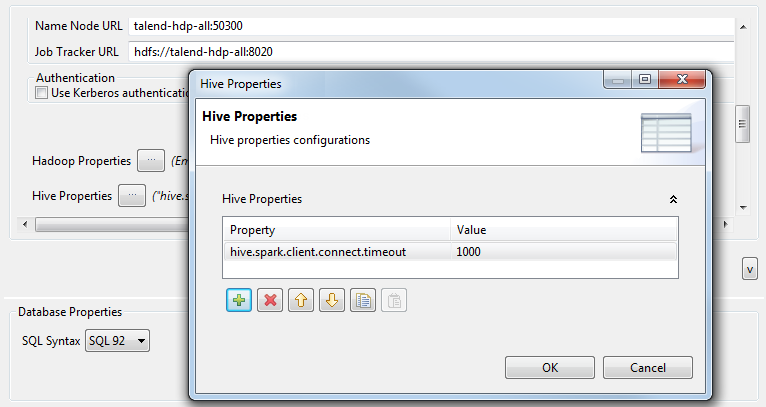
If you need to use custom configuration for the Hadoop or Hive distribution to be
used, click the [...] button next to Hadoop
properties or Hive Properties accordingly to
open the corresponding properties table and add the property or properties to be
customized. Then at runtime, these changes will override the corresponding default
properties used by Talend Studio for
its Hadoop engine.
For further information about the properties of Hadoop, see the Apache Hadoop documentation, or the documentation of the Hadoop distribution you need to use. For example, this page lists some of the default Hadoop properties.For further information about the properties of Hive, see Apache documentation for Hive. For example, this page describes some of the Hive configuration properties.For further information about how to leverage these properties tables, see Setting reusable Hadoop properties.

- Click the Check button to verify if your connection is successful.
- If needed, define the properties of the database in the corresponding fields in the Database Properties area.
-
Click Finish to validate your changes and
close the wizard.
The created connection to the specified Hive database displays under the DB Connections folder in the Repository tree view. This connection has four sub-folders among which Table schema can group all schemas relative to this connection.
 If you need to use an environmental context to define the parameters of this connection, click the Export as context button to open the corresponding wizard and make the choice from the following options:
-
Create a new repository context: create this environmental context out of the current Hadoop connection, that is to say, the parameters to be set in the wizard are taken as context variables with the values you have given to these parameters.
-
Reuse an existing repository context: use the variables of a given environmental context to configure the current connection.
For a step-by-step example about how to use this Export as context feature, see Exporting metadata as context and reusing context parameters to set up a connection.
-
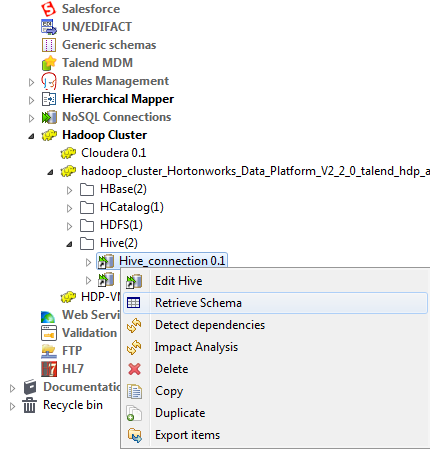
- Right-click the Hive connection you created and then select Retrieve Schema to extract all schemas in the defined Hive database.
Did this page help you?
If you find any issues with this page or its content – a typo, a missing step, or a technical error – please let us know!
