Skip to main content Skip to complementary content

Retrieving a Hive table schema

In this step, the table schema of interest is retrieved from the connected Hive database.

Information noteWarning: If you are working on a Git managed project while the Manual lock option is selected in Talend Administration Center, be sure to lock manually your connection in the Repository tree view before retrieving or updating table schemas for it. Otherwise the connection is read-only and the Finish button of the wizard is not operable. For information on locking and unlocking a project item and on different lock types, see Working collaboratively on project items.

Procedure

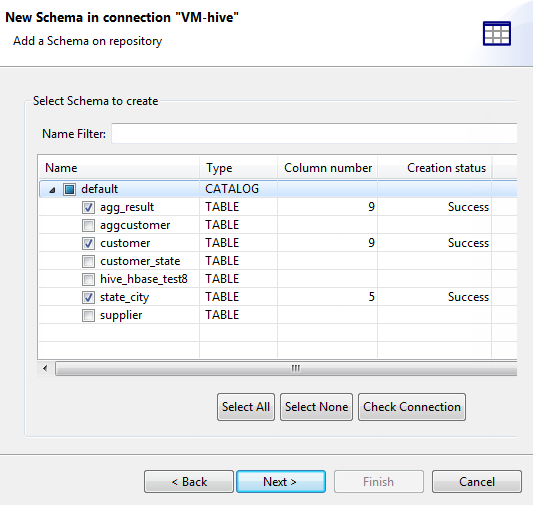
  1. In the Repository view, right-click the Hive connection of interest and select Retrieve schema from the contextual menu, and click Next on the wizard that opens to view and filter different tables in that Hive database.
    New Schema in connection "VM-Hive" dialog box showing schema to be selected.
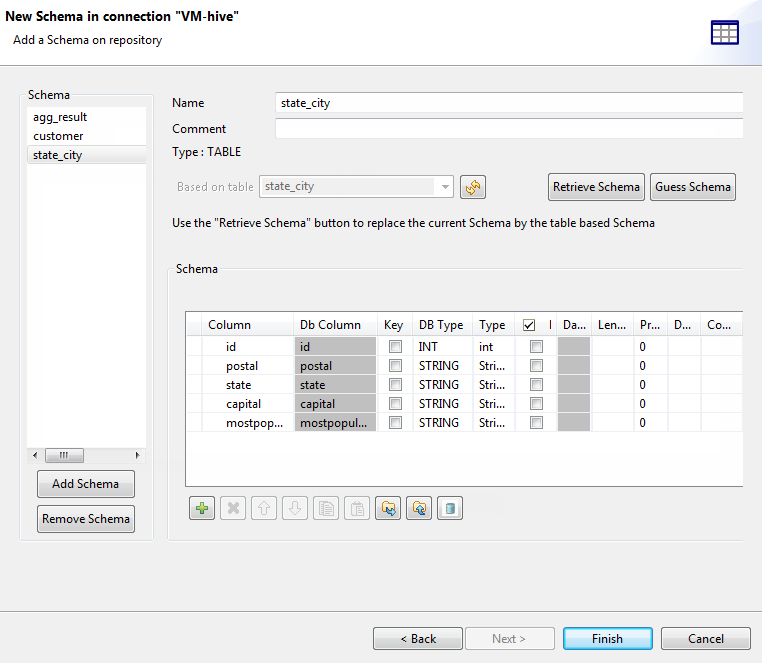
  2. Expand the nodes of the database tables you need to use and select the columns to be retrieved, and click Next to open a new view on the wizard that lists the selected table schema(s). You can select any of them to display its details in the Schema area on the right side of the wizard.
    New Schema in connection "VM-Hive" dialog box showing schemas added on repository.
    Information noteWarning: If your source database table contains any default value that is a function or an expression rather than a string, be sure to remove the single quotation marks, if any, enclosing the default value in the end schema to avoid unexpected results when creating database tables using this schema.
  3. Modify the selected schema if needed. You can rename the schema, and customize the schema structure according to your needs in the Schema area.
    The tool bar allows you to add, remove, or move columns in your schema.
    To overwrite the modifications you made on the selected schema using its default schema, click Retrieve schema. Note that all your changes to the schema will be lost if you click this button.
  4. Click Finish to complete the Hive table schema retrieval. All the retrieved schemas are displayed under the related Hive connection in the Repository view.
    If you need to further edit a schema, right-click the schema and select Edit Schema from the contextual menu to open this wizard again and make your modifications.
    Information noteWarning:

    If you modify the schemas, ensure that the data type in the Type column is correctly defined.

Results

As explained earlier, in addition to using the Hadoop cluster node, you can as well start from the Db connection node to create an Hive connection and retrieve schemas. In either way, you need always to define the specific Hive connection properties. At that step:
  • if you select from the Hadoop cluster list the Repository option to reuse details of an established Hadoop connection, the created Hive connection will eventually be classified under both the Hadoop cluster node and the Db connection node;

  • otherwise, if you select from the Hadoop cluster list the None option in order to enter the Hadoop connection properties yourself, the created Hive connection will appear under the Db connection node only.

Did this page help you?

If you find any issues with this page or its content – a typo, a missing step, or a technical error – please let us know!