Importing data to the Neo4j database
Procedure
-
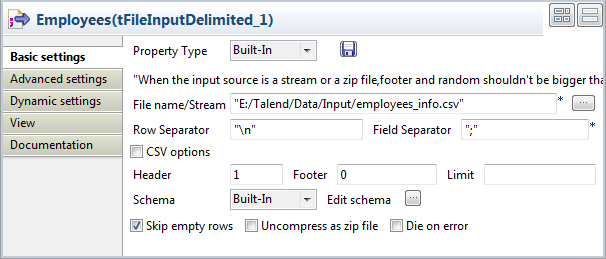
Double-click the tFileInputDelimited
component to open its Basic settings view
on the Components tab.
-
In the File name/Stream field, specify
the path to the CSV file that contains the employees data to read.
The input CSV file used in this example is as follows:
employeeID;employeeName;age;hireDate;salary;managerID 1;Rutherford Roosevelt;38;06-10-2008;13336.58;m5 2;Warren Adams;43;05-22-2008;11626.68;m6 3;Andrew Roosevelt;55;04-01-2007;10052.95;m4 4;Herbert Quincy;54;06-14-2007;10694.71;m6 5;Woodrow Polk;33;08-14-2007;13751.50;m4 6;Theodore Johnson;47;01-26-2008;12426.87;m6 7;Benjamin Adams;32;02-25-2008;10438.65;m4 8;Woodrow Harrison;51;10-11-2008;11188.27;m5 9;George Truman;40;04-28-2008;14254.49;m5 10;Harry Jackson;38;04-01-2008;12798.78;m6
- In the Header field, specify the number of rows to skip as header rows. In this example, the first row of the CSV file is the header row.
-
Click the [...] button next to Edit schema to open the Schema dialog box, and define the input schema based on
the structure of the input file. In this example, the input schema is
composed of six columns: employeeID
(integer), employeeName (String),
age (Integer), hireDate (Date), salary (Float), and managerID (String).
When done, click OK to close the Schema dialog box and propagate the schema to the next component.
-
Click the tNeo4jOutput component and
select the Component tab to open its
Basic settings view.
- Define a Neo4j database connection. In this example, the Neo4j database is accessible in REST mode, so select the Remote server check box and specify the URL of the Neo4j server in the Server URL field, "http://localhost:7474/db/data" in this example.
-
If needed, click the Sync columns button
to ensure the component has the same schema as the preceding
component.
Keep the rest of the parameters as they are.
Did this page help you?
If you find any issues with this page or its content – a typo, a missing step, or a technical error – please let us know!