Skip to main content Skip to complementary content

Basic settings tab

About this task

The Basic settings tab is part of the Component view, which is located on the lower part of the designing editor of the Integration perspective of Talend Studio.
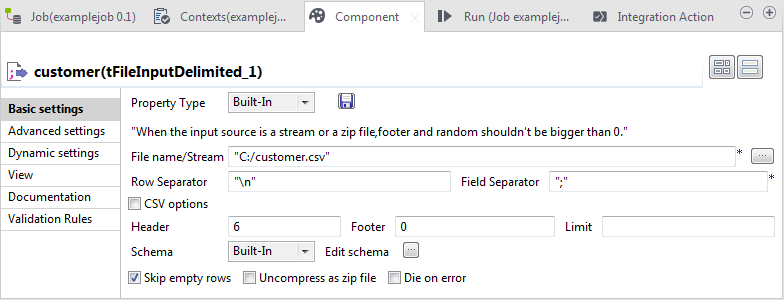
Basic settings tab.

Each component has specific basic settings according to its function requirements within the Job or Route.

Information noteNote:

Some components require code to be input or functions to be set. Make sure you use Java code in properties.

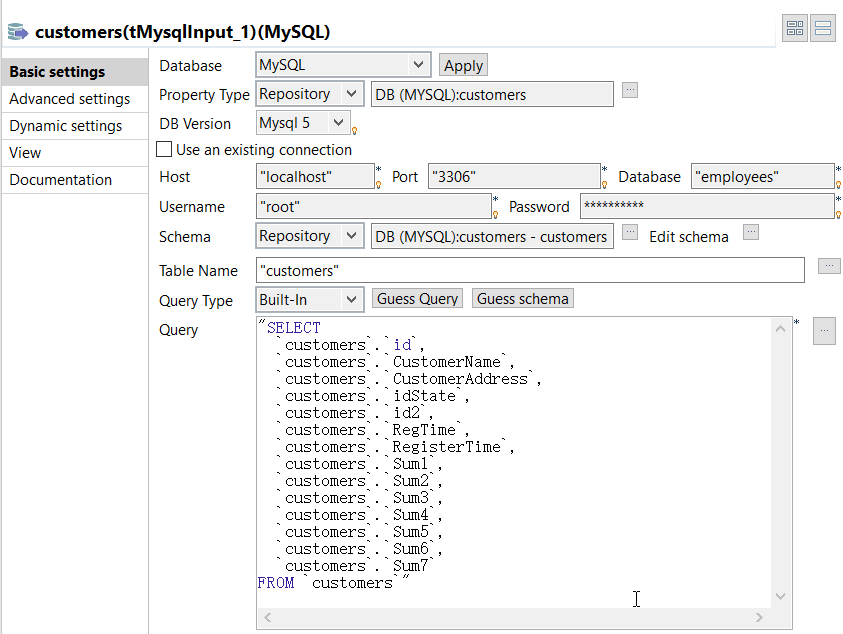
For File and Database components in a Job, you can centralize properties in metadata files located in the Metadata directory of the Repository tree view. This means that on the Basic settings tab you can set properties on the spot, using the Built-In Property Type or use the properties you stored in the Metadata Manager using the Repository Property Type. The latter option helps you save time.

Select Repository as Property Type and choose the metadata file holding the relevant information. Related topic: Centralizing database metadata.

Alternatively, you can drop the Metadata item from the Repository tree view directly to the component already dropped on the design workspace, for its properties to be filled in automatically.

If you selected the Built-in mode and set manually the properties of a component, you can also save those properties as metadata in the Repository. To do so:

Procedure

  1. Click the floppy disk icon. The metadata creation wizard corresponding to the component opens.
  2. Follow the steps in the wizard. For more information about the creation of metadata items, see Centralizing database metadata.
  3. The metadata displays under the Metadata node of the Repository.

Results

For all components that handle a data flow (most components), you can define a Talend schema in order to describe and possibly select the data to be processed. Like the Properties data, this schema is either Built-in or stored remotely in the Repository in a metadata file that you created. A detailed description of the Schema setting is provided in the next sections.

Setting a built-in schema in a Job

A schema created as Built-in is meant for a single use in a Job, hence cannot be reused in another Job.

Procedure

  1. Select Built-in in the Property Type list of the Basic settings view.
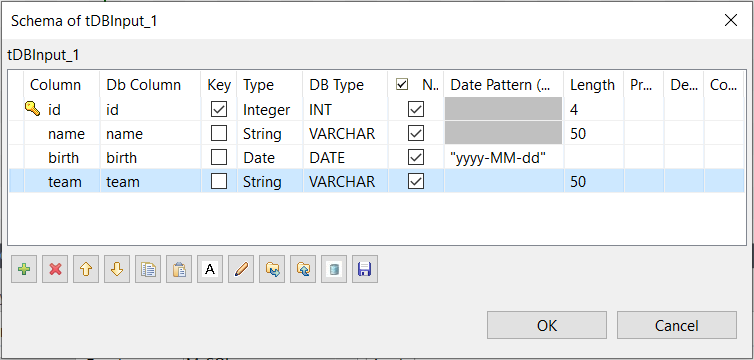
  2. Click the Edit Schema button to create your built-in schema by adding columns and describing their content, according to the input file definition.
    Schema editor.
    Information noteWarning: Avoid using any Java reserved keyword as a schema column name.
    Make sure the data type in the Type column is correctly defined.
    For more information regarding Java data types, including date pattern, see Java API Specification.
    Below are the commonly used Talend data types:
    • Object: a generic Talend data type that allows processing data without regard to its content, for example, a data file not otherwise supported can be processed with a tFileInputRaw component by specifying that it has a data type of Object.

    • List: a space-separated list of primitive type elements in an XML Schema definition, defined using the xsd:list element.

    • Dynamic: a data type that can be set for a single column at the end of a schema to allow processing fields as VARCHAR(100) columns named either as ‘Column<X>’ or, if the input includes a header, from the column names appearing in the header. For more information, see Dynamic schema.

    • Document: a data type that allows processing an entire XML document without regarding to its content.

    In all output properties, you also have to define the schema of the output. To retrieve the schema defined in the input schema, click the Sync columns tab in the Basic settings view.

    Information noteWarning: When creating a database table, you are recommended to specify the Length field for all columns of type String, Integer or Long and specify the Precision field for all columns of type Double, Float or BigDecimal in the schema of the component used. Otherwise, unexpected errors may occur.

    You can use the following two buttons at the bottom of the Schema editor dialog box of database components to edit Db Column names:

    • A: converts the Db Column name of each selected column to upper case or lower case.
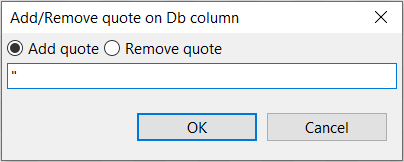
    • Pen: adds or removes quote characters in the Db Column name of each selected column by selecting Add quote or Remove quote and entering the quote character in the field in a pop-up dialog box.
      Information noteNote: The Guess Query function for database input components does not work when quote characters are added in Db Column names.
      Dialog box to add or remove quotes in database columns.

Setting a repository schema in a Job

If you often use certain database connections or specific files when creating your Jobs, you can avoid defining the same properties over and over again by creating metadata files and storing them in the Metadata node in the Repository tree view of the Integration perspective.

Procedure

  1. To recall a metadata file into your current Job:
    • Select Repository in the Schema list and then select the relevant metadata file.
    • Or, drop the metadata item from the Repository tree view directly to the component already dropped on the design workspace.
  2. Click Edit Schema to check that the data is appropriate.
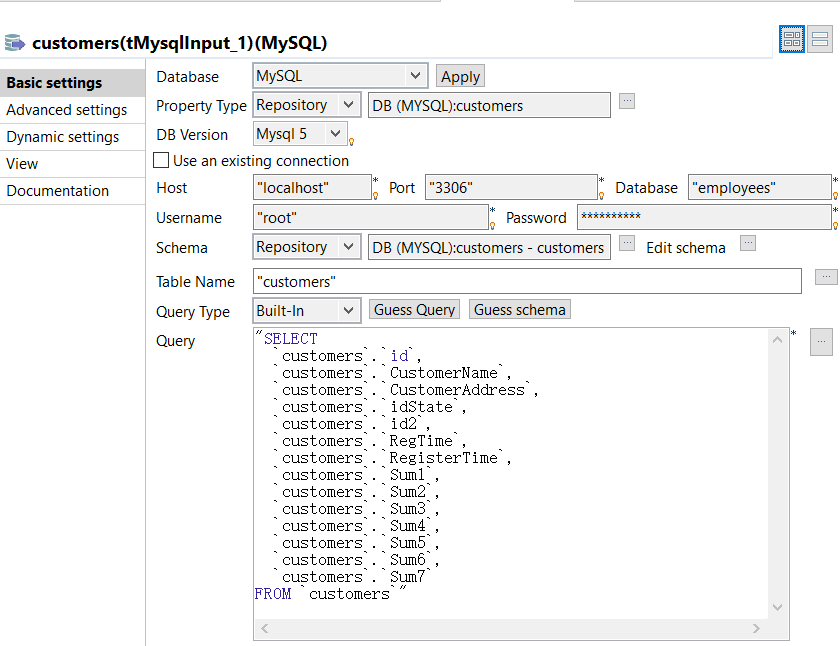
    Basic settings view of the component.

    You can edit a repository schema used in a Job from the Basic settings view. However, note that the schema hence becomes Built-in in the current Job.

    Information noteNote: You cannot change the schema stored in the repository from this window. To edit the schema stored remotely, right-click it under the Metadata node and select the corresponding edit option (Edit connection or Edit file) from the contextual menu.

Using a repository schema partially in a Job

When using a repository schema, if you do not want to use all the predefined columns, you can select particular columns without changing the schema into a built-in one.

The following describes how to use a repository schema partially for a database input component. The procedure may vary slightly according to the component you are using.

Procedure

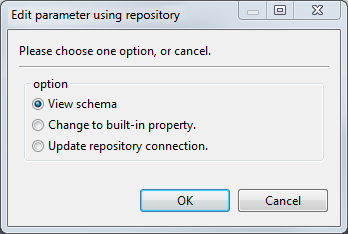
  1. Click the [...] button next to Edit schema on the Basic settings tab. The Edit parameter using repository dialog box appears. By default, the option View schema is selected.
    Edit parameter using repository dialog box.
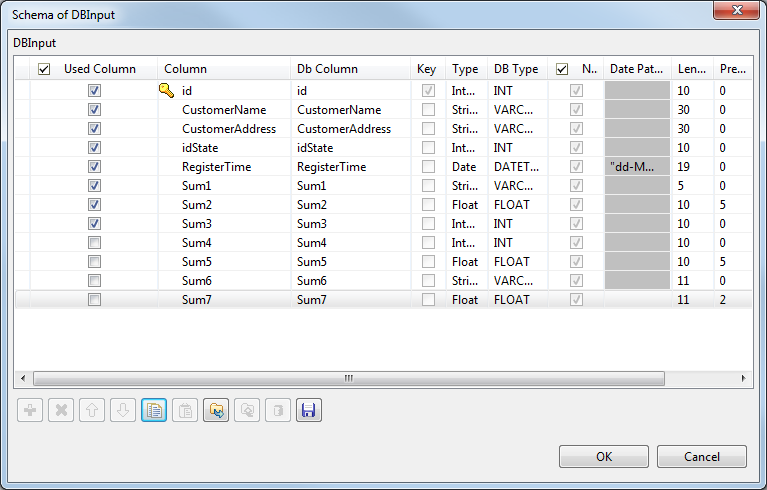
  2. Click OK. The Schema dialog box pops up, which displays all columns in the schema. The Used Column check box before each column name indicates whether the column is used.
  3. Select the columns you want to use.
    Schema dialog box.
  4. Click OK. A message box appears, which prompts you to do a guess query.
    Information noteNote: The guess query operation is needed only for the database metadata.
  5. Click OK to close the message box. The Propagate dialog box appears. Click Yes to propagate the changes and close the dialog box.
    Propagate dialog box.
  6. On the Basic settings tab, click Guess Query. The selected column names are displayed in the Query area as expected.
    Basic settings view of the component.

Setting a field dynamically (Ctrl+Space bar)

About this task

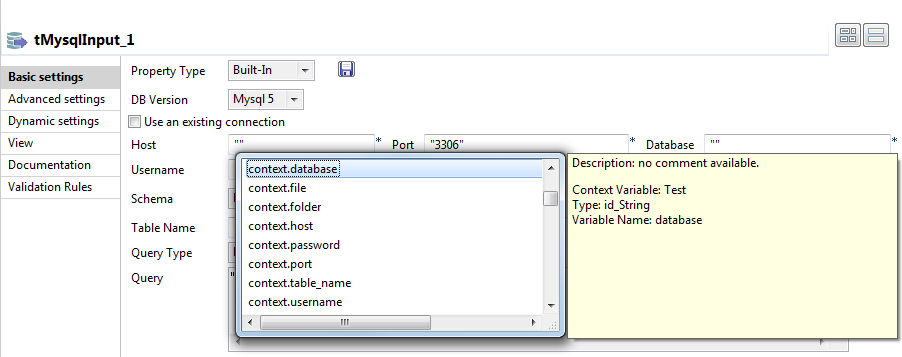
On any field of your component Properties view, you can use the Ctrl+Space bar to access the global and context variable list and set the relevant field value dynamically.

Procedure

  1. Place the cursor on any field of the Component view.
  2. Press Ctrl+Space bar to access the proposal list.
  3. Select on the list the relevant parameters you need. Appended to the variable list, a information panel provides details about the selected parameter.
    Basic settings view of the component.
    This can be any parameter including: error messages, number of lines processed, or else. The list varies according to the component in selection or the context you are working in.

Did this page help you?

If you find any issues with this page or its content – a typo, a missing step, or a technical error – please let us know!