Skip to main content Skip to complementary content

Adding validation rules

Availability-noteDeprecated

Validation rules are more advanced rules that you can use to define constraints between attributes within an entity.

Before you begin

You have already created a data model and the business entities and attributes in the data model. For further information, see Creating a data model, Creating business entities in a data model and Adding attributes to the business entity.

About this task

Consider as an example that your data model holds the following entities: Agency, Agent and Region. You want to create a validation rule to make sure that the agent Id is concatenated from the first three letters of its first name and the two first letters of its last name.

To add a validation rule to a business entity, do the following:

Procedure

  1. In the data model editor, right-click the Agent attribute and select Set the Validation Rule.
    A dialog box pops up.
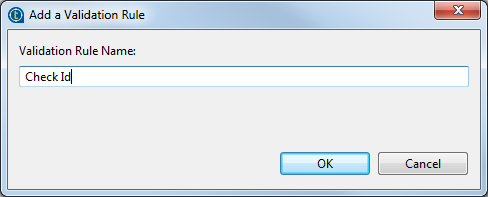
  2. Enter a name for the validation rule, Check Id in this example, and then click OK to close the dialog box.
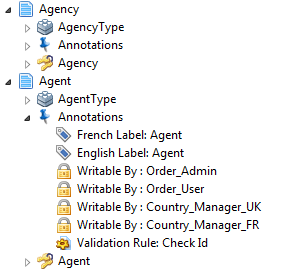
    The validation rule is displayed under the Annotations node of the Agent attribute.
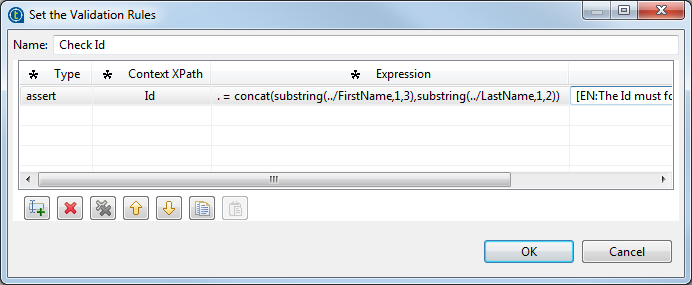
  3. Double-click the validation rule to open the Set the Validation Rules dialog box where you can set the parameters of the validation rule.
  4. Click the icon to add a line in the table and then click in the Type column and select from the list assert or report according to what type of rule you want to set. assert elements are instantiated if the XPath expression evaluates to false and are used to detect errors, whereas report elements are instantiated if the expression evaluates to true and are used to report the existence of an instance.
    Click in the Context XPath column and set the Xpath to the attribute for which you want to create a validation rule, Id in this example.
  5. Click in the Expression column and then click the three-dot button to open the expression editor.
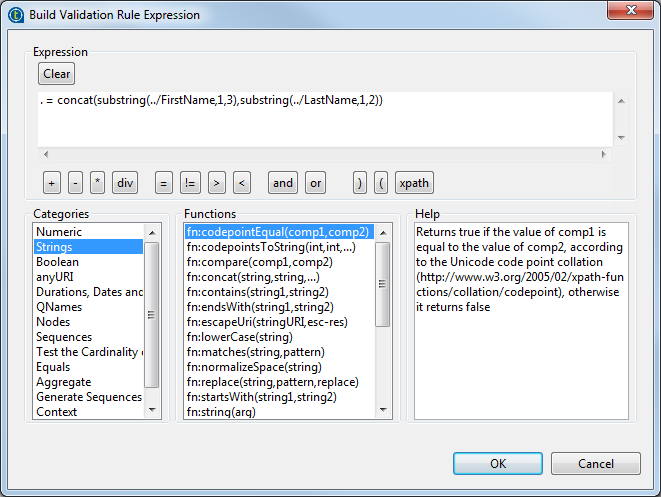
  6. Set the validation rule using the expression editor. Check the XPath functions online help for information on the right methods to use.
    In this example, you need to check that the agent Id corresponds to the concatenation of the three first characters of the Firstname attribute and the two first characters of the Lastname attribute.
    The dot at the beginning of the rule refers to the context attribute, Id in this example. You must then use the concat function to concatenate the attributes characters which are extracted with a substring function.
    Click OK to close the expression editor.
    The validation rule displays in the Expression field.
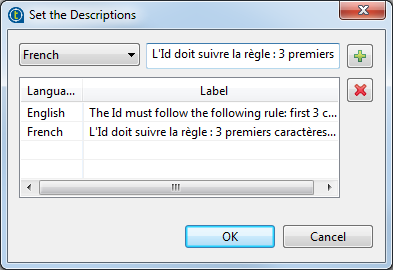
  7. In the Set the Validation Rules dialog box, click in the Message column and then click the three-dot button to open a dialog box. Here you can set up the error message that should be displayed when trying to save a record that has an agent Id that does not correspond to this validation rule.
  8. Select the message language from the language list and then enter the error message and click the plus button to add the message to the list.
  9. Repeat the operation to add error messages in different languages, if required and then click OK to close the dialog box.
    The defined error messages display in the Message column in the Set the Validation Rules dialog box.
  10. In the Set the Validation Rules dialog box, click OK to validate your changes and close the dialog box.
  11. Save your data model.

Did this page help you?

If you find any issues with this page or its content – a typo, a missing step, or a technical error – please let us know!