Inserting and updating records in ServiceNow
This Job connects to a ServiceNow account and inserts new records into existing
ServiceNow entities.
Before you begin
- You have access to a ServiceNow instance with valid credentials.
- You have permissions to insert/update records in the ServiceNow table.
- For more information about ServiceNow Table API, see the ServiceNow documentation.
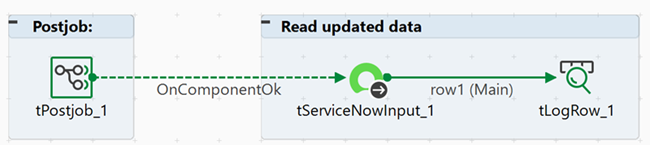
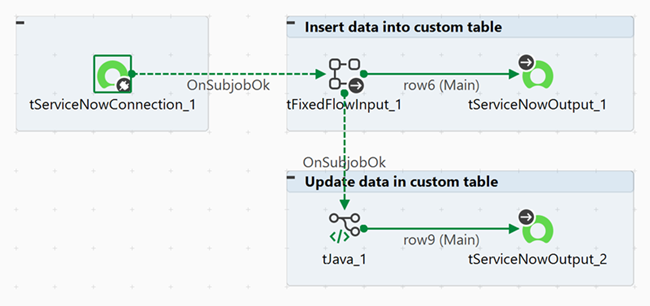
Linking the components
Procedure
-
Connect the tJava component to the second
tServiceNowOutput using a Row >
Main connection.
Configuring the components
Procedure
-
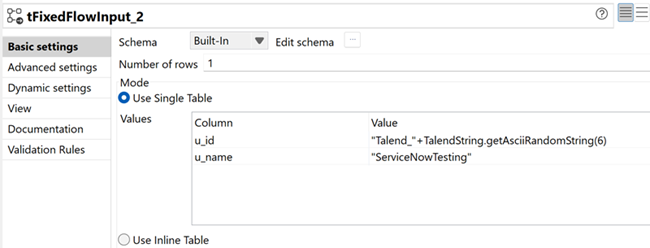
In the Values table of the Use Single
Table section, enter the values you want to insert for each
column.
-
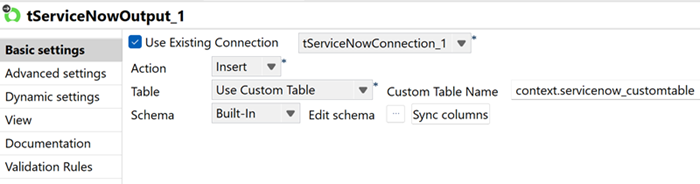
Click Sync columns to retrieve the schema from the previous component.
-
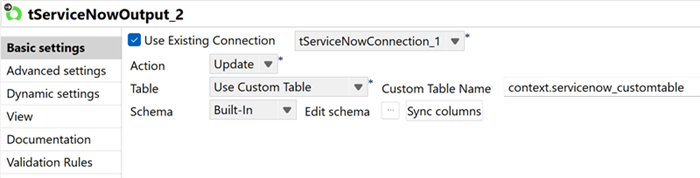
Click Sync columns to retrieve the schema from the
previous component.
Executing the Job
Procedure
- Press Ctrl + S to save your Job.
- Press F6 to execute it.
Results
The Job connects to a ServiceNow account, inserts, and updates the selected records in the ServiceNow table defined.
You can verify the updates in your ServiceNow instance by navigating to the table and checking the updated records.
What to do next