Configuring the tPersonator component
Procedure
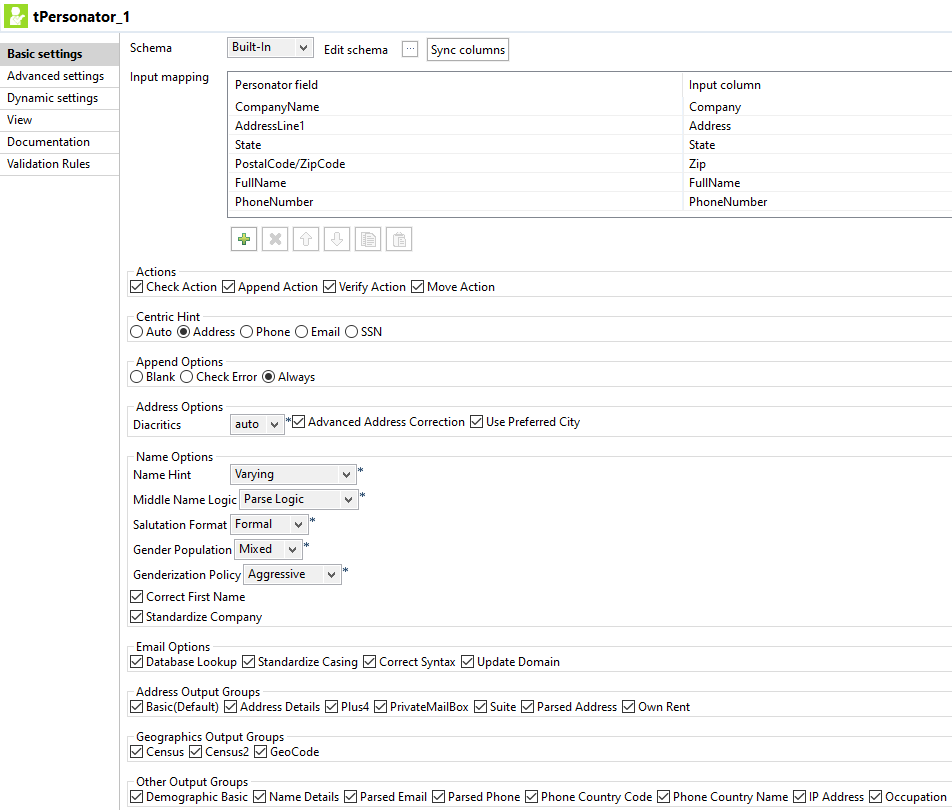
- Double-click the tPersonator component to open its Basic settings view.
- Select Built-in as Schema.
-
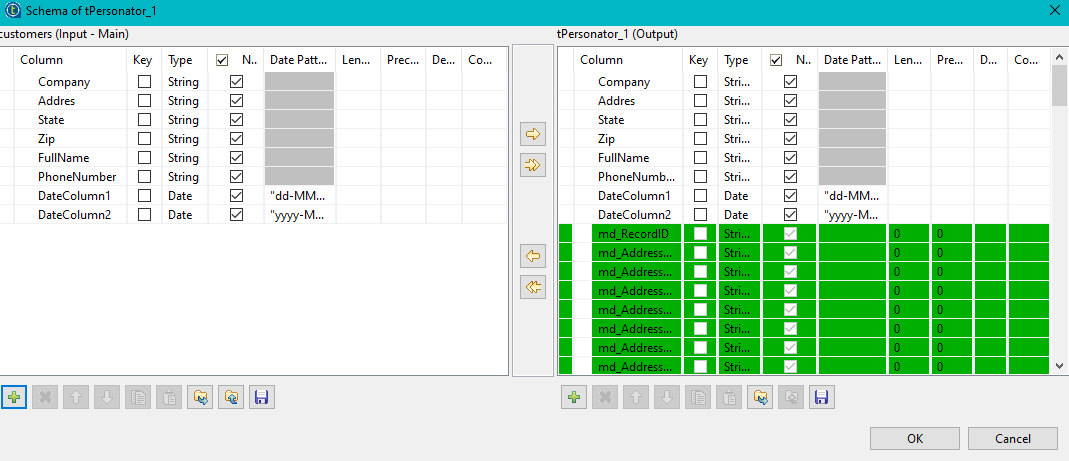
To check the schema, click the […] button next to Edit schema.

-
In Input mapping, click the [+] button to associate the tPersonator fields with the input data:
- CompanyName with Company
- AdressLine1 with Address
- State with State
- PostalCode/ZipCode with Zip
- FullName with FullName
- PhoneNumber with PhoneNumber
- Select Check action, Append action, Verify action and Move action.
- In Centric hint, select Auto.
- In Append options, select Always.
-
In Address options:
- Diacritics: Select auto.
- Select the Advanced address correction and Use preferred city check boxes.
-
In Name options, select the following options:
- Name hint:Varying
- Middle name logic: Parse logic
- Salutation format: Formal
- Gender population: Mixed
- Genderization policy: Neutral
- Correct first name and Standardize company check boxes
-
Select all the check boxes in Email options, Address outputs, Geographics outputs and Miscellaneous outputs.
You have the following configuration:

-
Click the Advanced settings tab:
- Clear the tStatCatcher statistics check box.
- Enter a License key.
- Enter the Number of retries: 5.
- Enter the Timeout in seconds: 100 .
- Browse the Cache directory.
- Enter the Batch request size (1-100): 2.
- Select the Multithreading check box.
- Enter the Thread count: 3.
- Select the Show debug console output check box.
Did this page help you?
If you find any issues with this page or its content – a typo, a missing step, or a technical error – please let us know!
