Configuring Microsoft Entra ID as a SAML identity provider
This topic describes how to set up Microsoft Entra ID (formerly Azure AD) as an identity provider for Qlik Cloud.
Configure a SAML application in Microsoft Entra ID
The first step is to set up a SAML application in Microsoft Entra ID to trust your Qlik Cloud tenant as a service provider (SP).
Do the following:
-
In the Microsoft Entra admin center, go to Enterprise applications > New application.
-
Click Create your own application.
-
Enter a name for the application.
-
Go to Single sign-on and select SAML as the single sign-on method.
-
On the Set up Single Sign-On with SAML page, enter the following information:
Setting Value Identifier (Entity ID) Your original tenant hostname Reply URL (Assertion Consumer Service URL) Your original tenant hostname with the path /login/saml appended to the end of the hostname SSO settings.
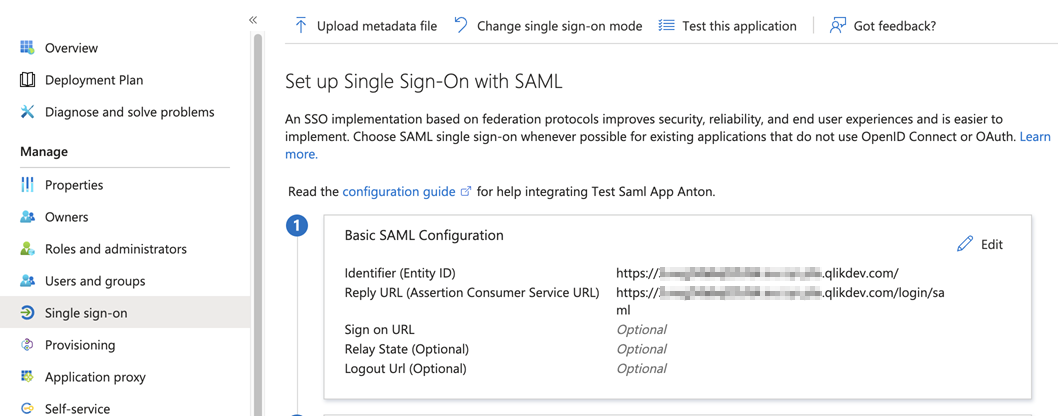
-
Go to the Attributes & Claims section, and click Edit to configure the display name and groups.
-
Select Add new claim and enter the following information:
Setting Value Name displayname Source Attribute Source attribute user.displayname Claim settings.
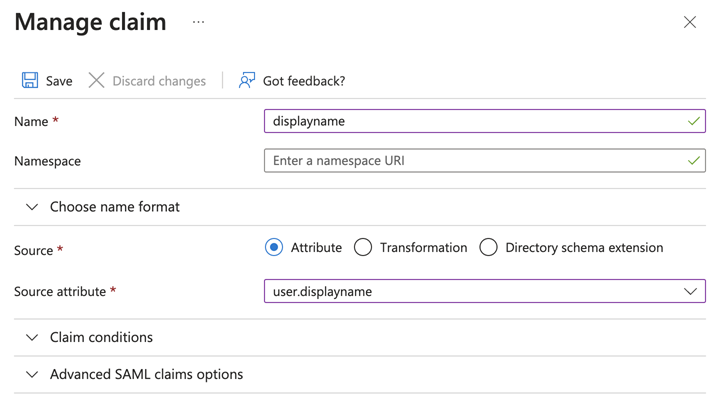
-
Click Save.
-
Select Add a group claim.
The configuration of group claims depends on where the groups are managed.
-
If your groups are cloud-managed:
-
Select Groups assigned to the application as associated groups.
-
For Source attribute, select Cloud-only group display names.
Information noteYou must also assign the relevant groups to the application for them to appear in the claims.
-
-
If you're using Microsoft Entra Connect:
-
Select All groups as associated groups.
-
For Source attribute, select sAMAccountName.
-
-
-
Click Save.
-
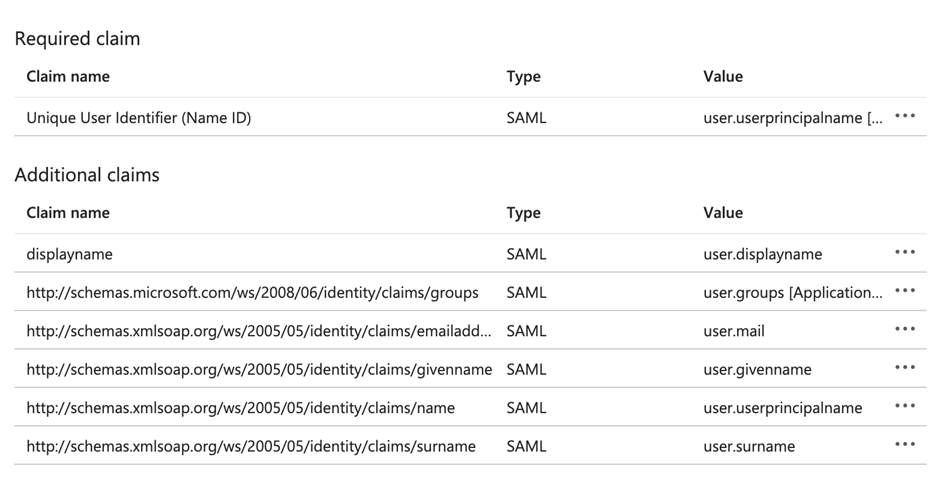
Under attributes and claims, you should now have the following claims listed:
-
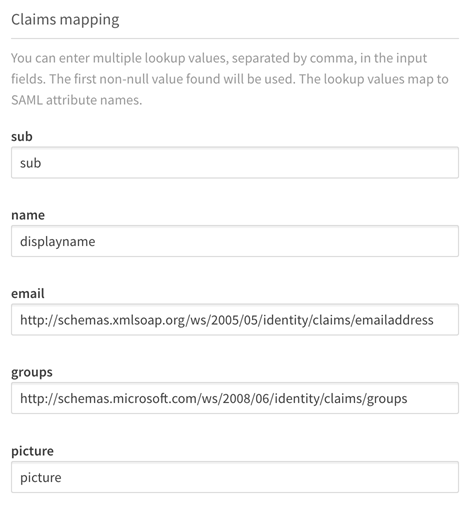
displayname
-
http://schemas.microsoft.com/ws/2008/06/identity/claims/groups
-
http://schemas.xmlsoap.org/ws/2005/05/identity/claims/emailaddress
Save these values for later use when setting up the IdP configuration in your Qlik Cloud tenant.
Claims mappings.
-
-
Assign users and groups.
-
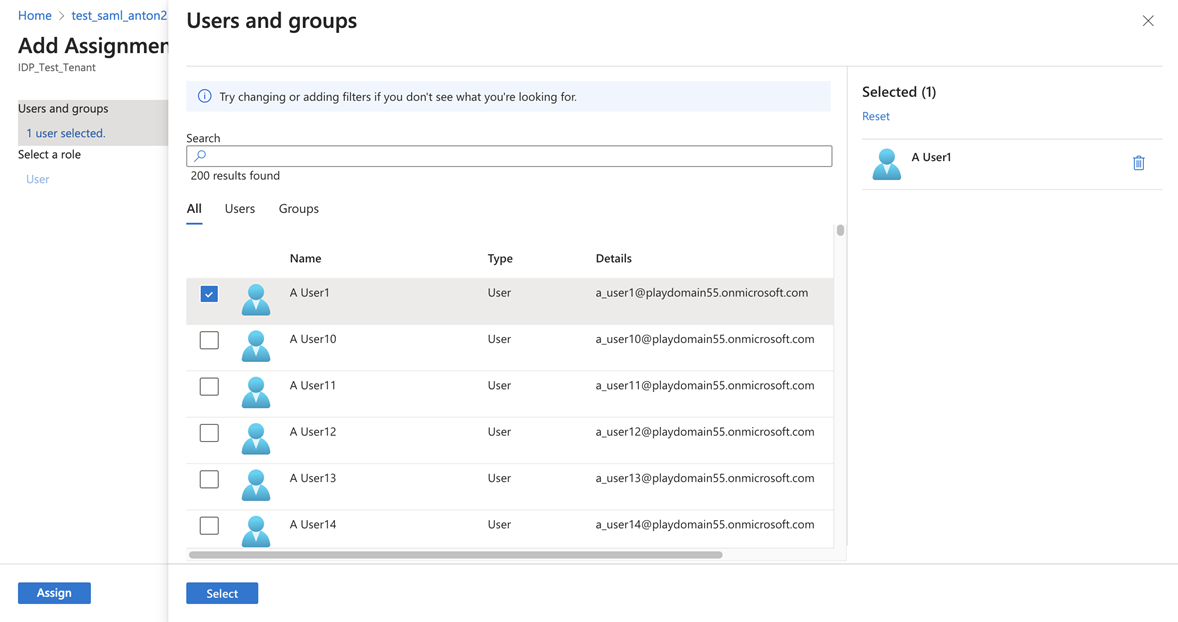
Go to Users and groups and click Add user/group.
-
Assign the users and groups that will use the application for login.
Assigning users to the application.
-
-
Retrieve IdP metadata.
-
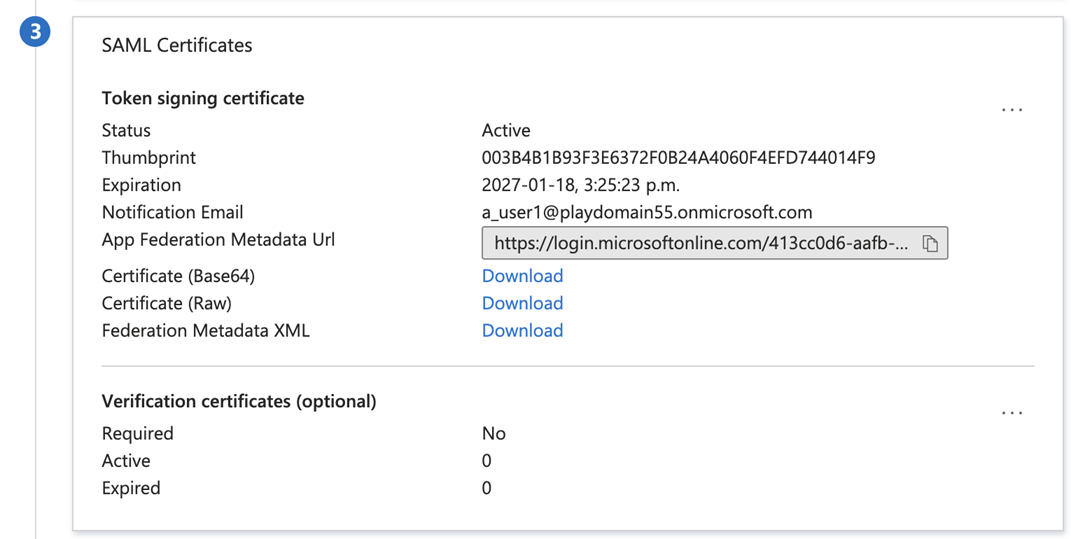
Go to SAML Certificates.
-
Download the Federation Metadata XML.
You need this file later during the setup in Qlik Cloud.SAML certificates.
-
Create and validate an IdP configuration in Qlik Cloud
Log in to Qlik Cloud as a tenant admin to create an IdP configuration.
Do the following:
-
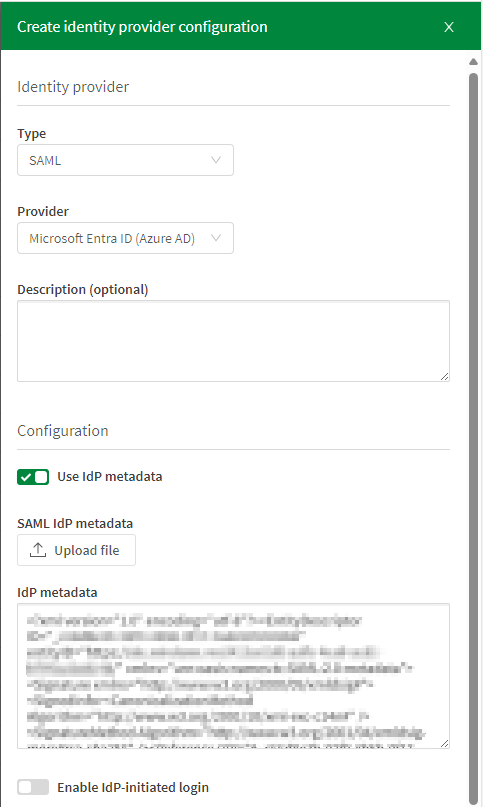
In the Administration activity center, go to Identity provider and click Create new.
-
For Type, select SAML.
-
For Provider, select Microsoft Entra ID (Azure AD).
-
Optionally, enter a description for the IdP configuration.
-
Select Use IdP metadata.
-
Under SAML IdP metadata, click Upload file and select the metadata file you downloaded during the Microsoft Entra ID setup.
IdP configuration.
-
Under Claims mapping, set name, email, and groups to the claim names from Microsoft Entra ID.
Claims mapping in IdP configuration.
-
Click Create.
-
In the Create interactive identity provider dialog, clear the Validate IdP checkbox, and then click Create.
This creates the IdP configuration without immediate validation. Validation will be performed at a later stage.Information noteIf preferred, you can validate now. However, we recommend that you complete the next section and upload the certificate file in Microsoft Entra ID first.
Configure SAML request signature validation
Download the Qlik Cloud SAML request signing certificate and upload it in Microsoft Entra ID.
Do the following:
-
In the Qlik Cloud Administration activity center, go to Identity providers.
-
On your SAML IdP configuration, click
and select View provider configuration.
-
Select Download signing certificate and then click Done.
Return to your SAML application in Microsoft Entra ID.
Do the following:
-
In Microsoft Entra ID, select your SAML application and go to Single sign-on.
-
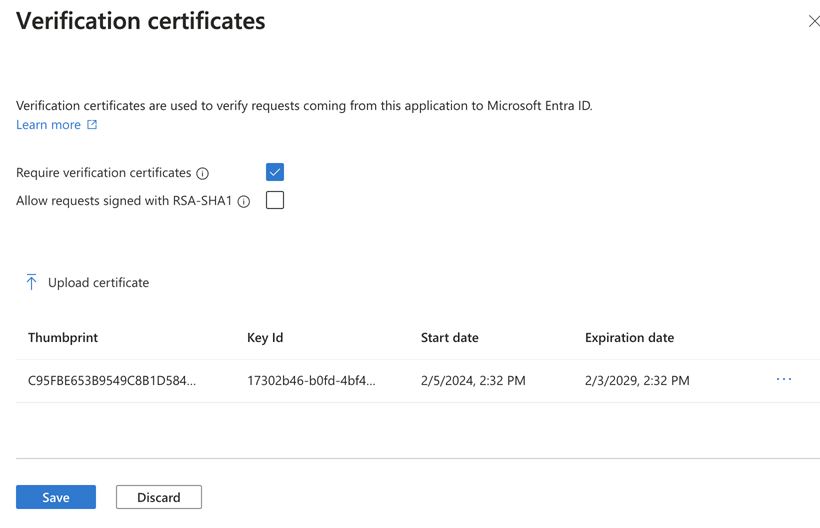
Under Verification certificates (optional), click Edit.
Verification certificates.

-
Select Require verification certificates.
Uploading verification certificates.
-
Click Upload certificate, and then locate the signing certificate file.
-
Click Save.
Microsoft Entra ID is now set up to validate SAML request signatures. Go back to Qlik Cloud to start the validation.
Validate your identity provider in Qlik Cloud
After successfully setting up Microsoft Entra ID, you can validate the IdP configuration in Qlik Cloud.
Do the following:
-
In the Administration activity center, go to Identity providers.
-
On your SAML IdP configuration, click
and select Validate.
-
Follow the steps in the validation wizard to perform a login as the user added to the Microsoft Entra ID application. Verify that the user profile data is correct.
You will be presented with the options to promote the user to a Qlik Cloud tenant admin and to activate the IdP. Note that activating the IdP will deactivate any previously configured interactive identity provider in the tenant.
