
To build a web page, proceed as follows:
-
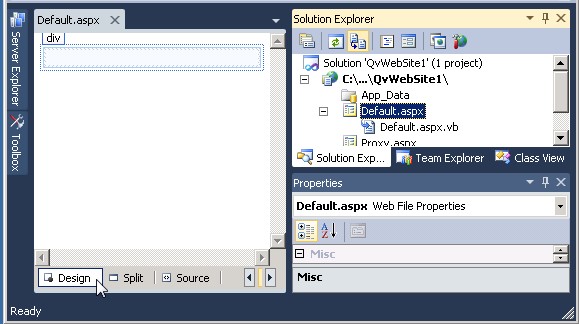
Double-click the Default.aspx web page to open it and enter Design mode.
-
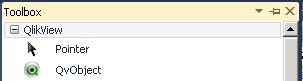
Select View > Toolbox to open the QlikView area.
-
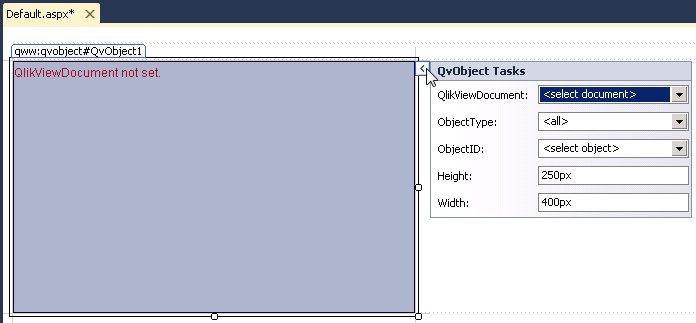
Select QvObject in the Toolbox and drag it to the web page. The control and a Smart Tag are opened. A Smart Tag is a Visual Studio feature that presents the most common properties of the object that have to be set. To view the Smart Tag at any time, click the arrow tab in the top right corner of the control.
 Information noteIf QvObject is not available in the Toolbox, see QlikView Control for information on how to add it manually.
 -
Press CTRL+S to save the Default.aspx web page.
Smart Tag Settings
The following object properties are available in the Smart Tag:
| Property ID | Description |
|---|---|
| QlikViewDocument | Select a document to connect to on QlikView Server. |
| ObjectType | Select an object type from the QlikView document. This filters the list for ObjectID (see below). |
| ObjectID | Select an object from the QlikView document. |
| Height | Set the height of the object on the web page. |
| Width | Set the width of the object on the web page. |
Property Viewer
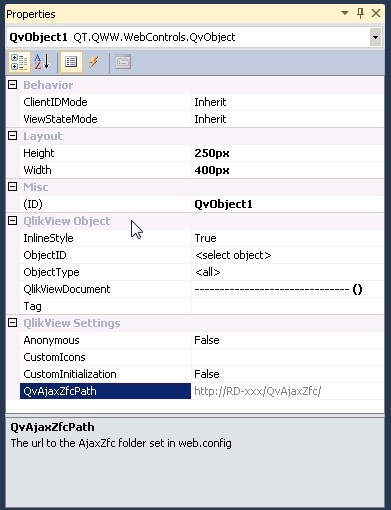
The object also has a properties view. Right-click the control to display the Properties pane, and make sure the control is highlighted. Only the properties under the QlikView Object and QlikView Settings headings are relevant to the object.
QlikView Object
The following object properties, in addition to the ones described in Smart Tag Settings, are available:
| Property ID | Description |
|---|---|
| InlineStyle |
See Inline Styles.
|
| Tag | A custom tag can be defined for the object and used in, for example, JavaScript. This can be used for customizing a QvObject, marking a QvObject for special action, distinguishing between one QvObject and another one at runtime, and so on. The tag information can be used to better integrate a QvObject. Information note The tag is added as an attribute of the div tag of the QvObject.The following example shows a function that returns an array of page elements (representing QvObjects) that have the tag that was passed as input: <script type="text/javascript">
GetAllQvObjectsByTag = function(tag) {
var tagObjs = [];
var divs = document.getElementsByTagName("div";
for (var i = 0; i < divs.length; i++) {
if (divs[i].getAttribute("Tag") == tag) {
tagObjs.push(divs[i]);
}
}
return tagObjs;
}
</script> |
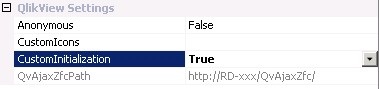
QlikView Settings
| Setting ID | Description |
|---|---|
| Anonymous | Set this property to True to allow the compiled web page to automatically assign the users opening the web page to Anonymous. It also affects the fetching of documents and objects during design. |
| CustomIcons |
Custom images can be used to substitute caption icons. The following caption icons can be replaced by custom icons:
The syntax of custom image is icon code:icon url. Custom icons must use relative paths. Separate each custom icon with a comma, if more than one is used. Information noteFor additional information on custom icons, see the JavaScript API documentation.
|
| CustomInitialization | Set this property to True to enable custom functions (or to make other adaptations, see the JavaScript API documentation) to run. See Customizations for an example of how to use this property. |
| QvAjaxZfcPath | Presents the path to the AJAX directory on the QlikView Web Server (QVWS and IIS, if configured). For example, /QvAjaxZfc/, if using a local web server, or http://QvWebServer/QvAjaxZfx/ (http address), if using a remote server. This property can only be edited in the Web.config file. |
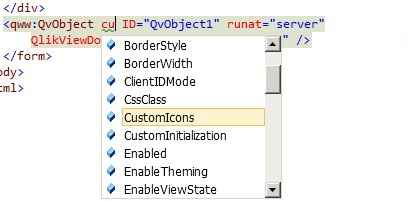
Source View
A web page can be viewed in Design mode or Source mode. The latter shows the actual web page code:
The <qww:QvObject... tag is the code created by inserting the QvObject on the web page. Properties can be specified here. Thanks to full integration with Visual Studio, there is also the advantage of IntelliSense®, that is, Visual Studio presents the available properties and methods of the control.
Customizations
If custom JavaScript functions are to run after the QlikView object has been rendered, add these functions in the BodyOnLoadFunctionNames array. To call the function MyInit, add the following line in the JavaScript for the page:
To add a custom function that is executed when a specific QlikView object is changed, use the function GetObject. In the following example, the number of values that are Enabled when a change is made are presented:
If custom functions are to be executed (or other adaptations are to be made, see the JavaScript API documentation), proceed as follows:
-
Set the QvObject property CustomInitialization to True, see QlikView Settings.
-
Add an adjusted Qv.InitWorkbench code row, containing the needed parameters. A function, MyInit, is executed at start-up, in the following example:
Qv.InitWorkbench({ View: 'Films', Host: 'Local', BodyOnLoadFunctionNames: 'MyInit'})
For more information on the arguments that can be passed using functions, see the JavaScript API documentation.