Skip to main content Skip to complementary content

Creating a new regular expression or SQL pattern

You can create new regular expressions or SQL patterns, including those for Java to be used in column analyses.

Management processes for regular expressions and SQL patterns are the same. The procedure below with all the included screen captures reflect the steps to create a regular expression. You can follow the same steps to create an SQL pattern.

Before you begin

You have selected the Profiling perspective.

Procedure

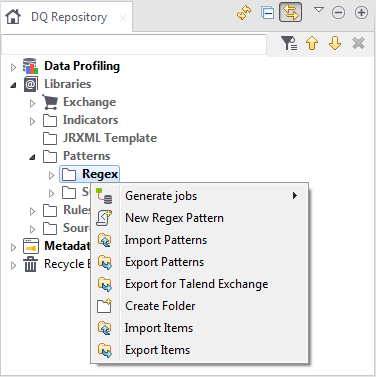
  1. In the DQ Repository tree view, expand Libraries > Patterns, and then right-click Regex.
    Contextual menu of the Regex node.
  2. From the contextual menu, select New Regex Pattern to open the corresponding wizard.
    When you open the wizard, a help panel automatically opens with the wizard. This help panel guides you through the steps of creating new regular patterns.
  3. In the Name field, enter a name for this new regular expression.
    Information noteImportant:

    Do not use the following special characters in the item names: ~ ! ` # ^ * & \\ / ? : ; \ , . ( ) ¥ ' " « » < >

    These characters are all replaced with "_" in the file system and you may end up creating duplicate items.

  4. Optional: Set other metadata (Purpose, Description and Author) in the corresponding fields and click Next.
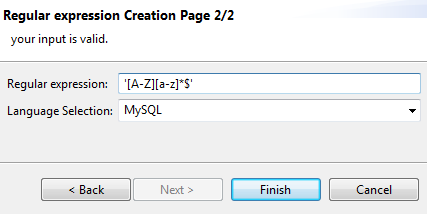
  5. In the Regular expression field, enter the definition of the regular expression to be created. The regular expression must be surrounded by single quotes. In this example, '[A-Z][a-z]*$'.
    Example of a regular expression.
    Information noteNote:

    For the PostgreSQL database, regular expressions are not compatible among the database different versions.

    If you want to use the regular expression with PostgreSQL version 9.1 or greater, you must either:
    • in the PostgreSQL database configuration, set the standard_conforming_strings parameter to off and write double backslashes in the definition, or
    • in the Regular expression field in the wizard, use a single backslash in the expression definition.

    For further information about PostgreSQL regular expressions, select Window > Show View, expand Help and then select Bookmarks.

    Information noteNote: From Talend Studio 8.0. R2024-03 onwards, only the PostgreSQL versions 12 and later are supported. The earlier versions have been removed.
  6. From the Language Selection list, select the language (a specific database or Java).
    Information noteNote:

    If you select a database from the Language Selection list, you will be able to generate ELT Jobs on the column analysis results to recuperate valid and invalid rows. If you select the Java or the Default language, you will be able to generate an ETL Job on the column analysis results.

    For more information about generating a Job to recuperate valid, invalid or both types of rows, see Recuperating valid and invalid rows in a column analysis.

  7. Click Finish to close the dialog box.
    A subfolder for this new regular expression is listed under the Regex folder in the DQ Repository tree view, and the pattern editor opens with the defined metadata and the defined regular expression.
  8. In the Pattern Definition view, click the [+] button and add as many regular expressions as necessary in the new pattern.
    You can define the regular expressions specific to any of the available databases or specific to Java.
    Information noteNote: If the regular expression is simple enough to be used in all databases, select Default from the list.
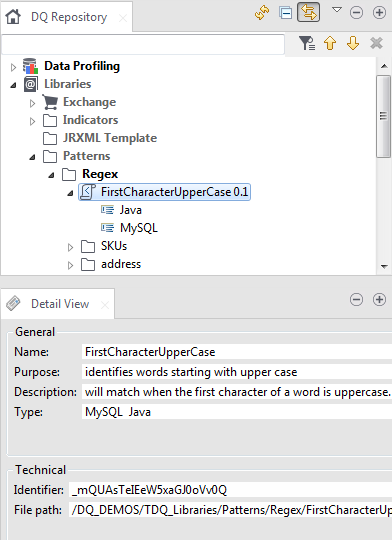
    Subfolders labeled with the specified database types or Java are listed below the name of the new pattern under the Patterns folder in the DQ Repository tree view.
    Overview of the Detail view of a regex.
  9. Save the new pattern.
    Once the pattern is created, you can drop it directly onto a database column in the open analysis editor.
  10. Optional: Click the pattern name to display its detail in the Detail View and Technical view in Talend Studio.

Did this page help you?

If you find any issues with this page or its content – a typo, a missing step, or a technical error – please let us know!