Generating a QVD file and uploading it to Qlik Cloud
The following Job aims at creating and populating a QVD file locally, then uploading the
generated file to Qlik Cloud.
Linking the components
Procedure
Drag and drop the following components from the Palette:
tRowGenerator, tQVDOutput, and
tQlikOutput.
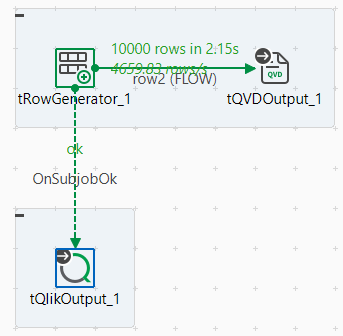
Connect the tRowGenerator to the
tQVDOutput component using a Row > FLOW connection.
Connect the tRowGenerator to the
tQlikOutput component using an Trigger >
On SubJob OK connection.
Configuring the components
Procedure
Double-click the tRowGenerator component to open its
editor.
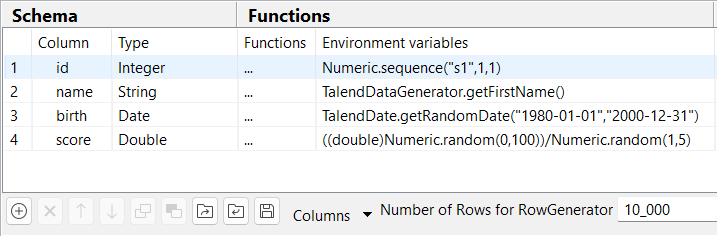
Define the schema columns to be generated.
In this use case, four columns are being created: id
(Integer), name (String), birth
(Date), score (Double); and 10000
rows are being generated.
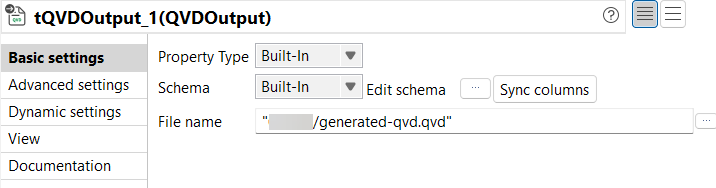
Double-click the tQVDOutput component to display its
Component view.
In the Basic settings view, enter the path and name of
the QVD file you want to create.
In the Advanced settings view, check that the default
selected options correspond to your use case (the specified directory will be
created if it does not exist, and you will get an error if the file already exists
on your machine).
Double-click the tQlikOutput component to display its
Component view.
Enter the URL address of your Qlik Cloud account as well as the API key to
access it.
In the Local file field, enter the path to the local
file you want to upload in Qlik Cloud. In this scenario it is the previously
generated QVD file.
In the Remote file name field, enter the name of the
file as it will be displayed in Qlik Cloud.
Executing the Job
Procedure
Press Ctrl + S to save your Job.
Press F6 to execute it.
Results
The generated-qvd.qvd file is created and populated with the
10000 rows.
It is then uploaded to Qlik Cloud and is visible from the Catalog.