Skip to main content Skip to complementary content

Evaluating the classification model

After you created a classification model, you can evaluate how good it is.

Linking the components

Procedure

  1. In the Integration perspective of Talend Studio, create another empty Spark Batch Job, named classify_and_evaluation for example, from the Job Designs node in the Repository tree view.
  2. In the workspace, enter the name of the components to be used and select them from the list that appears.
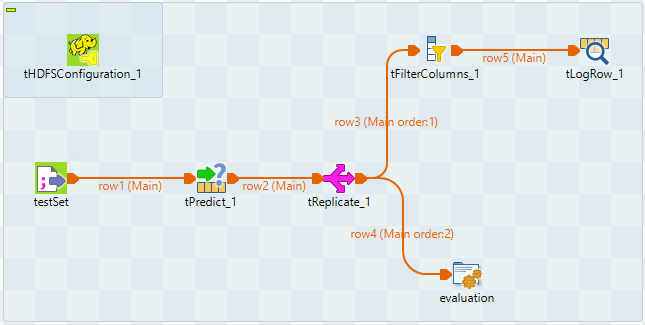
    In this Job, the components are tHDFSConfiguration, tFileInputDelimited, tPredict, tReplicate, tJava, tFilterColumns and tLogRow.
  3. Except tHDFSConfiguration, connect them using the Row > Main link as is displayed in the image above.
    A 7-component Job using the tPredict component.
  4. Double-click tHDFSConfiguration to open its Component view and configure it as explained previously in this scenario.

Loading the test set into the Job

Procedure

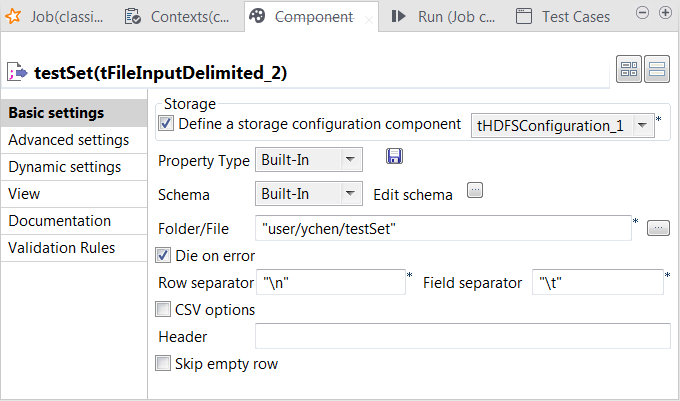
  1. Double-click tFileInputDelimited to open its Component view.
  2. Select the Define a storage configuration component check box and select the tHDFSConfiguration component to be used.
    tFileInputDelimited uses this configuration to access the training set to be used.
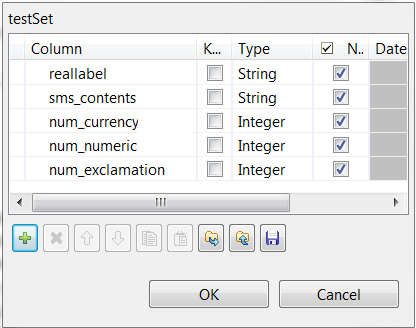
  3. Click the [...] button next to Edit schema to open the schema editor.
  4. Click the [+] button five times to add five rows and in the Column column, rename them to reallabel, sms_contents, num_currency, num_numeric and num_exclamation, respectively.
    The reallabel and the sms_contents columns carries the raw data which is composed of the SMS text messages in the sms_contents column and the labels indicating whether a message is spam in the reallabel column.
    The other columns are used to carry the features added to the raw datasets as explained previously in this scenario. They contains the number of currency symbols, the number of numeric values and the number of exclamation marks found in each SMS message.
  5. In the Type column, select Integer for the num_currency, num_numeric and num_exclamation columns.
  6. Click OK to validate these changes.
  7. In the Folder/File field, enter the directory where the test set to be used is stored.
  8. In the Field separator field, enter \t, which is the separator used by the datasets you can download for use in this scenario.

Applying the classification model

Procedure

  1. Double-click tPredict to open its Basic settings.
  2. In Model Type, select Random Forest Model.
  3. Select the Model on filesystem radio button and enter the directory in which the classification model to be used is stored.
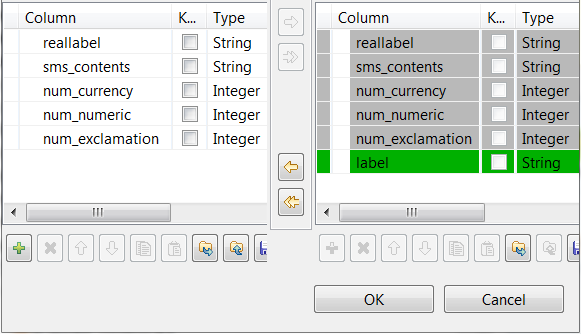
    The tPredict component contains a read-only column called label in which the model provides the classes to be used in the classification process, while the reallabel column retrieved from the input schema contains the classes to which each message actually belongs. The model will be evaluated by comparing the actual label of each message with the label the model determines.

Replicating the classification result

Procedure

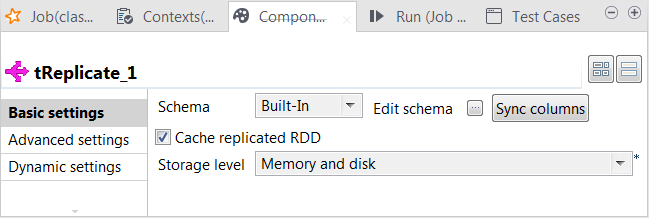
  1. Double-click tReplicate to open its Component view.
  2. Leave the default configuration as is.

Filtering the classification result

Procedure

  1. Double-click tFilterColumns to open its Component view.
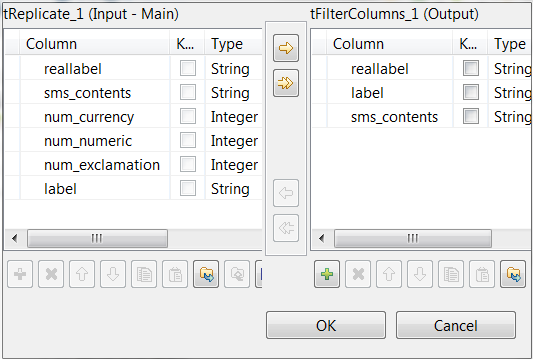
  2. Click the [...] button next to Edit schema to open the schema editor.
  3. On the output side, click the [+] button three times to add three rows and in the Column column, rename them to reallabel, label and sms_contents, respectively. They receive data from the input columns that are using the same names.
  4. Click OK to validate these changes and accept the propagation prompted by the pop-up dialog box.

Writing the evaluation program in tJava

Procedure

  1. Double-click tJava to open its Component view.
  2. Click Sync columns to ensure that tJava retrieves the replicated schema of tPredict.
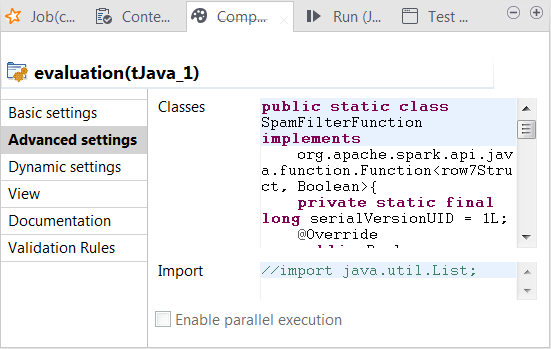
  3. Click the Advanced settings tab to open its view.
  4. In the Classes field, enter code to define the Java classes to be used to verify whether the predicted class labels match the actual class labels.
    spam for junk messages and ham for normal messages.
    In this scenario, row7 is the ID of the connection between tPredict and tReplicate and carries the classification result to be sent to its following components. row7Struct is the Java class of the RDD for the classification result. In your code, you need to replace row7, whether it is used alone or in row7Struct, with the corresponding connection ID used in your Job.
    Column names such as reallabel or label were defined in the previous step when configuring different components. If you named them differently, you need to keep them consistent for use in your code.
    public static class SpamFilterFunction implements 
    	org.apache.spark.api.java.function.Function<row7Struct, Boolean>{
    	private static final long serialVersionUID = 1L;
    	@Override
    	public Boolean call(row7Struct row7) throws Exception {
    		
    		return row7.reallabel.equals("spam");
    	}
    	
    }
    
    // 'negative': ham
    // 'positive': spam
    // 'false' means the real label & predicted label are different 
    // 'true' means the real label & predicted label are the same
    
    public static class TrueNegativeFunction implements 
    	org.apache.spark.api.java.function.Function<row7Struct, Boolean>{
    	private static final long serialVersionUID = 1L;
    	@Override
    	public Boolean call(row7Struct row7) throws Exception {
    		
    		return (row7.label.equals("ham") && row7.reallabel.equals("ham"));
    	}
    	
    }
    
    public static class TruePositiveFunction implements 
    	org.apache.spark.api.java.function.Function<row7Struct, Boolean>{
    	private static final long serialVersionUID = 1L;
    	@Override
    	public Boolean call(row7Struct row7) throws Exception {
    		// true positive cases
    		return (row7.label.equals("spam") && row7.reallabel.equals("spam"));
    	}
    	
    }
    
    public static class FalseNegativeFunction implements 
    	org.apache.spark.api.java.function.Function<row7Struct, Boolean>{
    	private static final long serialVersionUID = 1L;
    	@Override
    	public Boolean call(row7Struct row7) throws Exception {
    		// false positive cases
    		return (row7.label.equals("spam") && row7.reallabel.equals("ham"));
    	}
    	
    }
    
    public static class FalsePositiveFunction implements 
    	org.apache.spark.api.java.function.Function<row7Struct, Boolean>{
    	private static final long serialVersionUID = 1L;
    	@Override
    	public Boolean call(row7Struct row7) throws Exception {
    		// false positive cases
    		return (row7.label.equals("ham") && row7.reallabel.equals("spam"));
    	}
    	
    }
  5. Click the Basic settings tab and in the Code field, enter the code to be used to compute the accuracy score and the Matthews Correlation Coefficient (MCC) of the classification model.
    For general explanation about Mathews Correlation Coefficient, see https://en.wikipedia.org/wiki/Matthews_correlation_coefficient from Wikipedia.
    long nbTotal = rdd_tJava_1.count();
    
    long nbSpam = rdd_tJava_1.filter(new SpamFilterFunction()).count();
    
    long nbHam = nbTotal - nbSpam;
    
    // 'negative': ham
    // 'positive': spam
    // 'false' means the real label & predicted label are different 
    // 'true' means the real label & predicted label are the same
    
    long tn = rdd_tJava_1.filter(new TrueNegativeFunction()).count();
    
    long tp = rdd_tJava_1.filter(new TruePositiveFunction()).count();
    
    long fn = rdd_tJava_1.filter(new FalseNegativeFunction()).count();
    
    long fp = rdd_tJava_1.filter(new FalsePositiveFunction()).count();
    
    double mmc = (double)(tp*tn -fp*fn) / java.lang.Math.sqrt((double)((tp+fp)*(tp+fn)*(tn+fp)*(tn+fn)));
    
    System.out.println("Accuracy:"+((double)(tp+tn)/(double)nbTotal));
    System.out.println("Spams caught (SC):"+((double)tp/(double)nbSpam));
    System.out.println("Blocked hams (BH):"+((double)fp/(double)nbHam));
    System.out.println("Matthews correlation coefficient (MCC):" + mmc); 

Configuring Spark connection

About this task

Repeat the operations described above. See Selecting the Spark mode.

Executing the Job

Procedure

  1. The tLogRow component is used to present the execution result of the Job.
    If you want to configure the presentation mode on its Component view, double-click the tLogRow component to open the Component view and in the Mode area, select the Table (print values in cells of a table) radio button.
  2. If you need to display only the error-level information of Log4j logging in the console of the Run view, click Run to open its view and then click the Advanced settings tab.
  3. Select the log4jLevel check box from its view and select Error from the list.
  4. Press F6 to run this Job.

Results

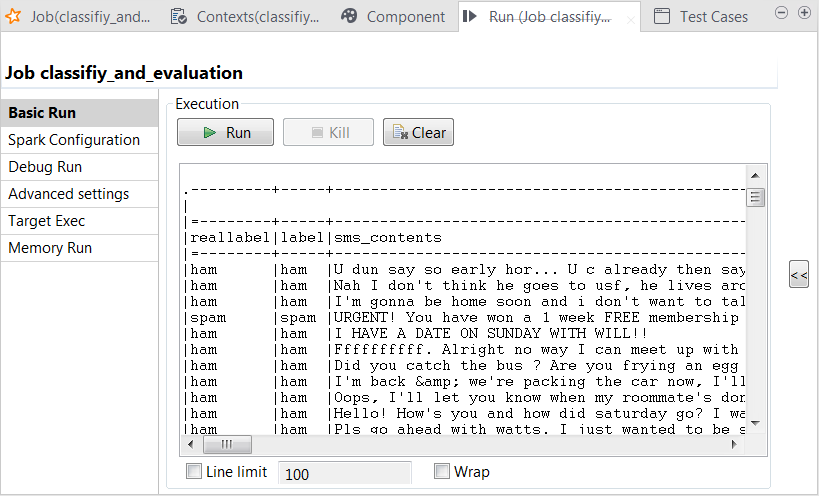
In the console of the Run view, you can read the classification result along with the actual labels:
You can also read the computed scores in the same console:
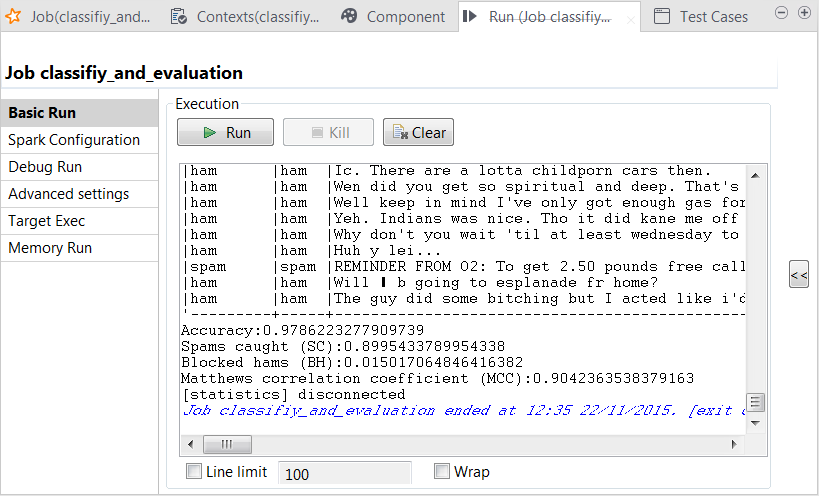
The scores show a good quality of the model. You can still enhance the model by continuing to tune the parameters used in tRandomForestModel and run the model-creation Job with new parameters to obtain and then evaluate new versions of the model.

Did this page help you?

If you find any issues with this page or its content – a typo, a missing step, or a technical error – please let us know!