Double-click the main tPigLoad component to open its
Component view.
Click the [...] button next to Edit
schema to open the schema editor and click the [+] button three times to add three rows.
In the Column column, rename the new rows to owner, pet
and age, respectively, and in the
Type column of the age row, select Integer.
Click OK to validate these changes and accept the propagation prompted by the pop-up dialog box.
In the Mode area, select Map/Reduce to use the remote Hadoop cluster to be
used.
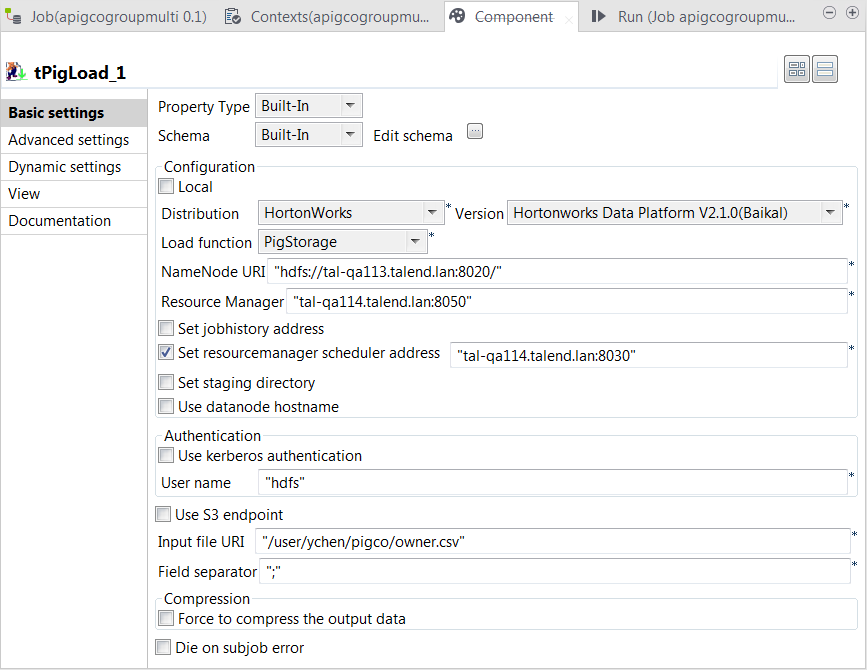
In the Distribution and the Version lists, select the Hadoop distribution you are using.
In this example, HortonWorks Data Platform V2.1.0
(Baikal) is selected.
In the Load function list, select PigStorage. Then, the corresponding parameters to be set
appear.
In the NameNode URI and the
Resource manager fields, enter the
locations of those services, respectively. If you are using WebHDFS, the location should be
webhdfs://masternode:portnumber; WebHDFS with SSL is not
supported yet.
Select the Set Resourcemanager scheduler address check box
and enter the URI of this service in the field that is displayed. This
allows you to use the Scheduler service defined in the Hadoop cluster to be
used. If this service is not defined in your cluster, you can ignore this
step.
In the User name field, enter the name of the user having the
appropriate right to write data in the cluster. In this example, it is
hdfs.
In the Input file URI field, enter the path pointing to the
relation you need to read data from. As explained previously, the relation
to be read here is the one containing the owner and pet sample data.
In the Field separator field, enter the separator of the data
to be read. In this example, it is semicolon (;).
Did this page help you?
If you find any issues with this page or its content – a typo, a missing step, or a technical error – please let us know!