
Working with inputs
When you run an automation that contains an input block from outside the automation editor, a modal appears to help you provide the required input values. This topic explains the modal workflow and how to provide inputs.
Running an automation with inputs
When you start a manual run of an automation that contains an input block, a modal appears offering you two options. The modal allows you to decide whether to stay on your current page or navigate to the automation History view where you can provide the required input values.
This modal appears when you run an automation from:
- The Hub
- The Catalog
- Any other location outside the automation editor where you can run an automation
If the automation does not contain an input block, the modal does not appear. Instead, you see a standard notification indicating whether the automation started successfully or failed to start.
Understanding the input modal
The input modal presents two actions:
- Stay here – Closes the modal and keeps you on the current page. Use this option if you do not wish to provide input values at this time. You can return to provide the required inputs at any time by navigating to the History view and selecting the run that requires input.
- Redirect me – Opens a new tab with the automation editor in History view. The run you just started is pre-selected in the left panel, allowing you to quickly access and fill in the input form.

The modal appears even if some or all input fields are optional. This gives you the flexibility to decide whether you need to provide input values for your specific use case.
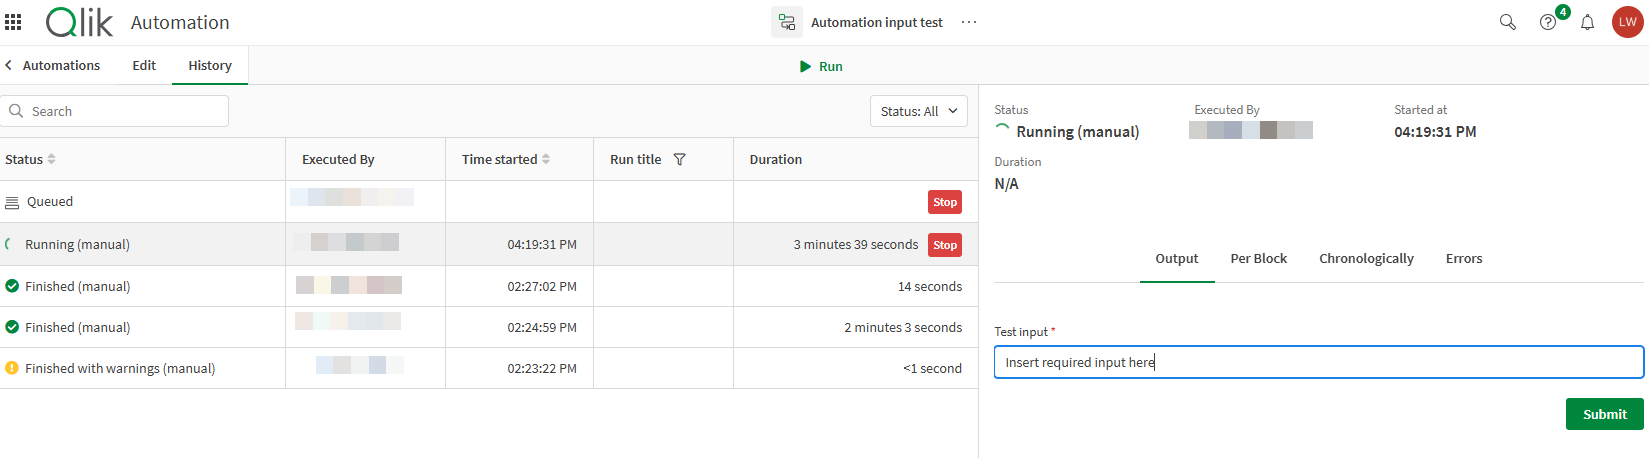
Providing inputs in the History view
Use the following steps to provide input values for your automation run.
- In the automation editor, open the History view by clicking the History tab above the automation canvas.
- In the left panel, click the run that requires input. If you ran the automation multiple times, additional runs will be queued until you provide input for the first one.
- In the right panel, locate the Input section. This section displays the input form with all fields defined in your automation's input block.
- Fill in each input field with the required value. To learn more about the different input types, see Input block.
- After you have provided all required input values, the automation proceeds with execution using the values you supplied.
Tips for working with inputs
- Required fields are marked with a red asterisk. You must provide a value for each required field before the automation can proceed.
- If you do not know what value to enter, contact the automation owner for guidance.
- You can select Stay here on the modal and return to provide inputs later. This can be useful if you need time to gather the information required.