
Salesforce oAuth app
Follow these steps to create your own Salesforce app.
Login to you Salesforce developer account or create a new one on Salesforce: Salesforce developer signup.
In the left menu, go to Apps > App Manager (located under Platform Tools):
Click New Connected App.
An app in the App Manager.
 4. Under “Basic Information” every field should be filled in. If you don’t have a logo, Salesforce has an option to choose one of their sample logos.
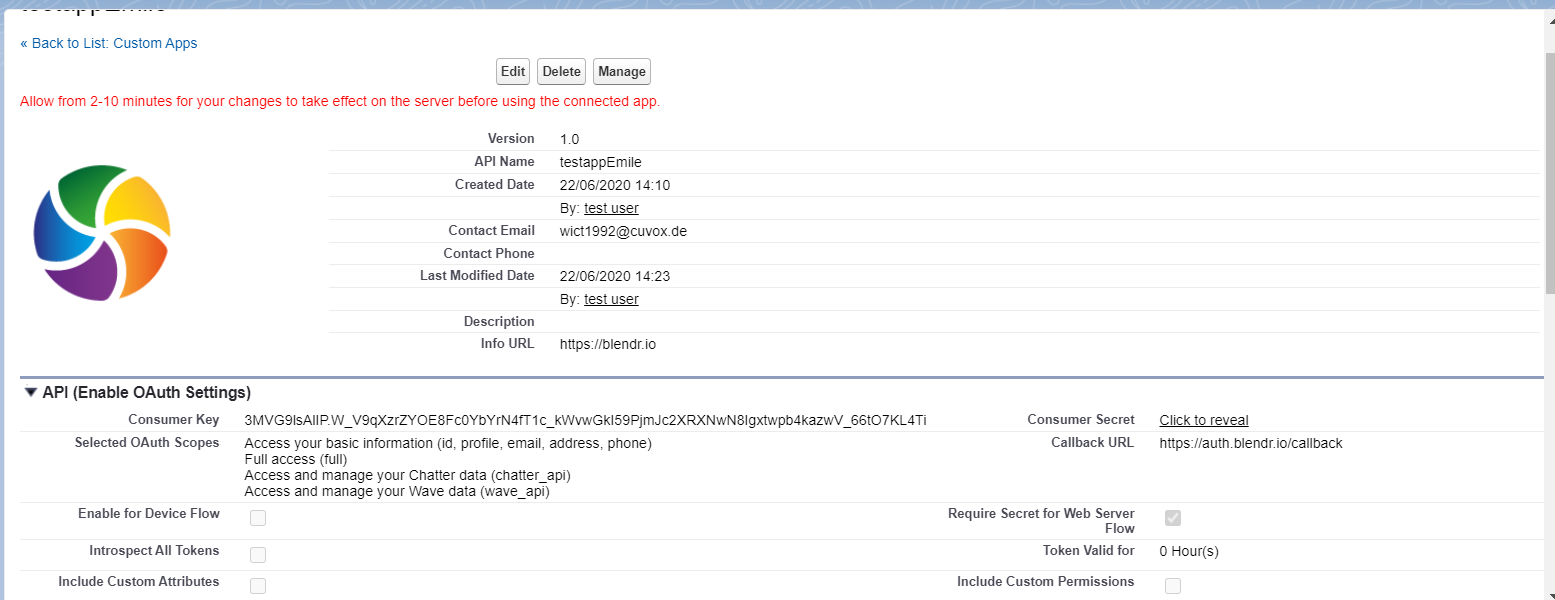
Under “API”: Check the “Enable OAuth Settings” checkbox and fill in the correct callback URL. Also selected the necessary scopes. Don’t select more scopes than you’ll need, as this will make your approval process much more difficult.
Under: “Web App Settings”: enter your applications URL from where a user can run your application.
Don't fill in “Custom Connected App Handler”.
Only fill in the “Mobile App Settings” part if you have a mobile application and you intend your users to access Salesforce from within this mobile application.
Only fill in “Canvas App Settings” if you want your app to be available as a canvas app. More information about canvas apps can be found here: Canvas app documentation. Check the checkbox, enter your app’s base URL and select “OAuth Webflow” as access method.
Select each location you want to use in your app. Don’t select locations you won’t need as this will make your approval process more difficult.Click “Save” and in the app overview you can find the client id (consumer key) and client secret (consumer secret) which you’ll need to sign in using OAuth.
The app overview.
More information can be found here: Create an app on Salesforce.
Did this page help you?
If you find any issues with this page or its content – a typo, a missing step, or a technical error – let us know how we can improve!