Formulating message body using template
About this task
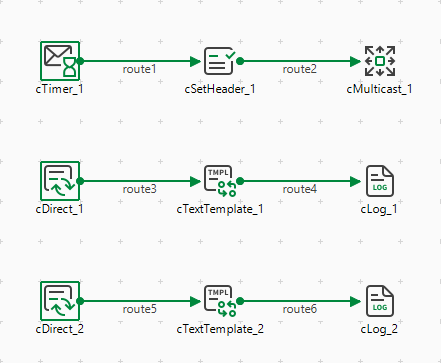
Dropping and linking the components
Procedure
- From the Palette, drag and drop a cTimer, a cSetHeader, a cMulticast, two cDirect, two cTextTemplate, and two cLog components onto the design workspace.
-
Link the components with the Row > Route connection as
shown below.
Configuring the components
Procedure
-
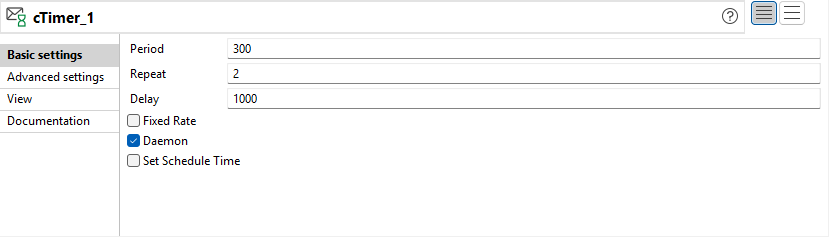
Double-click the cTimer
component to open its Basic settings view in
the Component tab.
- In the Repeat field, enter 2 to generate two message exchanges. Keep the default settings of the other options.
-
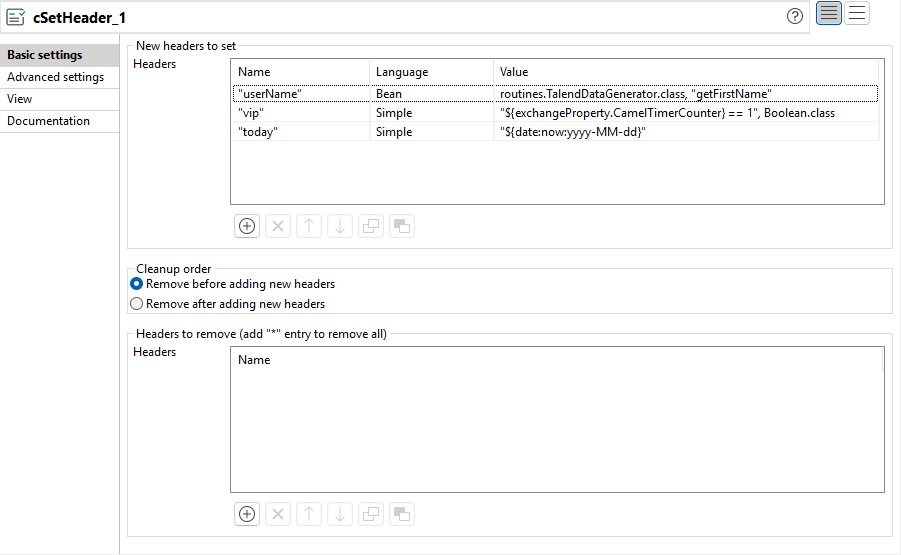
Double-click the cSetHeader
component to open its Basic settings view in
the Component tab.
-
In the New headers to set area, click the
[+] button to add three headers in the
Headers table, and then give each header a
name and a value.
Name the first header "username". Select Bean in the Language list and enter routines.TalendDataGenerator.class, "getFirstName" in the value field to generate a random first name for the header.Name the second header "vip". Select Simple in the Language list and enter "${exchangeProperty.CamelTimerCounter} == 1", Boolean.class in the value field to set the header as true if the current counter is equal to 1.Name the third header "today". Select Simple in the Language list and enter "${date:now:yyyy-MM-dd}" in the value field to generate the current date as the header.
-
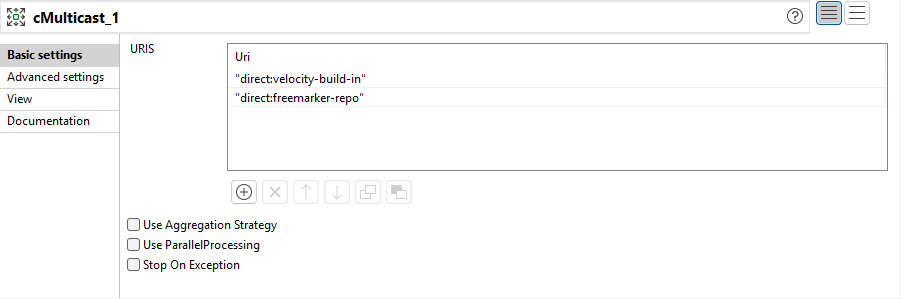
Double-click the cMulticast component to display its
Basic settings view in the
Component tab.
- Click [+] to add two rows to the URIS table. Specify the URIs of the endpoints where the message will be sent, "direct:velocity-build-in" and "direct:freemarker-repo" in this use case.
-
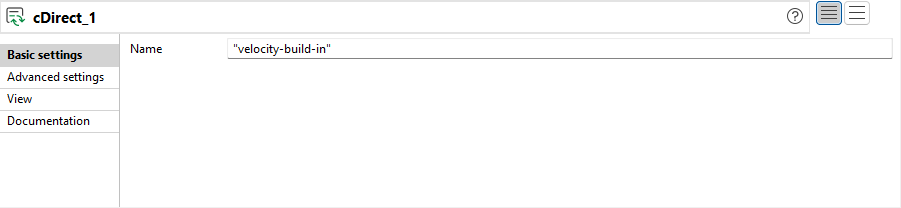
Double-click the first cDirect component to display its
Basic settings view in the
Component tab.
-
Enter the endpoint URI "velocity-build-in" in the
Name field.
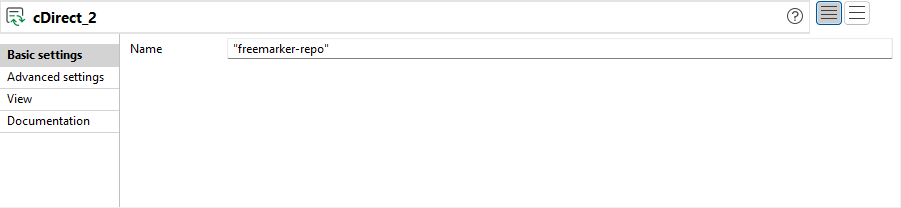
Repeat this step to set the Name for the second cDirect component as "freemarker-repo".
-
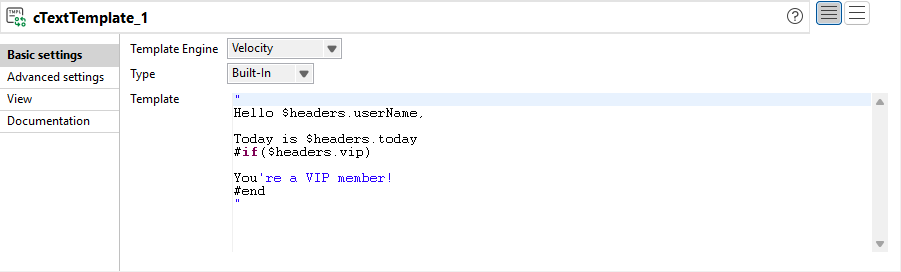
Double-click the first cTextTemplate component to display
its Basic settings view in the
Component tab.
-
Select Velocity in the Template
Engine list.
Select Built-in in the Type list.Enter the following code in the Template box.
" Hello $headers.userName, Today is $headers.today #if($headers.vip) You're a VIP member! #end "
-
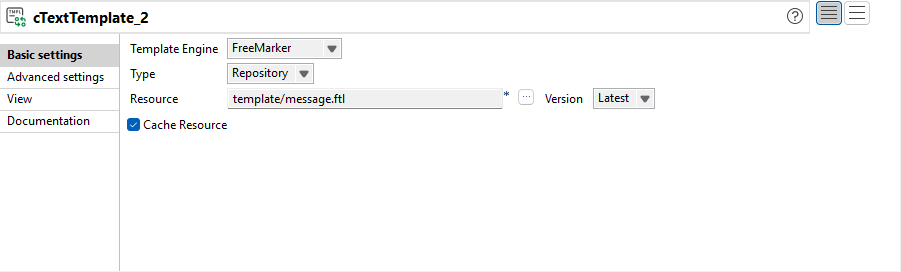
Double-click the second cTextTemplate component to
display its Basic settings view in the
Component tab.
-
Select FreeMarker in the Template
Engine list.
Select Repository in the Type list.Click [...] next to the Resource field and select the pre-defined template message.ftl in the Resources > template folder in the repository.
Hello ${headers.userName}, Today is ${.now?string("yyyy-MM-dd")}. <#if headers.vip?? && headers.vip> You're a VIP member! </#if>
-
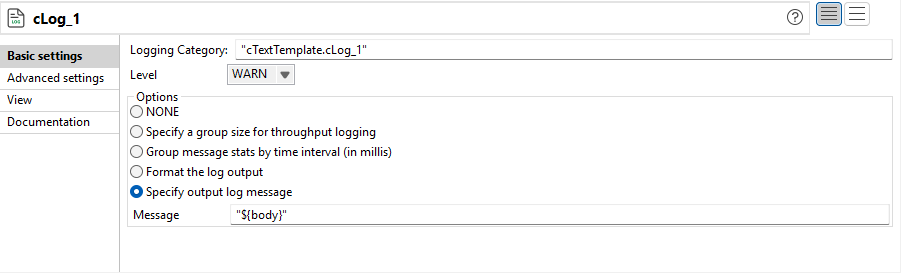
Double-click the first cLog component to open its
Basic settings view in the
Component tab.
-
Select the Specify output log
message option and enter the code "${body}"
in the Message field to display the message
body.
Repeat this step to configure the second cLog in the same way.
- Press Ctrl+S to save your Route.
Viewing the code and executing the Route
Procedure
-
Click the Code tab at the
bottom of the design workspace to check the generated code.
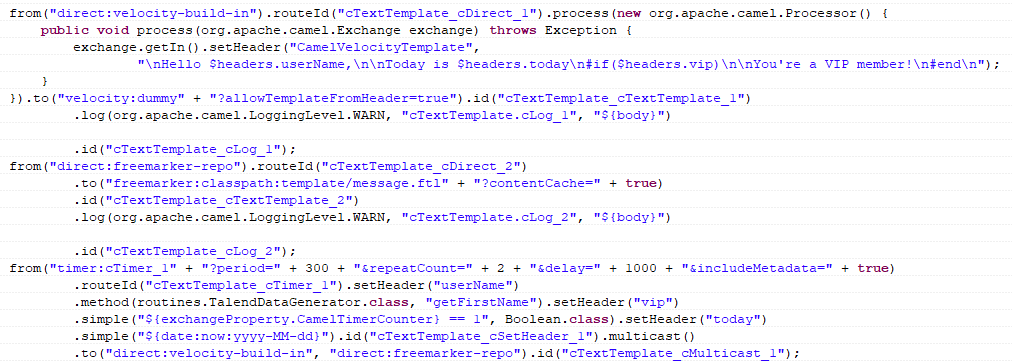
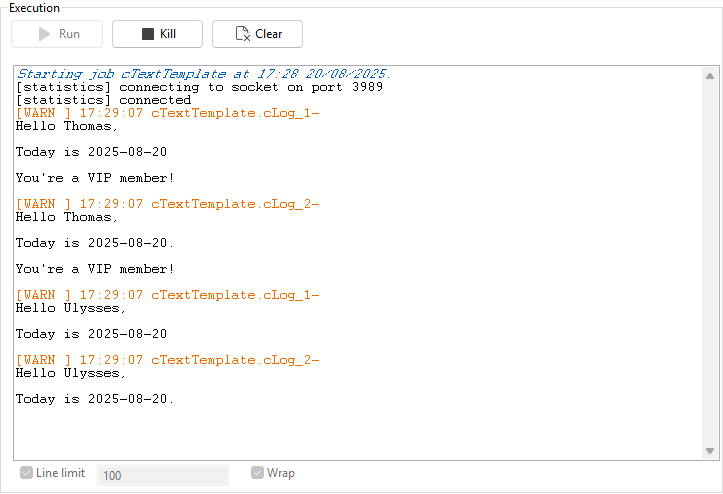
As shown above, the source message is routed from cTimer_1 to direct:velocity-build-in and direct:freemarker-repo via cMulticast_1. The message from direct:velocity-build-in is routed to cLog_1 and the message from direct:freemarker-repo is routed to cLog_2.
-
Click the Run view to display it and click
the Run button to launch the execution of your Route. You
can also press F6 to execute it.
The message body is generated as specified in the template.
Related reference
Did this page help you?
If you find any issues with this page or its content – a typo, a missing step, or a technical error – please let us know!