
Configuring tPigLoad
Procedure
-
Double-click tPigLoad to open its
Component view.
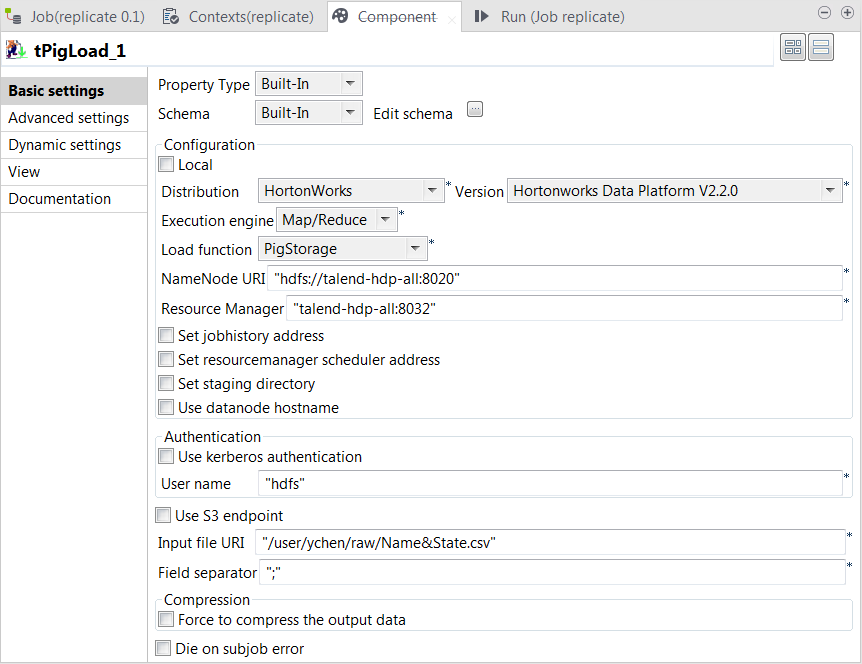
-
Click the
 button next to Edit schema to open the schema editor.
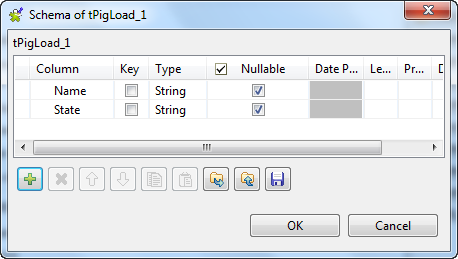
-
Click the
 button twice to add two rows and name them Name and State, respectively.