
Using templates
Templates are pre-built automations that are simple to configure and quick to implement. You can customize templates as much or as little as needed to meet your specific use case, and they are especially helpful for understanding the logical sequence in common workflows. This topic provides an overview of how to use templates. See all templates for a list of templates you can use.
For a visual demo on how to get started using templates, see Creating automations from templates.
Searching templates
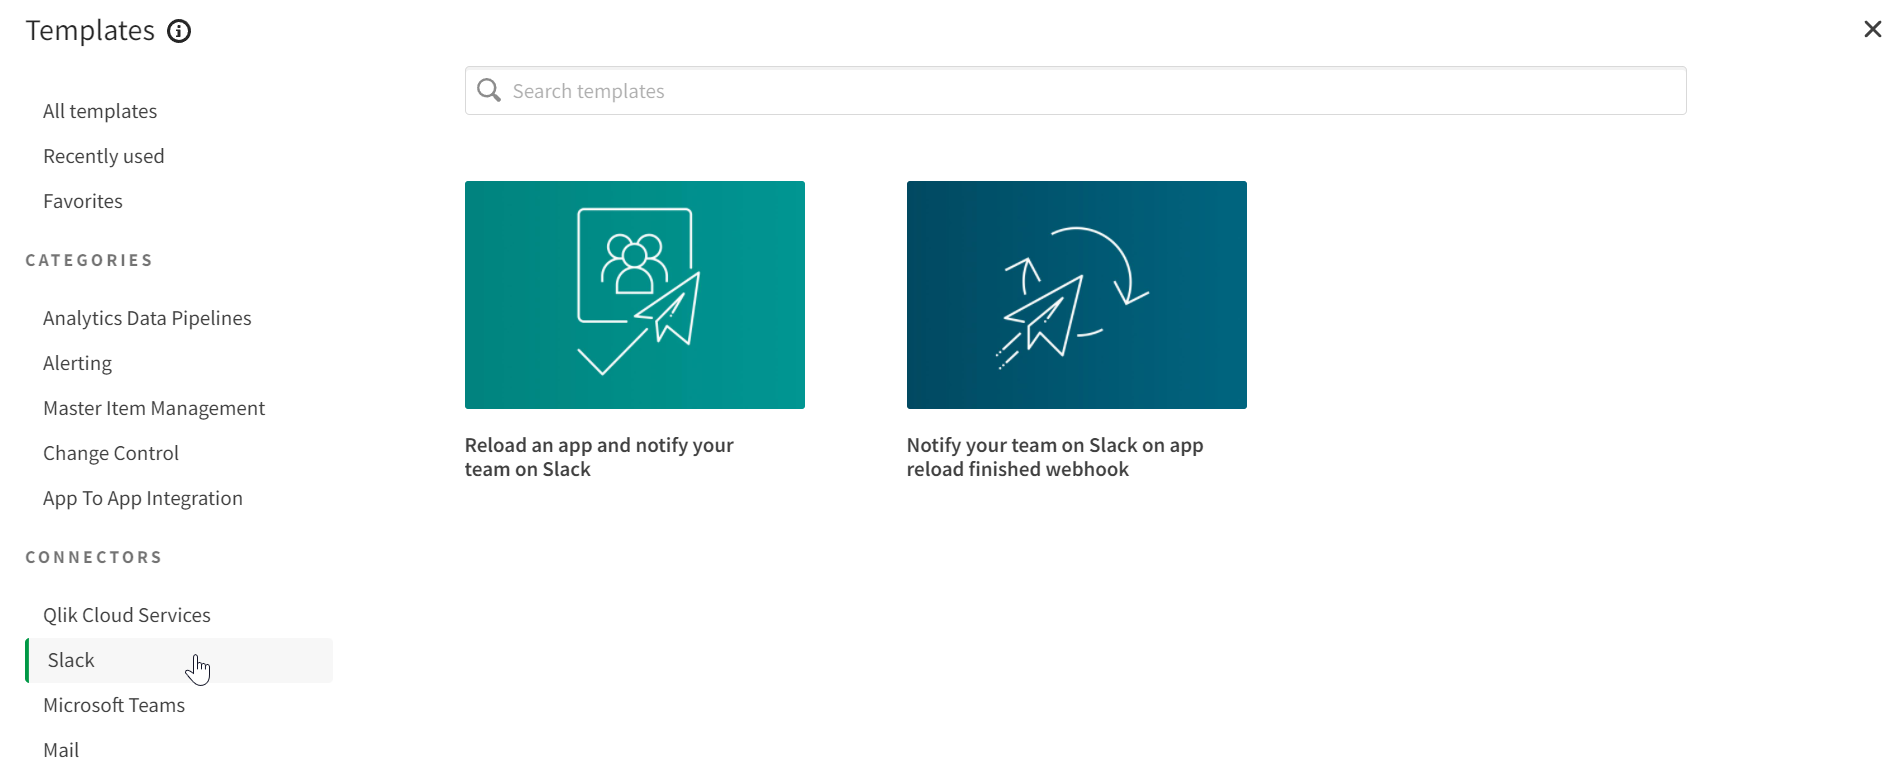
Templates are available from the template window when you create a new automation. Use the category and connector filters to narrow down the templates you see. For example, you can search for templates that include the Slack connector by selecting the Slack connector tag. This filters the available templates to those that have a Slack connector block somewhere in the automation.
Most of the templates include connectors that integrate third-party cloud applications and services. To use those connectors, you must authentication the connection. See connector blocks to learn how to authenticate connectors.
Customizing templates
When you add a template to the automation canvas, most blocks are preconfigured with field mapped inputs from the preceding blocks, however, you will want to verify and adjust each block as required. You can edit the automation by adding or removing blocks. For example, you might want to use a reporting template to send automatic reports to your team using Slack, but the template that is best suited for your business process is preconfigured in the Microsoft Teams block. You can swap the Microsoft Teams connector blocks for the appropriate Slack connector blocks. When you replace blocks, you'll need to adjust the field mapping between blocks, but using a template provides a good starting point for any automation.

Template example
This example shows you how to choose a template from the template window and how to configure it. Each template has a specific workflow and requires a unique configuration, but this example will help you understand how to walk through a template to adjust it to meet your needs. In this example, you'll configure a template to reload multiple apps in parallel.
Do the following:
-
In the Analytics or Qlik Talend Data Integration activity center, click Automation.
-
Click Create new automation.
-
Under Connectors, select Qlik.
This filters templates that include the Qlik connector.
-
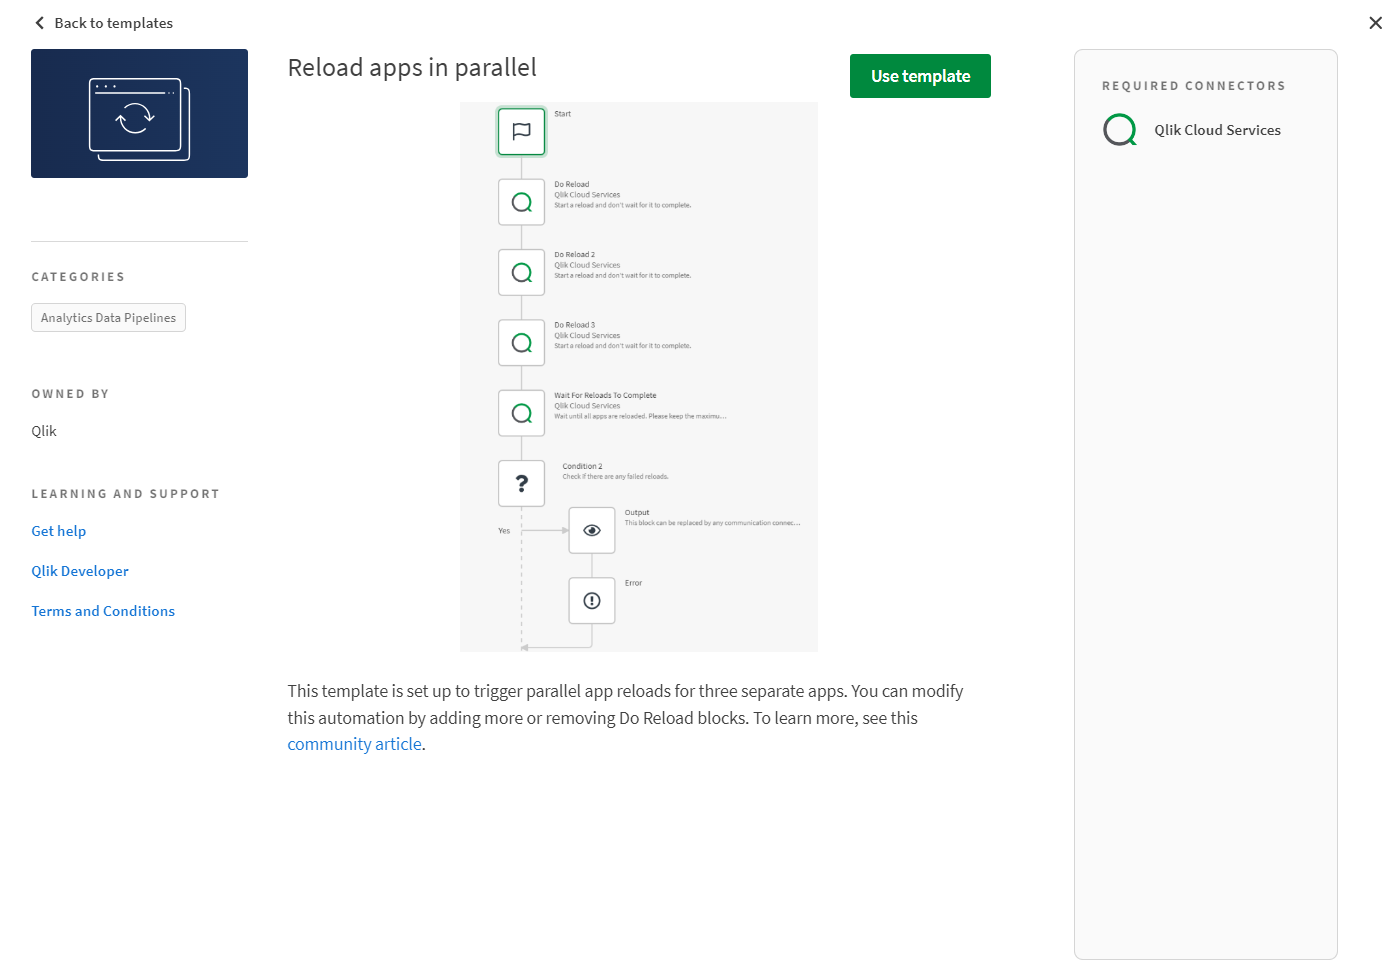
Hover over the Reload apps in parallel tile, then click Details.
The details page provides a preview of what the automation looks like and gives you a short description on what it does.
-
Click Use template.
You can choose to rename the template, select a Space to save it in, and modify the description. After you save these changes, the template opens in the automation editor.
-
The template includes three Do reload blocks. Optionally add or remove these blocks as needed. For this example, remove one of the reload blocks.
-
On the Inputs section for each Do reload block, enter the app ID for the app you want to reload. Use the Do lookup function to find your app ID.
-
Select the Wait for reloads to complete block. The Reload Ids field is prefilled with the output from the Do reload blocks. If you added or removed blocks, adjust the inputs.
In this example you removed a block, so adjust your formula to look like this:
{$.DoReload.id}, {$.DoReload2.id}Information noteUse the formula parsing toggle to see the input field as a raw json object.
-
Select the Condition block. The condition is preconfigured to watch for a status =
failedreturned from any of the reload blocks. You can adjust this condition as needed. For this example, leave the condition as is. -
Select the Output block. This block is executed on the YES branch of the condition. This means that if one of the reload blocks fails, the output block is executed. It is preconfigured with a message. For this example, leave the output as is.
-
Select the Error block. This block is preconfigured to stop the automation if a reload fails. For this example, leave the error as is.
-
The NO branch of the condition is empty. Add an Output block to this branch.
-
Clear the Data to output field and enter a reload successful message.
Your app reloads were successful!
-
Click Save, then click Run.
With the removal of the reload block and the addition of an output block on the YES branch, this automation now looks like this:

As the automation executes, the Output section in the History tab opens. You should see the message that corresponds to the status of the parallel app reloads.
