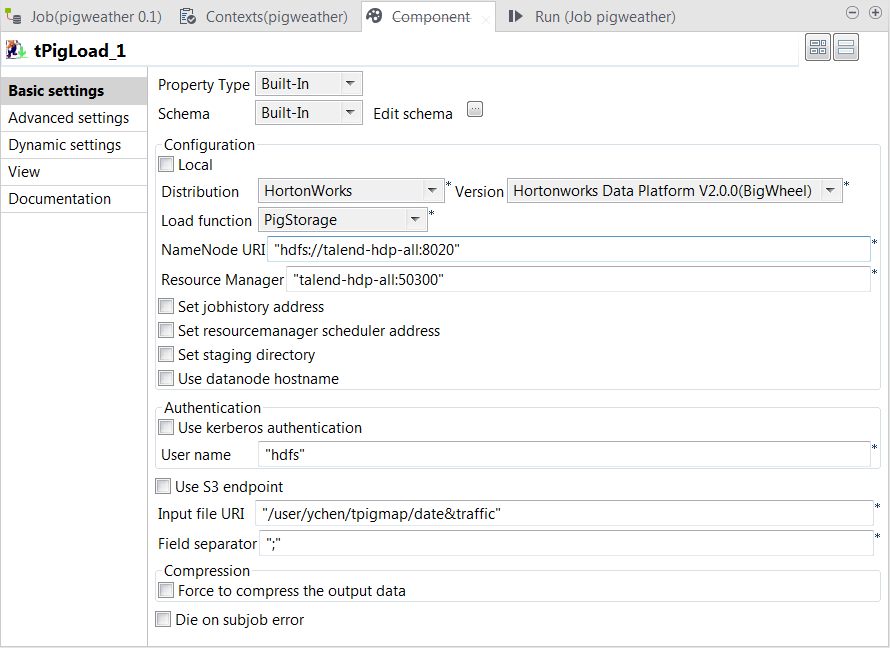
Double-click the tPigLoad labeled
traffic to open its Component view.
Click the
button next to Edit
schema to open the schema editor.
Click the
button three times to add three rows and in the
Column column, rename them as date, street
and traffic, respectively.
Click OK to validate these
changes.
In the Mode area, select the Map/Reduce option, as we need the Studio to
connect to a remote Hadoop distribution.
In the Distribution list and the
Version field, select the Hadoop
distribution to be used. In this example, it is Hortonworks Data Platform V1.0.0.
In the Load function list, select the
PigStorage function to read the source
data, as the data is a structured file in human-readable UTF-8
format.
In the NameNode URI and the
Resource Manager fields, enter the
locations of the master node and the Resource Manager of the Hadoop distribution to
be used, respectively. If you are using WebHDFS, the location should be
webhdfs://masternode:portnumber; WebHDFS with SSL is not
supported yet.
In the Input file URI field, enter the
directory where the data about the traffic situation is stored. As explained
earlier, the directory in this example is /user/ychen/tpigmap/date&traffic.
In the Field separator field, enter
; depending on the separator used by
the source data.
Did this page help you?
If you find any issues with this page or its content – a typo, a missing step, or a technical error – please let us know!