Configuring tPigLoad
Procedure
-
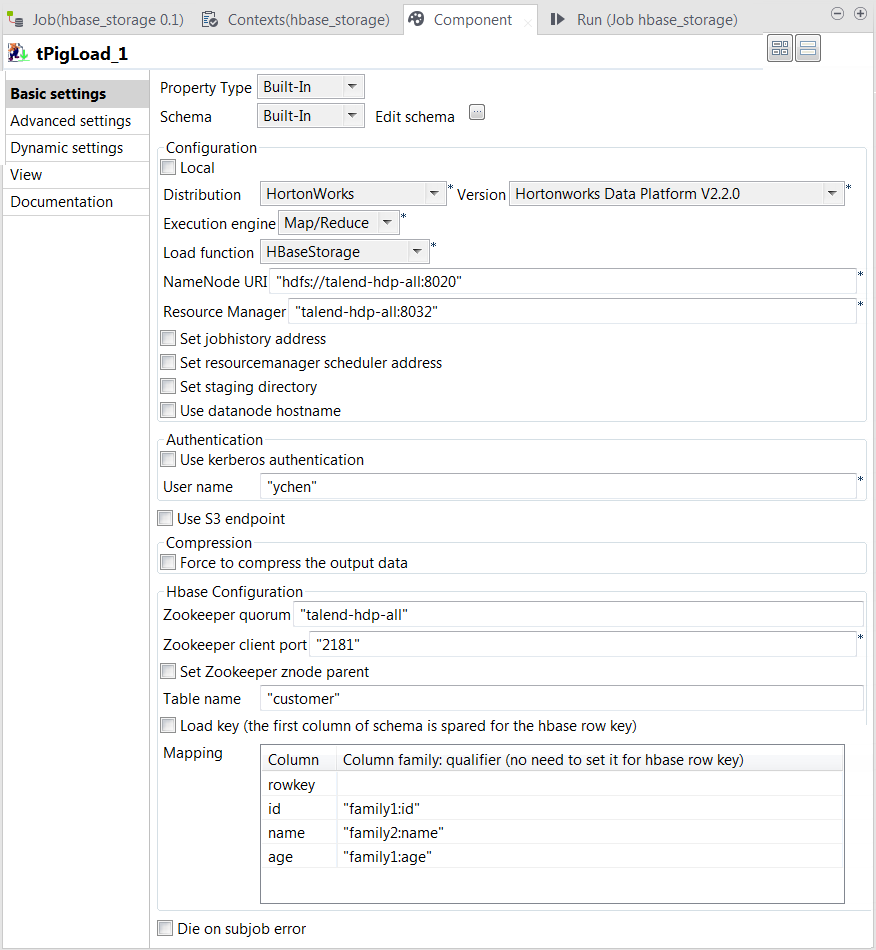
Double-click tPigLoad to open its
Component view.
-
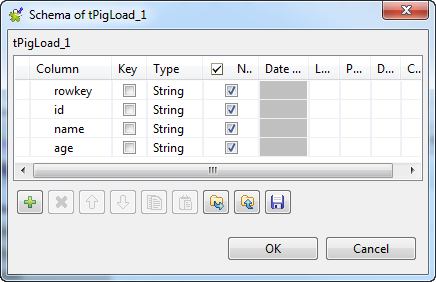
Click the
 button next to Edit
schema to open the schema editor.
button next to Edit
schema to open the schema editor.
-
Click the
 button four times to add four rows and rename them:
rowkey, id, name and age. The rowkey column put at the top of the schema to store the
HBase row key column, but in practice, if you do not need to load the row
key column, you can create only the other three columns in your
schema.
button four times to add four rows and rename them:
rowkey, id, name and age. The rowkey column put at the top of the schema to store the
HBase row key column, but in practice, if you do not need to load the row
key column, you can create only the other three columns in your
schema.