In this step, we will configure the last Job, F_Read_Results, to read the results data from Hadoop and display
them on the standard system console.
Procedure
-
Double-click the first tHDFSInput
component to open its Basic settings
view.
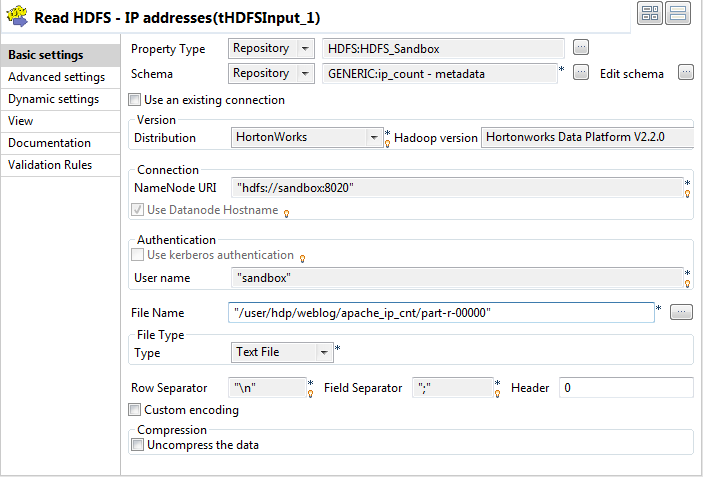
-
Click the Property Type list box and select Repository, and then click the [...] button to open the Repository Content dialog box to use a centralized HDFS connection.
-
Select the HDFS connection defined for connecting to the HDFS system and click
OK.
All the connection details are automatically filled in the respective
fields.
-
Apply the generic schema of ip_count to this component. The schema should contain
two columns, host (string, 50
characters) and count (integer, 5
characters),
-
In the File Name field, enter the
path to the result file in HDFS, /user/hdp/weblog/apache_ip_cnt/part-r-00000 in this
example.
-
From the Type list, select the type of the file to read,
Text File in this example.
-
In the Basic settings view of the
tLogRow component, select the
Table option for better
readability.
-
Configure the other subjob in the same way, but in the second
tHDFSInput component:
-
Apply the generic schema of code_count, or configure the schema of this
component manually so that it contains two columns: code (integer, 5 characters) and
count (integer, 5
characters).
-
Fill the File Name field with
/user/hdp/weblog/apache_code_cnt/part-r-00000.
-
Upon completion of the component settings, press Ctrl+S to save your Job configurations.