Consuming in the data marketplace
All the data products that you have access to via spaces are visible in your Catalog view. To make the certified and trusted data products available more widely to your organization, including analytics consumers, they need to be activated on the Data marketplace.
Activating a data product to the data marketplace
- From the launcher menu
, select Data Integration > Data products.
- Click the data product you want to activate.
- Click Activate.
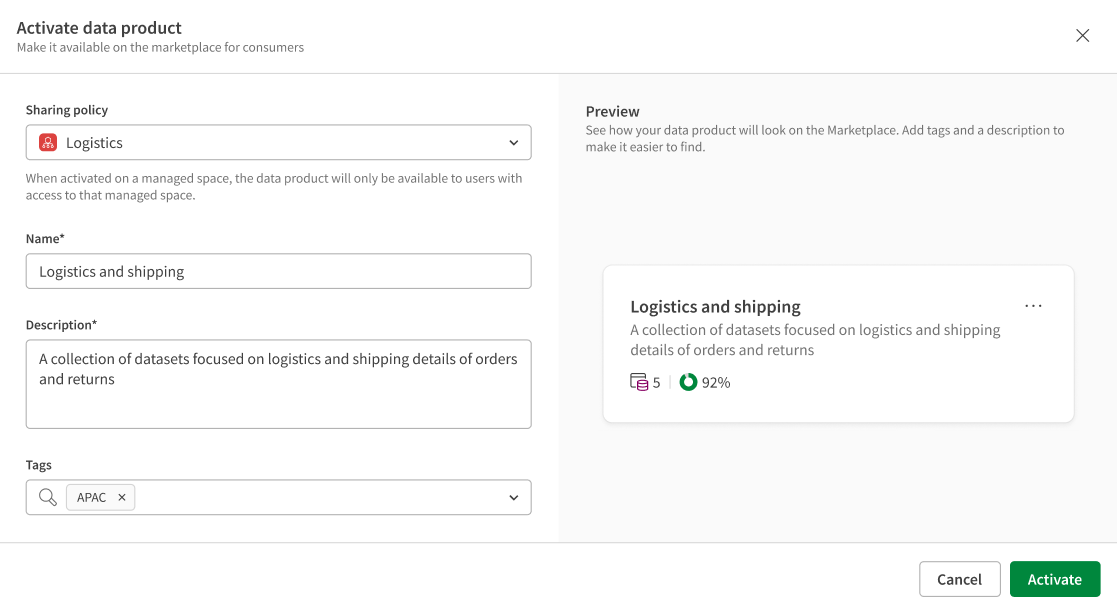
The Activate data product dialog opens

-
From the Sharing policy drop-down list, select a managed space in which the data product will be published.
Activating a data product on the data marketplace actually publishes a copy in the managed space that you select during activation. So all users that are part of this managed space will see the activated data product both in their catalog and in the data marketplace.
-
In the Names, Description, and Tags fields, review or edit the information entered during the data product creation.
-
After looking at the Preview, click Activate.
The data product has now an active version on the data marketplace. As the owner of the data product, you will see in your catalog both the main data product, and the published copy.
When browsing the data marketplace, you will see the main data products in their original spaces.
Deactivating a data product
When you want to update a data product or if it's no longer relevant, you need to deactivate it.
- From Data products, click the data product to deactivate.
- Click the three dots menu icon on the top right of the data product.
- Click Deactivate.
- In the confirmation dialog that opens, click Deactivate again.
Even if your data product has been used as source for one or more analytics apps, you can safely deactivate it and the app will still work.
Updating an active data product
If you want to make changes to an active data product, you have to do so on the original data product. Before doing your modifications, you will have to deactivate the data product.
- From Data products, click the data product to deactivate.
- Deactivate the data product.
- Make the necessary changes in datasets or details of the data product.
- Activate it again.
After reactivating your data product, the changes are now visible by other users of the data marketplace. Any analytics app based on the previous version of the data product will still work, but you will have to create a new app in order to benefit from the latest data.
Consuming a data product
When you have found a data product with the data that corresponds to your needs, you can directly create an analytics app from it or consume it through APIs.
For more information about the API endpoints, see Consuming data products through APIs.
To create an analytics app:
- From the data marketplace, open the data product of your choice.
- Click Consume in > Application on the top right.
The Create app from data product dialog opens.
-
In the corresponding field, enter a Name for app.
-
From the corresponding drop-down list, select in which Space you want to save the app.
-
Add a Description to document the purpose of the app.
-
Add some Tags to the app to make it easier to find.
-
Click Next.
-
Using the corresponding check boxes, select which datasets you want to load into your app, among all the datasets included in your data product, and click Next.
-
Review the summary of the selected data. You can click each individual dataset to get a preview of the fields they contain.
-
Optionally select the Open app check-box to directly view the app once it’s created.
-
Click Load into app.
The analytics app has been created and is empty for now. You can start adding sheets and work on the app. For more information, see Creating analytics and visualizing data.
