Edit Model Types
Finally, object types are associated to custom models, ready to be populated.
Steps
- Begin editing a metamodel.
- Go to the Model Types panel on the right.
- Here you may:
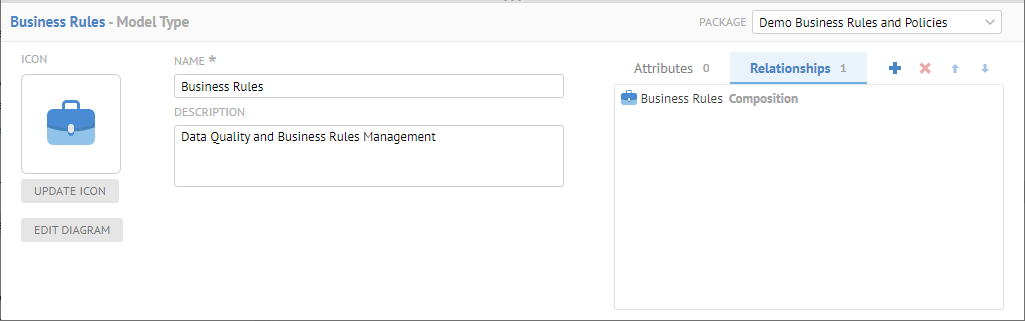
- Click on a Model Type and then edit its properties in the panel at the bottom, including:
- NAME – Name of the model type
The name of any Model Type must be unique in the entire repository. Thus, it behooves you to consider the naming carefully
- DESCRIPTION – Description of the model type
- PACKAGE – Metamodel package that the model type is a member of.
- (Contained) Attributes and Relationships – Widget for adding attribute types and relationships to object types. Click the tab (either Attributes or Relationships) you wish to edit and:
- Click Add to include a new attribute type or relationship
- Click Delete to remove the selected attribute type or relationship.
- Click UPDATE ICON to provide an icon that will be displayed for every instantiated model of this type.
- Click EDIT DIAGRAM to edit the diagram of the model
- Click Add in the header of the Model Types panel to create a new model type
- Click Delete in the header of the Model Types panel to remove the selected model type.
SAVE-ing after deleting a Model Type removes it entirely from the repository. Also, all instantiated model and contained objects will be removed. There is no undo.
Example
Again, we are creating a business organization metamodel where we can define a particular company’s areas of business in a hierarchical fashion (business unit organization chart) and then organize harvested metadata within that structure.
As we were editing earlier, we should already be signed in as Administrator, and at MANAGE > Metamodel, and have already clicked START EDITING.
In the Model Types panel (on the right), click Add.

Enter “Business Policies” in the NAME and click OK.
Click UPDATE ICON and provide something nice.
Click SAVE.
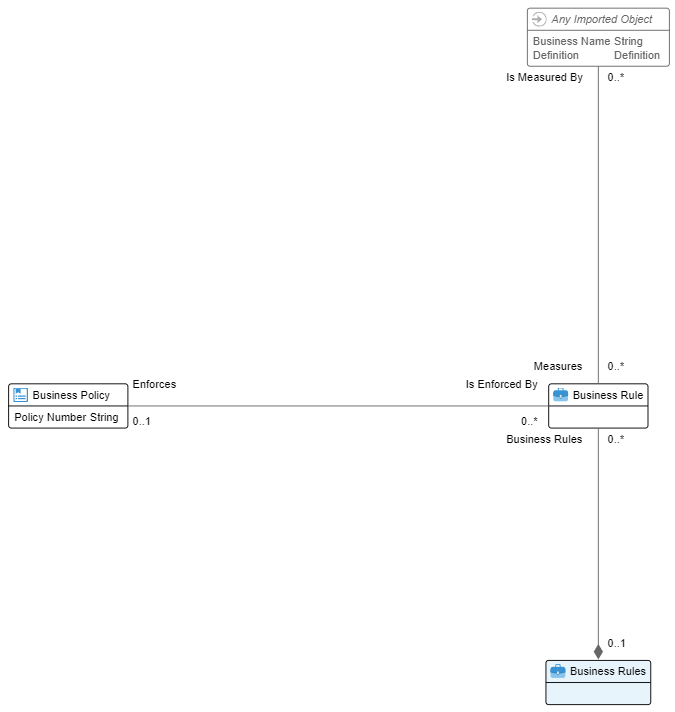
To add object types to the model type, we must include them using relationships.
In this case, we have only one relationship. It is a container relationship between the model and business units.
Go to the Relationships tab above the widget and click  Add.
Add.
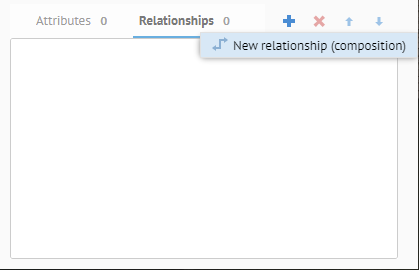
We may only select the composition relationship so that the model will be composed of the objects, in this case Business Policies. As with other composition relationships, the UI will understand that this it should be presented as a hierarchy.
Specify the same object type (Business Unit) as the CHILD OBJCET TYPE and enter “Business Policy” as the GROUP NAME. Specify a CARDINALITY of Many so that we can have more than one business rule at the root and click OK.
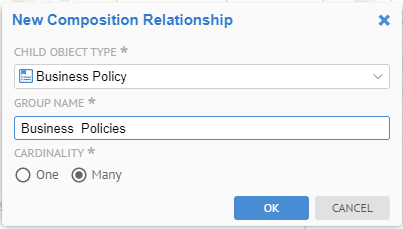
The GROUP NAME will be use as a tab in the object page and may be specified in MQL queries and worksheet filters.
Click SAVE and we have a model type.

Please do the same for a model type named “Business Rules” which contains Business Rules.
Next, click EDIT DIAGRAM to show the diagram and clean it up.