
Centralizing Snowflake metadata
Use the Snowflake metadata wizard to connect to Snowflake and retrieve table schemas.
About this task
The Snowflake metadata wizard does not support Snowflake views.
Procedure
-
In the Repository tree view, expand the
Metadata node, right-click Db
Connections, and click Create connection.

-
In the Create Snowflake dialog box, enter a name for the
connection and click Next.

-
Specify or update the values for the following advanced properties and click
Finish to close the dialog box.

- Login Timeout: specify how long to wait for a response when connecting to Snowflake before returning an error.
- Tracing: select the log level for the Snowflake JDBC driver. If enabled, a standard Java log is generated.
-
Role: enter the default access control role to use to
initiate the Snowflake session.
This role must already exist and has been granted to the user ID you are using to connect to Snowflake. If this field is left empty, the PUBLIC role is automatically granted. For more information about the Snowflake access control model, see Understanding the Access Control Model.
The newly created Snowflake connection is displayed under Snowflake in the Db Connections node in the Repository tree view, along with the schemas of the tables you retrieved. -
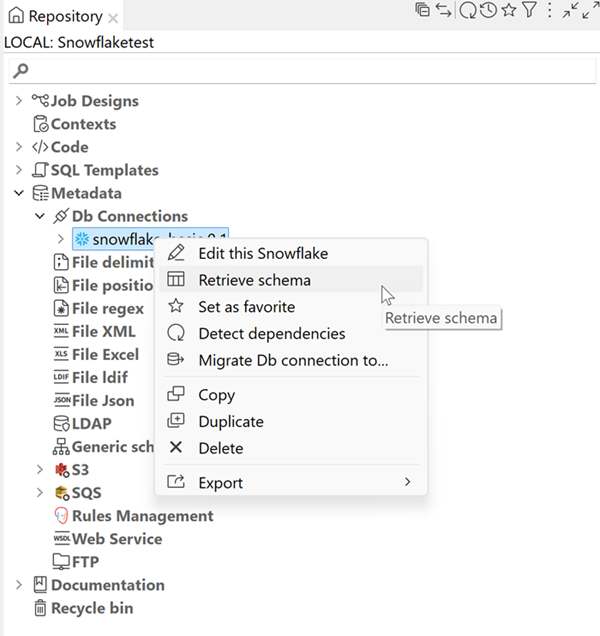
Right-click the Snowflake connection and click Retrieve
schema to select the tables to include.
-
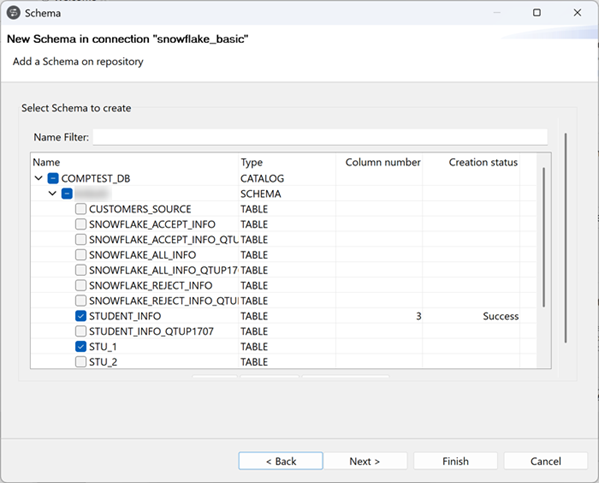
Select the tables whose schema you want to retrieve and click
Next.
-
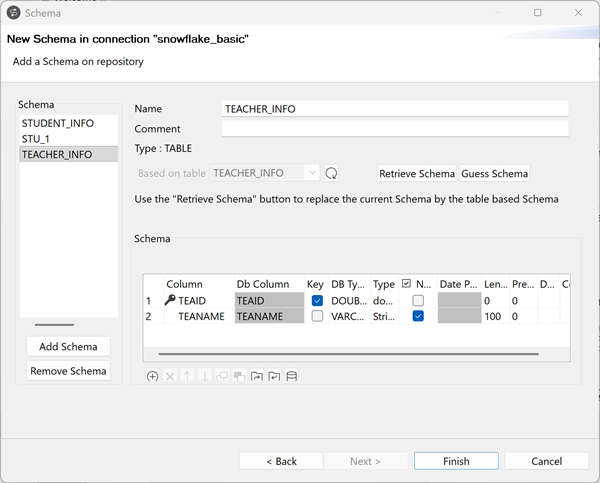
Edit the table schemas and click Finish.
Results
You can add a Snowflake component to the design workspace by dragging and dropping the Snowflake connection or any retrieved table from the Repository view to reuse the connection or schema information. For more information, see Using centralized metadata in a Job and the related Snowflake component documentation.
In the Repository tree view, you can also:
- To modify the connection, right-click the connection node under Db Connections and select Edit this Snowflake from the context menu.
- To edit a table schema, right-click the table node and select Edit Schema from the context menu.