Skip to main content Skip to complementary content

Configuring CDC in AS/400 journal mode

The following configuration steps only need to be set up once for a given publisher/subscriber scenario.

Step 1: Set up a publisher in AS/400 journal mode

About this task

To set up a publisher, you need to:

Procedure

  1. Create a new Job in Talend Studio.
  2. Set a DB connection dedicated to CDC by filling in DB connection data. For example, a connection called AS400_CDC.
  3. Set a DB connection to where data is located by filling in DB connection data. For example, a connection called AS400_DATA.

Results
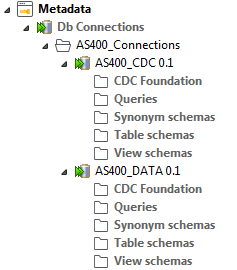
Example of two connections in the Metadata node.

Step 2: Identify the source table in AS/400 journal mode

To identify the table(s) to catch, right-click the newly created data connection to retrieve the schema of the source table and load it in the repository. In this example, this data connection is AS400_DATA.
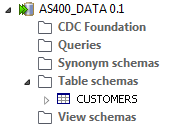
Example of the 'customers' table schema.

Step 3: Create the subscriber(s) table in AS/400 journal mode

About this task

To set the connection between CDC and the data:

Procedure

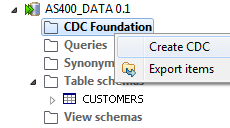
  1. Right-click the CDC Foundation folder of the data connection and select Create CDC to open the Create Change Data Capture dialog box. In this example, this data connection is AS400_DATA.
    Contextual menu of the CDC Foundation node.
  2. In the Create Change Data Capture dialog box, click the [...] button next to the Set Link Connection field to select connection to the database that corresponds to CDC. In this example, select AS400_CDC.
  3. Click Create Subscriber to create the subscribers. Then the command to be executed is displayed.
    In general, this command reads as follows:
    open <AS400_server_host>
                         user <Username> <Password>
                         quote rcmd "crtsavf qgpl/instfitcdc"
                         quote rcmd "clrsavf qgpl/instfitcdc"
                         bin
                         cd qgpl
                         put "<Studio_install>\plugins\org.talend.designer.cdc_<version>\resource\fitcdc.savf" instfitcdc
                         quote rcmd "rstlib savlib(fitcdc) dev(*savf) savf(qgpl/instfitcdc) RSTLIB(<CDC_library_name>)"
                         quote rcmd "CHGCMD CMD(<CDC_library_name>/RUNCDC) PGM(<CDC_library_name>/F2CD00) CURLIB(<CDC_library_name>)"
                         quote rcmd "dltf qgpl/instfitcdc"
                         quit  

    It is automatically executed via FTP by Talend Studio to install the RUNCDC program, restore the CDC library (the CDC database), and create the TSUBSCRIBERS table which provides information on all tables where CDC has been set up.

    The CDC library by default contains the following tables:

    • FITAB: contains the information about the last executions and receivers used in its TBDT1 field.
      • position 1-10: the library of the last receiver of previous run
      • position 11-20: the name of the last receiver of previous run
      • position 21-40: the last date/time process
      • position 41-50: the library of the last receiver of current run
      • position 51-60: the name of the last receiver of current run
    • FICLH: contains the RUNCDC command execution logs and the receivers used.
    • FICLF: contains technical logs about the files used.

    Both FITAB and FICLH tables provide information on the receivers already used by the RUNCDC program, and can help clean up receivers if needed.

    If you extract change data frequently later, there might be an overflow on the NUM_ORD field in the FITAB table when its value reaches 9999999. If it happens or before it happens, you can reset its value by executing the command Change F2CD65 NUM_ORD in FITAB to 0 (zero) and then remove all records in the FICLH, FICLF, FITMP, and FIRCV tables.

    If there is any issue related to the FITAB table after a reboot of your AS/400 system, you might need to reset the value of the NUM_ORD field.

  4. If you need to manually execute the command, copy the command and click Skip to close this dialog box. In this situation, the command is not executed by Talend Studio and you need to paste or even edit the command by yourself and execute it in your AS/400 system.
    Otherwise, click Execute to directly run the default command in Talend Studio. A step-by-step execution list appears.
    Note that on the list, you might read an error with number 550 describing issues such as the fact that not all objects have been restored. This could be normal if the library that was not restored has in fact been restored in your AS/400 system. Contact the administrator of your AS/400 system for clarification.
  5. Once done, in the Create Change Data Capture dialog box, click Finish.
    In the CDC Foundation folder, the CDC database connection appears, along with the subscription table schema.

Step 4: Finalize the subscription in AS/400 journal mode

About this task

You must specify the table to which the subscriber wants to subscribe and then activate the subscription.

Procedure

  1. Right-click the schema that corresponds to the source table and select Add CDC. The Create Subscriber and Execute SQL Script dialog box displays. The long name and the short name of the source table are both displayed in this dialog box.
    Information noteWarning: The source table to be monitored should have a primary key so that the CDC system can identify the lines on which changes have been done. You cannot set up a CDC environment if the schema of your source table does not have a primary key.
    In this example, since the long name CUSTOMERS does not exceed 10 characters, the short name reads the same as the long name.
  2. In the Subscriber Name field, enter the name you want to give the subscriber. By default, the subscriber name is APP1.
  3. Click Execute and then Close.
    In the CDC Foundation folder, the change table schema and the associated view appear. A new record is added to the TSUBSCRIBERS table.
  4. From your AS/400 system:
    1. Create a new receiver:
      CRTJRNRCV JRNRCV(<source_library_name>/<receiver_name>)
    2. Create a new journal and attach the receiver created in the previous step:
      CRTJRN JRN(<source_library_name>/<journal_name>) JRNRCV(<source_library_name>/<receiver_name>)
    3. For the file to be monitored, start journaling changes into the journal created in the previous step:
      STRJRNPF FILE(<source_library_name>/<file_to_be_monitored>) JRN(<source_library_name>/<journal_name>) IMAGES(*BOTH)
    If the sequence number of the journal receiver reaches its maximum value later, you can increase the size of the receiver by executing the command CHGJRN JRN(<Journal_name>) JRNRCV(*GEN) RCVSIZOPT(*MAXOPT3) on your AS/400 system. For more information, see Change Journal (CHGJRN).
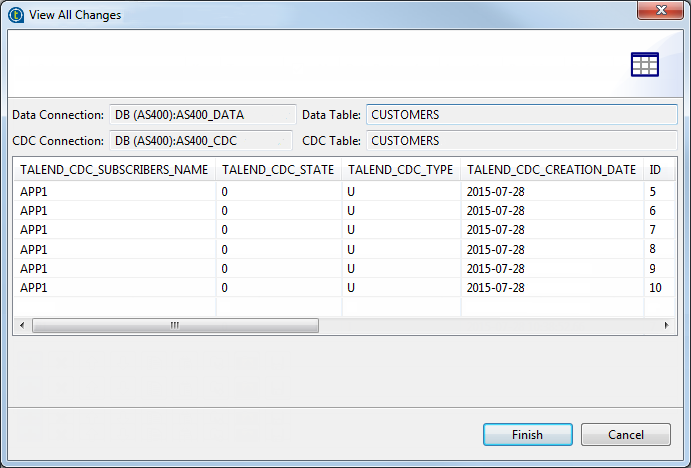
  5. To view any changes made to the data, right-click the relevant table in the Table schemas folder and select View All Changes to open the relevant dialog box.
    Overview of the View All Changes dialog box.
  6. Click Finish to close the dialog box.

Did this page help you?

If you find any issues with this page or its content – a typo, a missing step, or a technical error – please let us know!