Creating a connection to a MongoDB database
- Big Data
- Big Data Platform
- Cloud Big Data
- Cloud Big Data Platform
- Cloud Data Fabric
- Data Fabric
- Real-Time Big Data Platform
Procedure
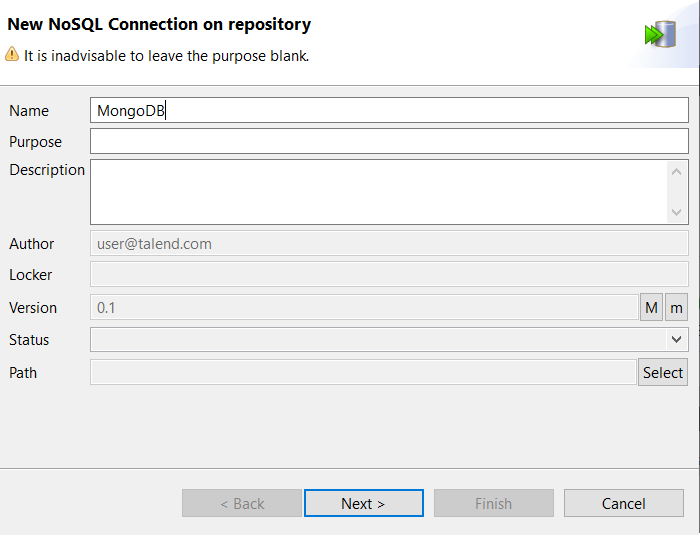
- In the Repository tree view, expand the Metadata node, right-click NoSQL Connection, and select Create Connection from the contextual menu. The connection wizard opens up.
-
In the connection wizard, fill in the general properties of the connection you
need to create, such as Name, Purpose and Description.
The information you fill in the Description field is displayed as a tooltip when you hover over the connection.
 When done, click Next to proceed to the next step.
 -
Select MongoDB from the DB Type list and MongoDB version of the database you are
connecting to from the DB Version list, and
specify the following details:
-
Enter the host name or IP address and the port number of the MongoDB server in the corresponding fields.
If the database you are connecting to is replicated on different hosts of a replica set, select the Use replica set address check box, and specify the host names or IP addresses and the respective ports in the Replica set address table. This can improve data handling reliability and performance.
- If you want to establish a connection using a MongoDB Atlas URI, select the Use connection string check box, and specify the URI in the field.
-
If you want to restrict your MongoDB connection to a particular database only, enter the database name in the Database field.
If you leave this field blank, the wizard will list the collections of all the existing databases on the connected server when you retrieve schemas.
-
If your MongoDB server requires authentication for database access, select the Require authentication check box and provide your username and password in the corresponding fields.
- Among the mechanisms listed from the Authentication mechanism drop-down list, the NEGOTIATE one is recommended if you are not using Kerberos, because it automatically select the authentication mechanism the most adapted to the MongoDB version you are using. For more information about the other mechanisms in this list, see MongoDB Authentication from the MongoDB documentation.
- Because the SCRAM-SHA-256 authentication mechanism is only supported by MongoDB 4.x and later versions, SCRAM-SHA-256 SASL option is available only when MongoDB 4.4.X and later is selected from the DB Version drop-down list.
- If the username to be used to connect to MongoDB has been created in a specific Authentication database of MongoDB, select the Set Authentication database check box to enter the name of this Authentication database in the Authentication database field that is displayed. For more information about the MongoDB Authentication database, see User Authentication database.
- The X509 option from the
Authentication mechanism drop-down list allows
you to authenticate using X.509 certificates. You can also select the
Use certificate authority check box to use a CA
certificate.Information noteNote: The X509 option is available only when you have installed the R2022-02 Talend Studio Monthly update or a later one delivered by Talend. For more information, check with your administrator.
- If you must use an SSL connection to connect to your MongoDB server, you can select the Enable SSL (using preference setup) check box to use the centralized connection information. Then make sure that you configured this connection in Window > Preferences > Talend > SSL and restart Talend Studio to activate it.
-
- Click the Check button to make sure that the connection works.
-
Click Finish to validate the settings.
The newly created MongoDB database connection appears under the NoSQL Connection node in the Repository tree view. You can now drop it onto your design workspace as a MongoDB component, but you still need to define the schema information where needed.Next, you need to retrieve one or more schemas of interest for your connection.
Did this page help you?
If you find any issues with this page or its content – a typo, a missing step, or a technical error – please let us know!
