Skip to main content Skip to complementary content

Creating the database connection

Before you proceed to analyze customer data, stored in the MySQL database in this example, you must first set up the connection to the database.

Before you begin

  • You have opened the Profiling perspective in the Studio.

  • You have created a column analysis and opened the analysis editor. For further information, see Defining a column analysis.

  • You have imported the gettingstarted.sql file which holds the customer data into a MySQL database to which you have access. For further information, see Setting up input customer data for the service.

Procedure

  1. In the analysis editor, click the New Connection tab to open the Create New Connection wizard.
  2. From the Connection Type list, select DB connections and click Next.
  3. Click Finish to create the database connection, list it under the Metadata node and open a new step in the wizard.
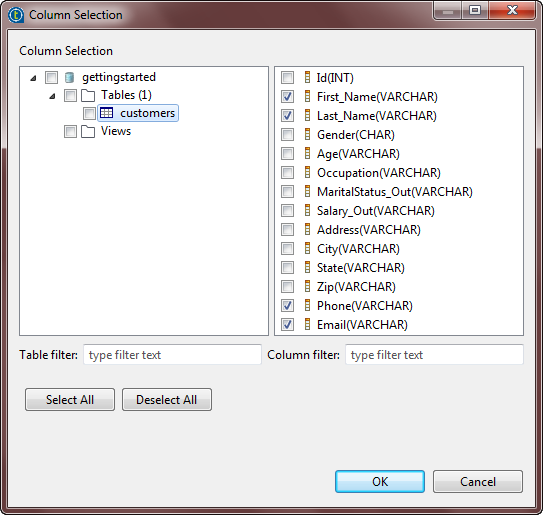
  4. Expand the database connection, click on the table name and select the check boxes of the columns on which you want to create the analysis.
  5. Click OK to close the wizard and list the columns in the analysis editor.

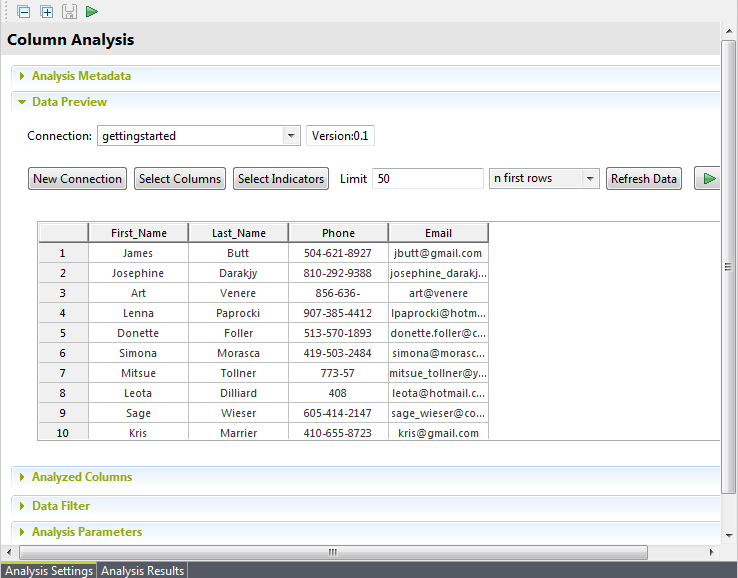
    You can click Refresh Data to display the actual data in the analysis editor.

Did this page help you?

If you find any issues with this page or its content – a typo, a missing step, or a technical error – please let us know!