Running the Azure DevOps pipeline
When you create your azure-pipelines.yml configuration file for the first time, your pipeline is automatically built when you save your changes.
You have the possibility to run it manually or trigger the build based on changes made to your project. By default, there is no build trigger in the script provided by Talend but you can change the trigger parameter value to master if you want to automatically trigger a build whenever a commit is made on the master branch of your project for example.
Procedure
- Go to .
- Either click Queue to queue another build with the same parameters or Edit to update the azure-pipelines.yml and run a build to take these changes into account.
Results
The pipeline is launched and your project is being processed according to the Maven phases that have been defined in your script. The best practice is to use the deploy phase in order to generate the source code, compile it, test it, package it and then deploy the packages.
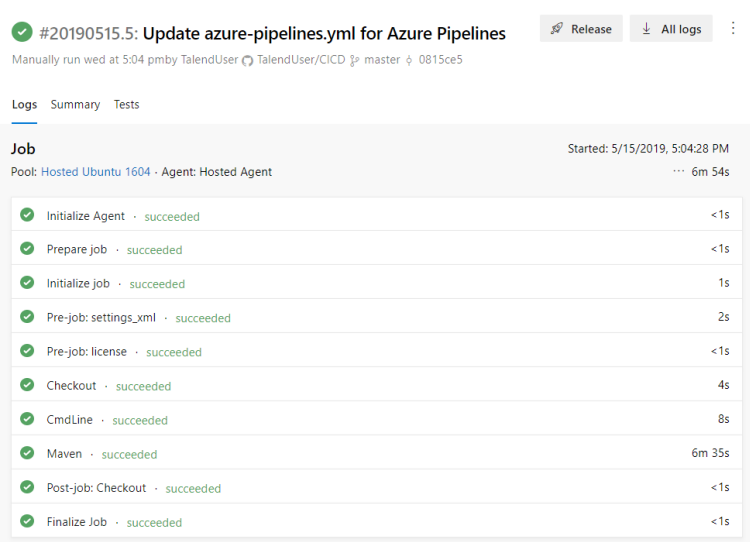
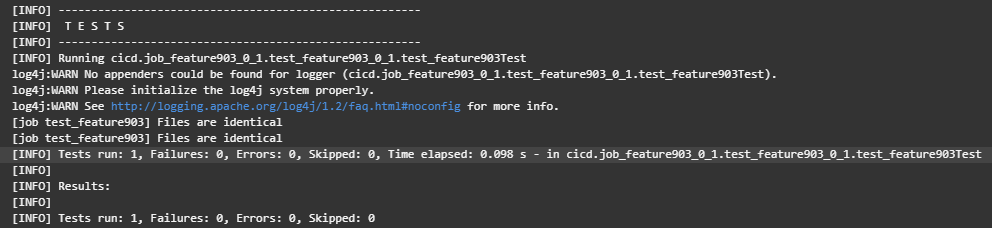
You can see their results displayed:
- in the Azure DevOps pipeline detailed view: the detail of your results can be found in the
logs that you can display by clicking the Maven
step.Example where you can see the successful execution of the test named test_feature903:
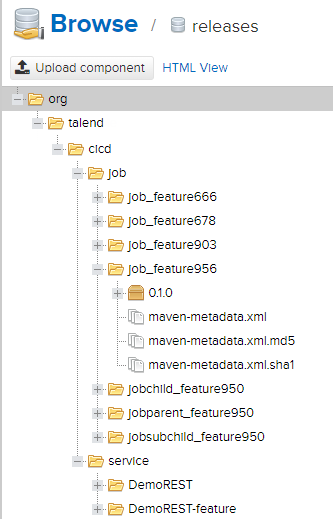
- in your Nexus web application or Artifactory: example of Jobs and Services artifacts with
version 0.1.0 deployed in the
releases repository with an
org.talend.cicd Group ID:
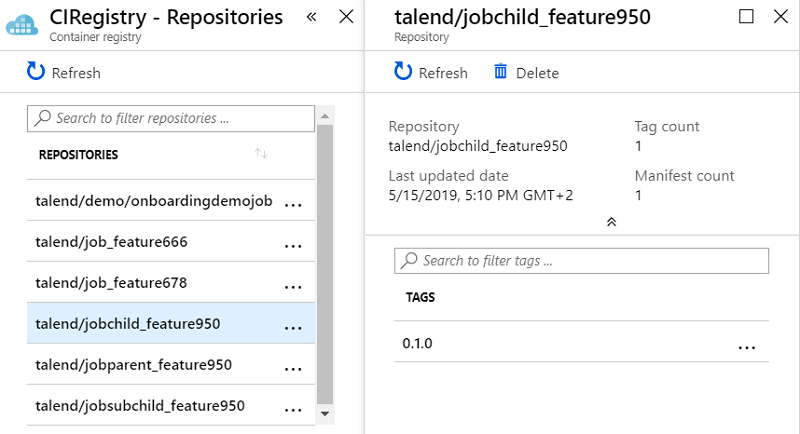
- in your Docker registry: example of artifacts with version 0.1 pushed
in an Azure Docker registry called CIRegistry: