
You can define custom properties for your visualization extension. Qlik Sense automatically adds them to the properties panel and takes care of persistence. You then find the selected values in the layout parameter.
For every property, you define a JavaScript object with different fields depending on what custom property type you are defining.
The following UI components can be used to display your custom properties in the properties panel:
- Button
- Button group
- Check box
- Color-picker
- Drop down list
- Input box / text box
- Link
- Media
- Radio button
- Range slider
- Slider
- Switch
- Text
- Text area
These can be grouped into sections and headers in the properties panel. Each of them exposes different configuration options to manipulate their behavior.
Defining custom properties for more details on each component.
Improving the maintainability of properties
If you have a lot of different properties defined in the main JavaScript file, you will soon realize that the size of the script file may become quite large and it may be hard to read and maintain. There are different approaches for this:
- Split the definition into several JavaScript variables.
- Create a separate JavaScript file for the definition of your properties and load this file in your visualization extension's main script file.
Defining properties in a separate JavaScript file
This section shows how to define your properties in a separate JavaScript file. We start out with the following code defined in your main script file.
define( [
		'jquery'
	],
	function ( $ ) {
		'use strict';

		return {

			// Define what the properties panel looks like
			definition: {
				type: "items",
				component: "accordion",
				items: {
					dimensions: {
						uses: "dimensions"
					},
					measures: {
						uses: "measures"
					},
					appearance: {
						uses: "settings",
					}
				}
			},
			// Paint/Rendering logic
			paint: function ( $element, layout ) {
			// Main rendering logic goes here
			}
		};
	} );
Create a file and name it properties.js. Save it to the same folder as your main files of the visualization extension are located. The new properties.js file should look like this:
define( [], function () {
	'use strict';
	// *****************************************************************************
	// Dimensions & Measures
	// *****************************************************************************
	var dimensions = {
		uses: "dimensions",
		min: 0,
		max: 1
	};
	var measures = {
		uses: "measures",
		min: 0,
		max: 1
	};
	// *****************************************************************************
	// Appearance section
	// *****************************************************************************
	var appearanceSection = {
		uses: "settings"
	};
	// *****************************************************************************
	// Main properties panel definition
	// Only what is defined here is returned from properties.js
	// *****************************************************************************
	return {
		type: "items",
		component: "accordion",
		items: {
			dimensions: dimensions,
			measures: measures,
			appearance: appearanceSection
		}
	};
});
Then you need to load the external definition of properties into your main script file and assign the properties definition.
define( [
		// Load properties.js using requireJS
		// Note: if you load .js files, omit the file extension
		// otherwise requireJS will not load it correctly
		'./properties'
	],
	function ( props ) {
		'use strict';
		return {
			definition: props,
			// Paint/Rendering logic
			paint: function ( $element, layout ) {
			// Main rendering logic goes here
			}
		};
	} );
Adding a basic custom property
In this section you will define the most basic but one of the more common components, a text box.
	// Text box definition
	var myTextBox = {
		ref: "props.myTextBox",
		label: "My text box",
		type: "string"
	};
In the definition of all UI components, there are common properties that can be set.
type
Used for all custom property type definitions. Can be string, integer, number or boolean.
ref
Name or ID used to reference a property.
label
Used for defining the label that is displayed in the properties panel.
component
Used for defining how the property is visualized in the properties panel.
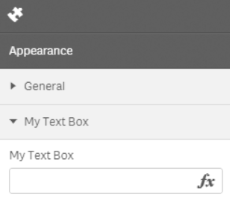
Adding the component definition to the properties panel
In this section you will add the newly created string based text box to the Appearance section.
	// Appearance section
	var appearanceSection = {
		uses: "settings"
	};
	// Main properties panel definition
	// Only what is defined here is returned from properties.js
	return {
		type: "items",
		component: "accordion",
		items: {
			appearance: appearanceSection
		}
}; var myTextBox = {
ref: "props.myTextBox",
label: "My text box",
type: "string"
};
// Appearance section
var appearanceSection = {
uses: "settings",
items: {
myTextBox: myTextBox
}
};
// Main properties panel definition
// Only what is defined here is returned from properties.js
return {
type: "items",
component: "accordion",
items: {
appearance: appearanceSection
}
};
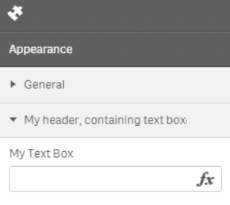
Adding a custom section header
In the previous example you added a text box within a new section. The section header was automatically reusing the label of the component. In this section you will add a custom section header. To do so, you create a new header (myNewHeader in the example below) into the existing Appearance section and then you add the items there:
var appearanceSection = {
    uses: "settings",
    items: {
        // Definition of the custom section header
        myNewHeader: {
            type: "items",
            label: "My header, containing text box",
            items: {
                myTextBox: myTextBox
            }
        }
    }
};

// NOTHING CHANGED HERE ...
// Return overall definition of the property accordion
return {
    type: "items",
    component: "accordion",
    items: {
        appearance: appearanceSection
    }
};
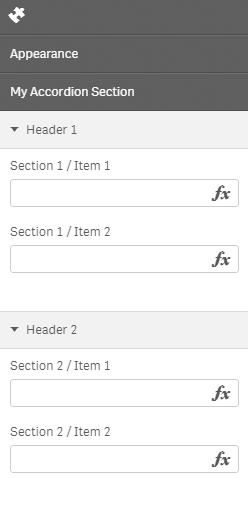
Adding a custom section
You can also create completely new accordion sections.
// Some components
var header1_item1 = {
    ref: "props.section1.item1",
    label: "Section 1 / Item 1",
    type: "string",
    expression: "optional"
};

...
...

// Define a custom section
myCustomSection = {
    // not necessary to define the type, component "expandable-items" will automatically
    // default to "items"
    // type: "items"
    component: "expandable-items",
    label: "My Accordion Section",
    items: {
        header1: {
            type: "items",
            label: "Header 1",
            items: {
                header1_item1: header1_item1,
                header1_item2: header1_item2
            }
        },
        header2: {
            type: "items",
            label: "Header 2",
            items: {
                header2_item1: header2_item1,
                header2_item2: header2_item2
            }
        }

    }
}
The key in the code above is that you add the component expandable-items. The rest of the code works as in the previous examples.
return {
    type: "items",
    component: "accordion",
    items: {
        appearance: appearanceSection,
        customSection: myCustomSection
    	 }
    };
});
Displaying and persisting custom properties
Once you have defined the custom properties, Qlik Sense takes care of the rest, as:
- Displaying the custom properties together with the built-in properties
- Persistence of property values. If the value of a property is changed, you do not have to take care of persisting, that is saving and loading, the property value.
Referencing property values
Referencing property values of custom properties are similar to referencing values from built-in properties, but with one exception. By using ref, you can define how the property values is exposed in the object tree. This principle applies to all custom property items.
Examples:
var myTextBox = {
    ref: "myTextBox",
    ...
};console.log( layout.myTextBox );var myTextBox = {
ref: "prop.myTextBox",
...
};console.log( layout.prop.myTextBox );