
Backing up certificates
To be able to recover from a system crash, you should create a backup of the certificates on the central node of your Qlik Sense site.
Do the following:
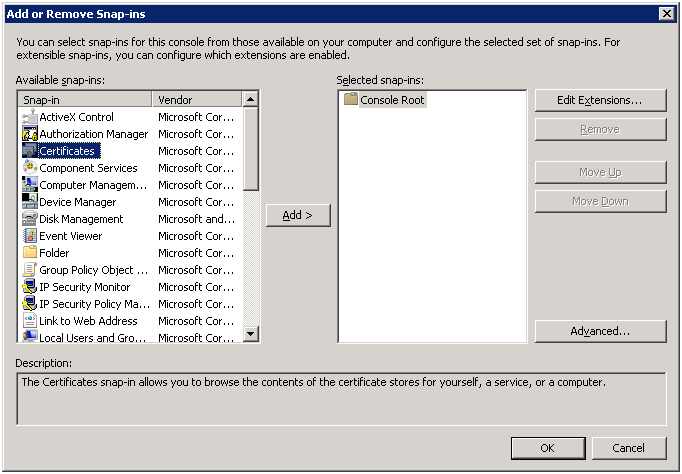
- From the Windows start menu, type mmc to find the Microsoft Management Console (mmc) . Launch the mmc as the user that runs the Qlik Sense services.
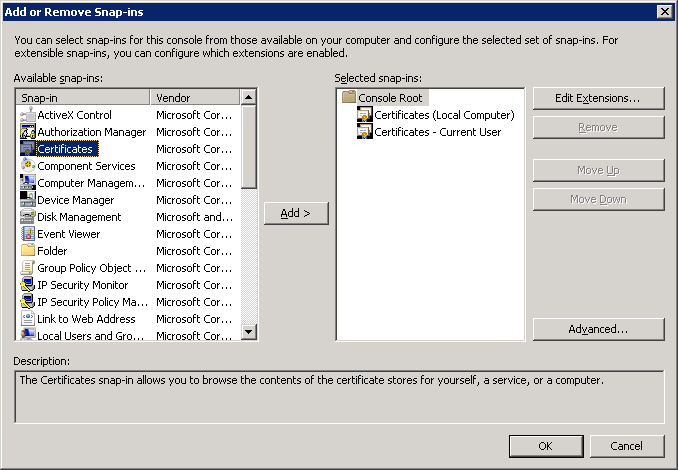
- Select File>Add/Remove Snap-in.
- Double-click Certificates.
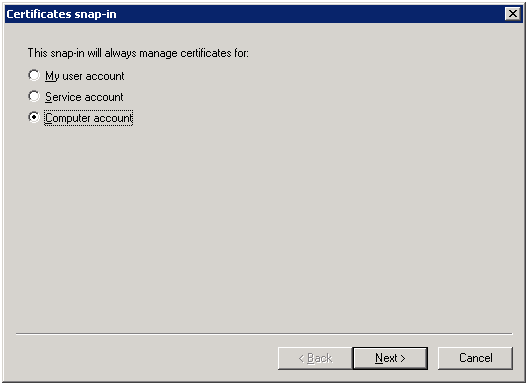
- Select Computer account, then click Next.
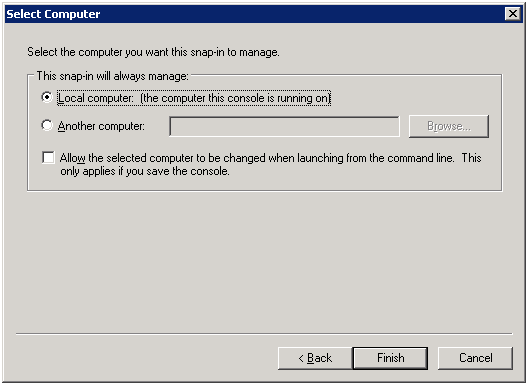
- Select Local computer, then click Finish.
- Double-click Certificates.
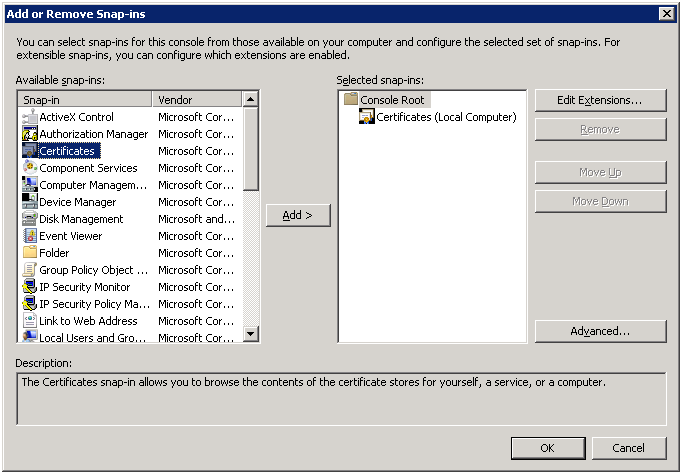
- Select My user account and click Finish.
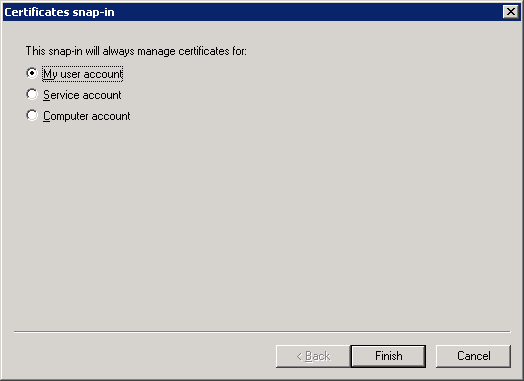
- Click OK.
-
Complete this step for each of the following certificates:
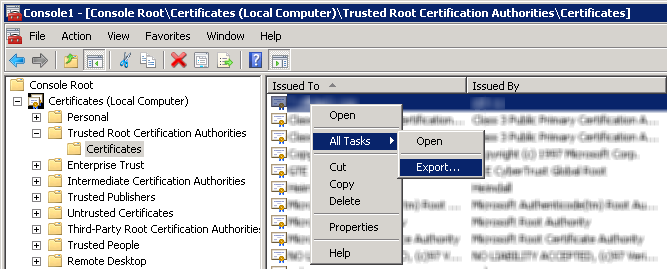
Certificate Location Issued to Issued by certificate authority Certificates (Local Computer) > Trusted Root Certification Authority > Certificates <server-name>-CA <server-name>-CA server certificate Certificates (Local Computer) > Personal > Certificates <server-name> <server-name>-CA client certificate Certificates (Current User) > Personal > Certificates QlikClient <server-name>-CA QlikServiceCluster certificate Certificates (Local Computer) > Personal > Certificates QlikServiceCluster <server-name>-CA -
Expand the certificate location for the certificate you want to export.
Tip noteFor example, to export the Certificate Authority, expand Certificates (Local Computer) > Trusted Root Certification Authority > Certificates. -
Right-click the certificate you want to export, then select All Tasks>Export.
-
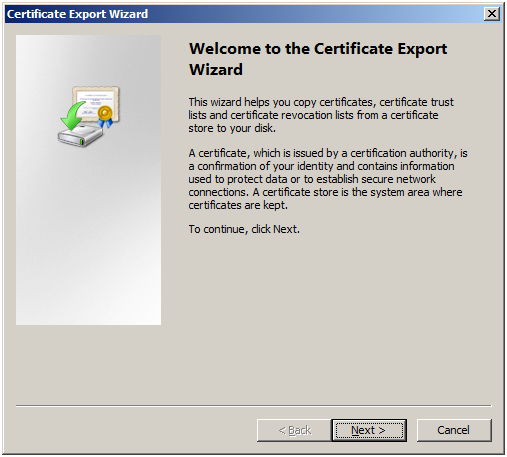
Click Next.
-
Select Yes, export the private key, then click Next.
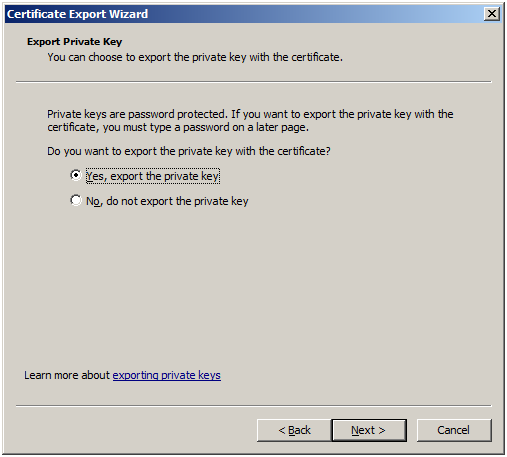
- Select Personal Information Exchange.
-
Check the Export all extended properties box, then click Next.

-
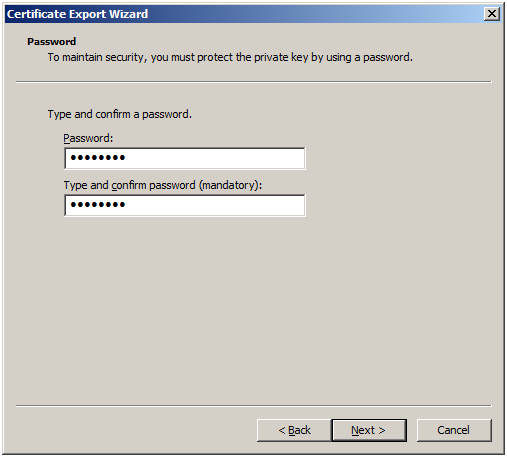
Enter and confirm a password, then click Next. You may need to check the Password box before entering your password, depending on the Windows Server version.
The password is needed when importing the certificate.
-
Enter a file name for the .pfx file, then click Next.
Tip noteWe recommend to include the server name in the file name to avoid confusion with other certificate files.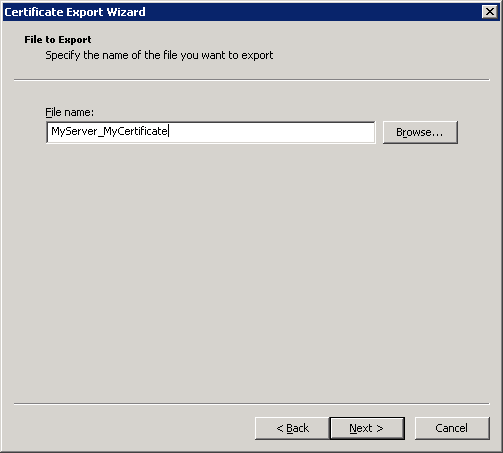
-
Click Finish.
The .pfx file that contains the CA for all nodes in the Qlik Sense site is stored in the selected location.
Information noteMake sure to complete this step for each certificate. -
-
Close the MMC console.
Information noteYou do not need to save these changes before closing.