Configuring the Bot Channel Service
The Bot Channel Service is disabled by default. To enable it, you must configure a parameter in the services.config file.
Setting up user configuration for Bot Channel Service
-
Log on to your Qlik Sense Enterprise on Windows server.
-
Navigate to %ProgramFiles%\Qlik\Sense\BotChannelService\install.
-
Run the ChannelConfig.bat file.
When you run the batch file (.bat), you are prompted to enter the relevant chat bot parameters:
Parameter Mandatory Default value Description microsoftAppId Yes The Microsoft App ID generated when you created the Azure Web App Bot. microsoftAppPassword Yes The Microsoft App password generated when you created your Azure Web App Bot. slackBotToken No N/A The Bot User OAuth Token generated when you created your Slack app. Leave empty if you do not want to connect Slack. qlikRootUserId Yes The user's Qlik Sense user ID. It is listed under Users in the QMC. qlikRootUserDir Yes The user directory that the user comes from. It is listed under Users in the QMC. virtualProxyPrefix Yes The virtual proxy prefix from when you created the Qlik Sense virtual proxy. externalURL No N/A The Qlik Sense public URL. The URL can include the virtual proxy prefix, for example: insight.qlik.com/{vp_prefix}.
Information noteDo not add the HTTPS to the URL.disableParsingInfo No N Y if you want to disable parsing information. emailInAttribute No Y N if the user email is available in the Name or User ID property.
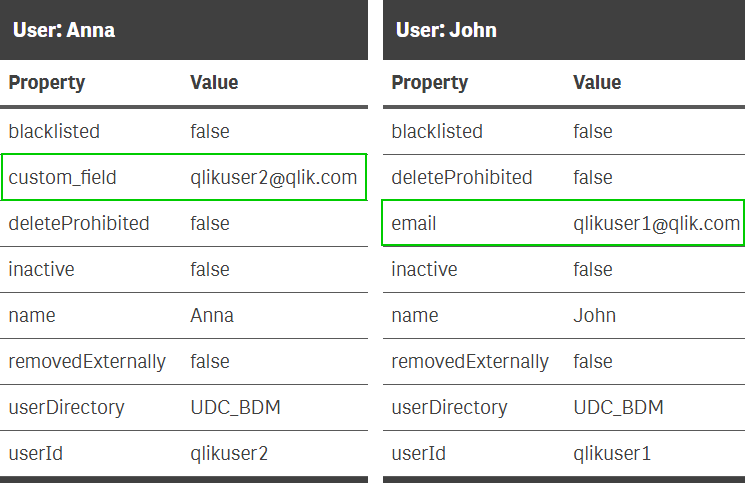
For example, in the image below, the email for John is in UserID and the email for Anna is in Name.

Y if the email address is defined in a different property.
emailPropertyName No email If you entered N for emailInAttribute, enter name or userid to specify in which property the email is located.
If you entered Y for emailInAttribute, specify the property name used for the email address. If you do not specify a property name, the default value is used.
For example, the email address for Anna is in a custom property custom_field. The email for John is in the default property email.
 Information noteYou see a configuration successful message when complete. If you receive an error message, run the bat file again.
Enabling the chat bot service
Do the following:
-
Navigate to %ProgramFiles%\Qlik\Sense\ServiceDispatcher\.
-
Open the services.config file in a text editor.
-
Locate the bot-channel-service section, then comment out the disabled=true parameter. It should look like the following example:
[bot-channel-service] //Disabled=true Identity=Qlik.bot-channel-service DisplayName=Bot Channel Service ExePath=Node\node.exe Script=..\BotChannelService\index.js -
Save the file.
-
Restart the Qlik Sense Service Dispatcher.
-
Open Insight Advisor Chat by clicking on the Ask Insight Advisor button.

-
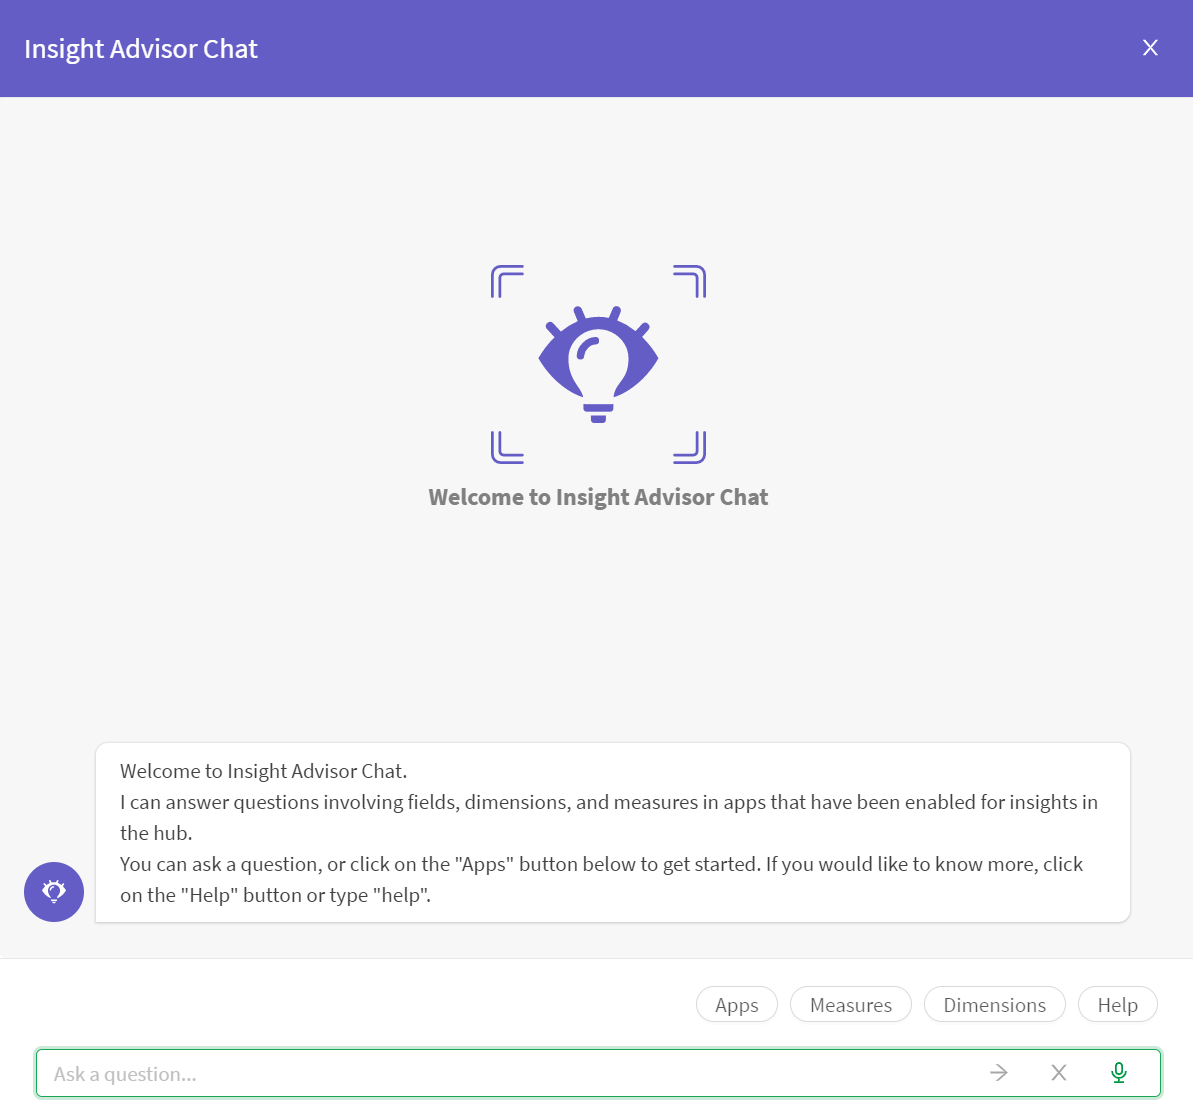
Verify that the chat feature opens to the following window.
 Information noteIf it is not working, verify that you have correctly set up the security rules in the QMC. See Configuring Qlik Insight Advisor Chat in Qlik Sense Enterprise on Windows for more information.
 -
Restart the Qlik Sense Proxy Service.
Resource utilization in a multi-node deployment
A multi-node deployment consists of a central node and one or more rim nodes. When deploying Insight Advisor Chat in a multi-node deployment, the NLP runtime stack (nl-parser, nl-broker, nl-app-search, data-prep) is part of the service dispatcher which is deployed on each node in a multi-node site.
Requests that are going through Insight Advisor Chat on the central node are handled by the NLP runtime stack that is deployed on the central node. Requests that happen on a rim node are handled by the NLP stack that is running on that same rim node. There are no load balancing rules for the NLP runtime stack and if any part of the NLP stack is disabled on a node, then requests coming through Insight Advisor Chat on that node will fail.
