
This chapter discusses the architectural and installation requirements and options for building a clustered and resilient QlikView Server deployment.
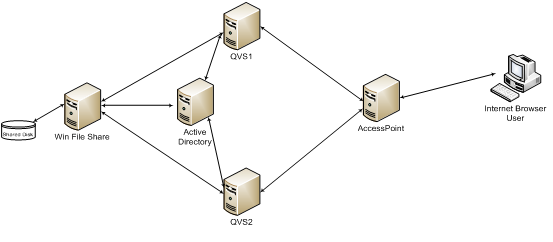
The following figure shows a clustered, load balanced QlikView Server deployment.
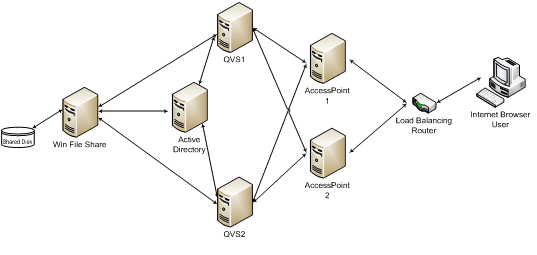
The following figure shows a resilient, clustered, load balanced QlikView Server deployment that uses AccessPoint load balancing.
The QlikView Server load balancing capabilities are included in the QlikView web portal, AccessPoint. This chapter also discusses how to make this component resilient using network load balancing (if needed).
Why Cluster QlikView Servers?
By clustering QlikView Servers, the objectives described below can be achieved.
Horizontal User Scalability
If more resources than can be provided by a single QlikView Server are needed, an additional server can be added. For example, if the server can support 100 concurrent users, but 200 concurrent users have to be supported, an additional server can be added. In this scenario, the first 100 users could be allocated to server A and the second 100 users to server B. Alternatively, the servers could be clustered so that you set resilience.
Resilience
When the number of users increases, so does the users’ reliance on QlikView. By clustering the QlikView Servers, resilience can be built into the deployment. In the case above, where a single server can support 100 users, three servers could be used to build resilience into the deployment. This would allow one server to be lost (for example, because of hardware failure) with the system still capable of supporting 200 users. Having all three servers as active nodes helps reduce the response times by not running all servers at 100% of their capacity. This also limits the number of users affected if a node is lost.
QlikView does not provide any session recovery. In practice, this means that if a node in the QlikView cluster is lost, the users lose the analysis they are currently performing. They will have to reconnect to the cluster to resume their work. This does not mean that the data within the QlikView application is lost and needs to be reloaded, because the data is stored in the QlikView document file on the file system. Only the selections made in the application are lost.
Load balancing
A QlikView deployment uses a load-balancing algorithm to take advantage of the full capacity of all the machines in a QVS clusters. The web server running the AccessPoint determines which QVS to use. There are three options for how to load balance your QVS. See: QVS Load Balancing Options.
Requirements for Clustered QlikView Deployment
There are three high-level requirements for building a clustered QlikView deployment:
- Clustered QlikView Server license key
- Shared storage area for Root folder
- Same build number
Clustered QlikView Server License Key
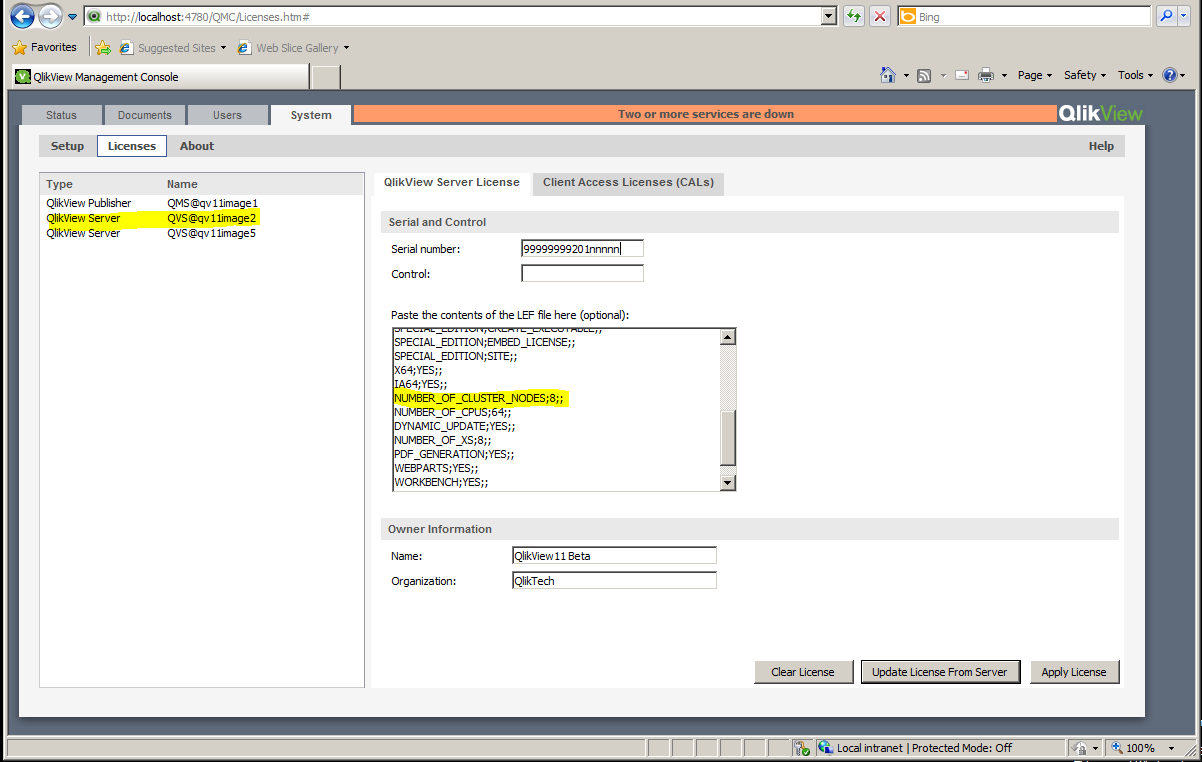
In a clustered environment, the QlikView Server machines are installed with the same license key, which must be enabled for clustering. This can be checked confirmed by examining the following entry in the License Enabler File (LEF):
NUMBER_OF_CLUSTER_NODES; 2 (number of nodes in the cluster)
Clustered QlikView Servers share configuration and license information between themselves via the shared storage, so that configuration and license management only needs to be performed once from the QlikView Management Console (QMC) for all nodes.
The servers must be installed on the same network subnet and have a shared root document directory; hence the requirement for a shared network storage. The configuration information is stored in Persistent Global Objects (.pgo) files.
If the servers fail to start or reset after ten minutes, check for the LEF entry above. This is usually an indication that QlikView Server is installed on more machines than allowed.
Shared Network Storage
In QlikView shared network storage is required for storing QlikView documents that need to be accessed in a QlikView Server cluster. A shared network storage is also used for storing .pgo (Persistent Global Objects) files, .meta files, and shared files (.Shared or .TShared). Configuring a shared network storage enables collaborative objects to be shared across the nodes in the cluster (using shared files).
The requirements for a shared network storage in QlikView Server are the following:
- The network storage must be hosted on a Windows-based file share.
- QlikView Server (QVS) supports the use of a SAN (NetApp, EMC, etc.) mounted to a Windows Server 2008 R2 (or later) and then shared from that server.
- The QlikView Server nodes in the cluster must have network latency below 4 milliseconds to connect to the file share server. Performance can degrade if this is not the case.
- The bandwidth to the file share must be appropriate for the amount of traffic on the site. The frequency and size of the documents being saved after reloading, and opened into memory, drives this requirement. 1 Gigabit networking is suggested.
- The following shared storage options are not supported:
- Shared storage systems based on Linux OS are not supported. This includes systems supporting SMB file sharing protocol or NTFS disk drive format .
- Windows-based shared storage systems that rely on CIFS file sharing protocol are not supported.
- QlikView does not support Windows Distributed File System (DFS).
Information note Hosting files on any type of unsupported system may create an unstable QVS cluster where CALs disappear and QVSs stall.
Although not strictly required, it is also good practice to :
- Set an alternate path for temporary files to a common shared folder reachable by all QlikView Servers in the cluster.
- If extensions are used, set the alternate extension path to a common shared folder.
- Set the log folder to a common shared folder.
QVS Load Balancing Options
QVS supports three load balancing strategies:
- Random (default setting): A round robin type strategy ideal for most users, since the session is distributed across all nodes in the cluster.
- Loaded document: Used when sessions for the same document are to be routed to the same server. This strategy is designed for deployments where there are more documents than a single node in the cluster can handle. AccessPoint makes the decision based on if the document is already loaded and on the amount of RAM available on the server.
- CPU with RAM overload allows QlikView Web Server (QVWS) to route traffic based on two factors, (1) RAM and (2) CPU use. The node is chosen using the following criteria:
- If RAM is readily available (low) on all available nodes, choose the node with the lowest CPU use.
- If RAM is moderately used on all available nodes, choose the node with the most RAM available.
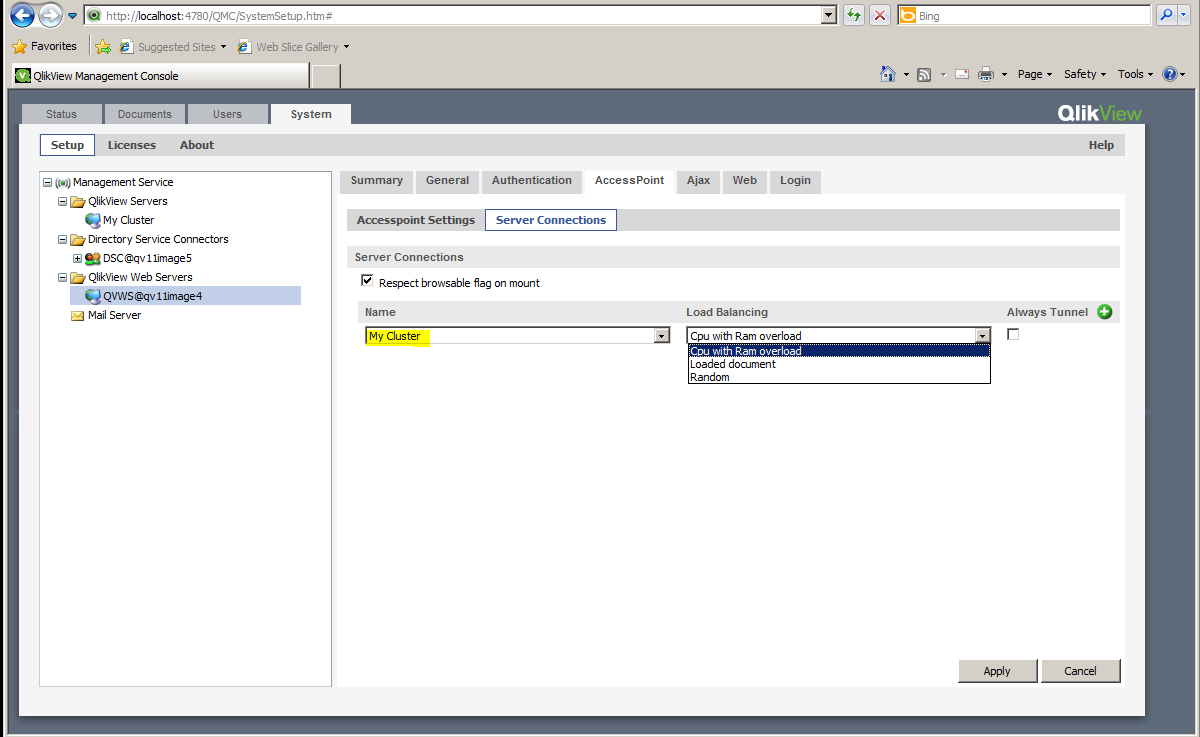
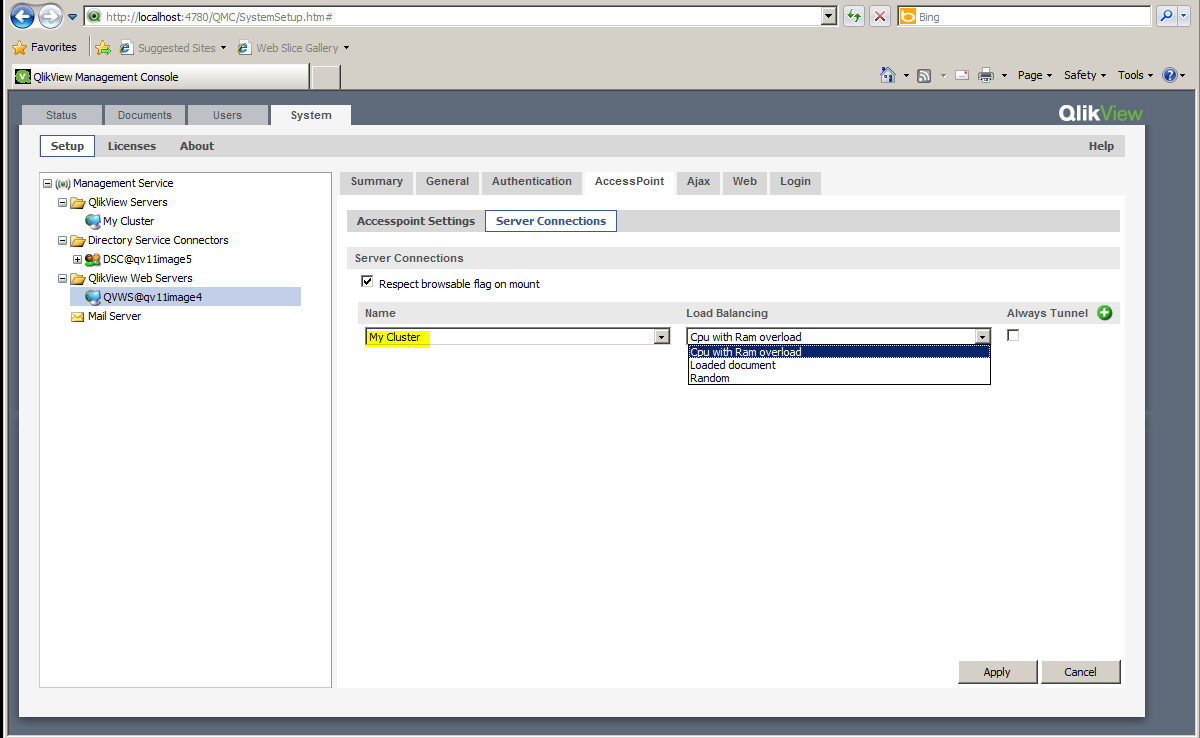
The QVS load balancing strategy can be set in the QMC under System>Setup>QlikView Web Servers. Select the web server on the AccessPoint tab:
Load Balancing the Web Server
The network load balancer provides the resilience for AccessPoint, routing the sessions to an available AccessPoint server. This is done by third-party software and hardware.
There are several requirements on the load balancer:
- Support for session persistence / sticky sessions: This ensures a user's session persists on the same node within the cluster, usually by using a cookie.
- Availability: The load balancer checks the availability of the AccessPoint web server and the QlikView servers.
- Some form of load balancing algorithm to determine which server is the least loaded.
Session Persistence
The requirement is for the user’s session to be routed consistently to the same server. Methods for doing this vary from device to device – refer to the load balancer documentation for information on the options available.
Availability Checking
A special web page on the AccessPoint provides automated checking of the system status:
http://myAccessPoint/QvAjaxZfc/QvsStatus.aspx
This page returns an http status code of 200, if the AccessPoint and at least one QlikView Server in the cluster respond. Any other status code returned by this page should be considered an error. Common errors from this page include:
- 404: The AccessPoint is unable to respond. Check the web server.
- 503: No QlikView Servers responded to the AccessPoint and therefore it cannot service user requests.
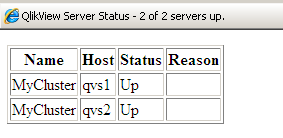
The status of the QlikView Server cluster is also displayed on the web page:
Building and Installing a QlikView Cluster
Proceed as follows to configure and activate a QlikView Server cluster using the QMC:
- Install and license the first QlikView Server in the cluster. This will be the first copy of QlikView Server.
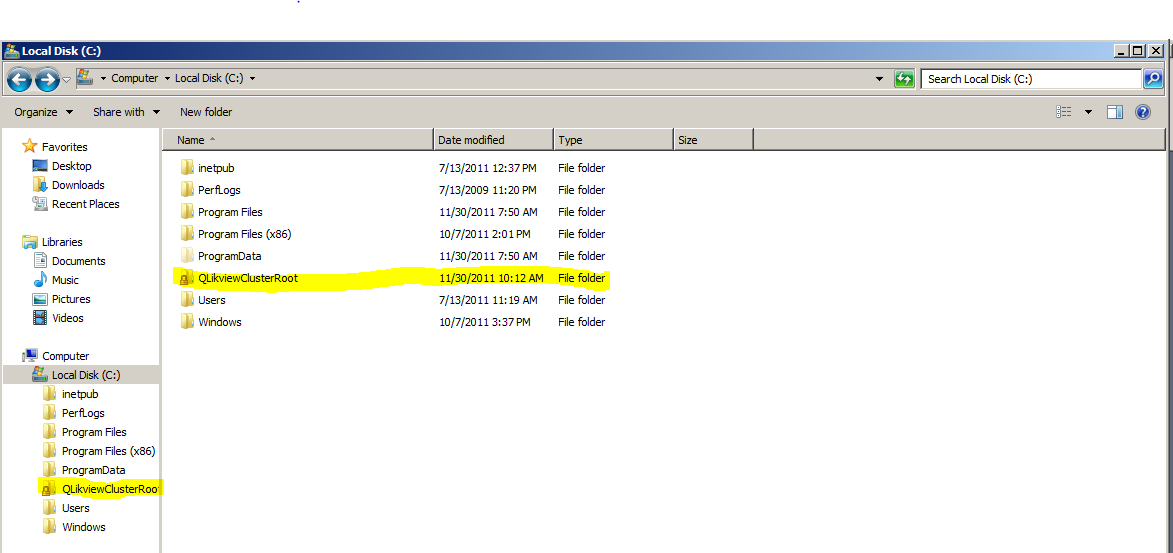
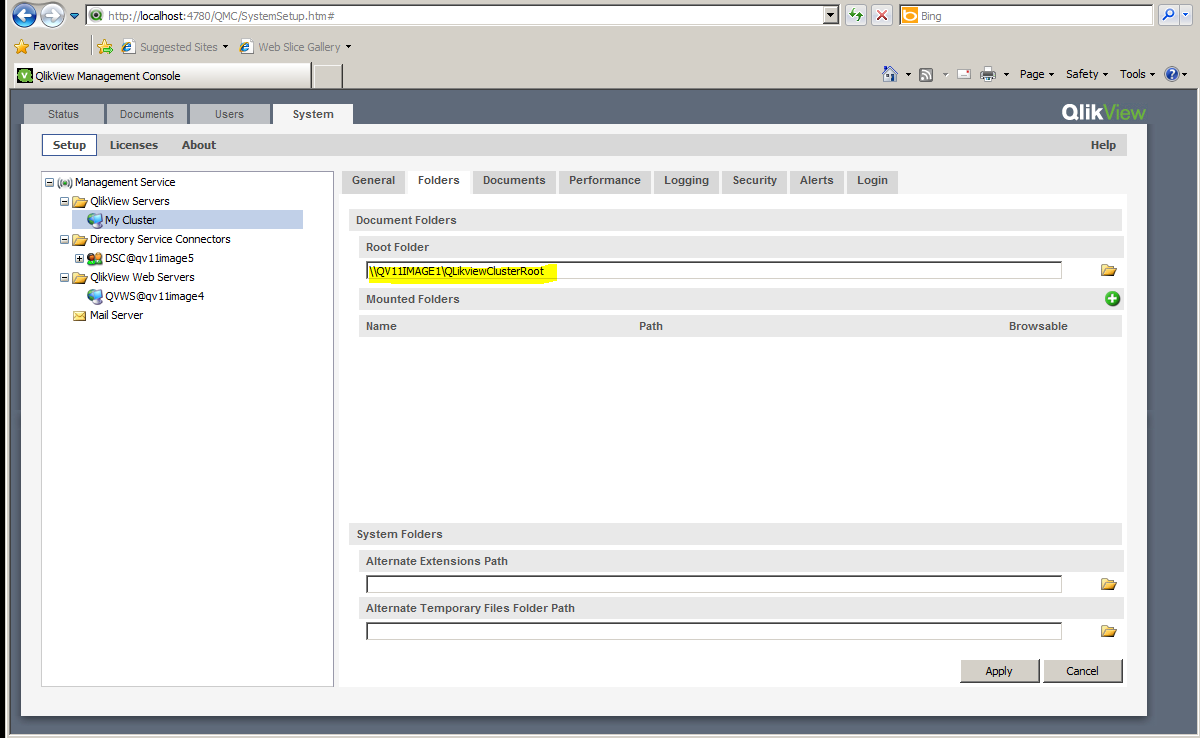
- Configure the document folder to point to a folder on the file system that all QlikView Servers in the cluster can access.
- Install the next QlikView Server in the cluster.
- Ensure that all QlikView services are running as local administrators and that they are members of the “QlikView Administrators” local group.
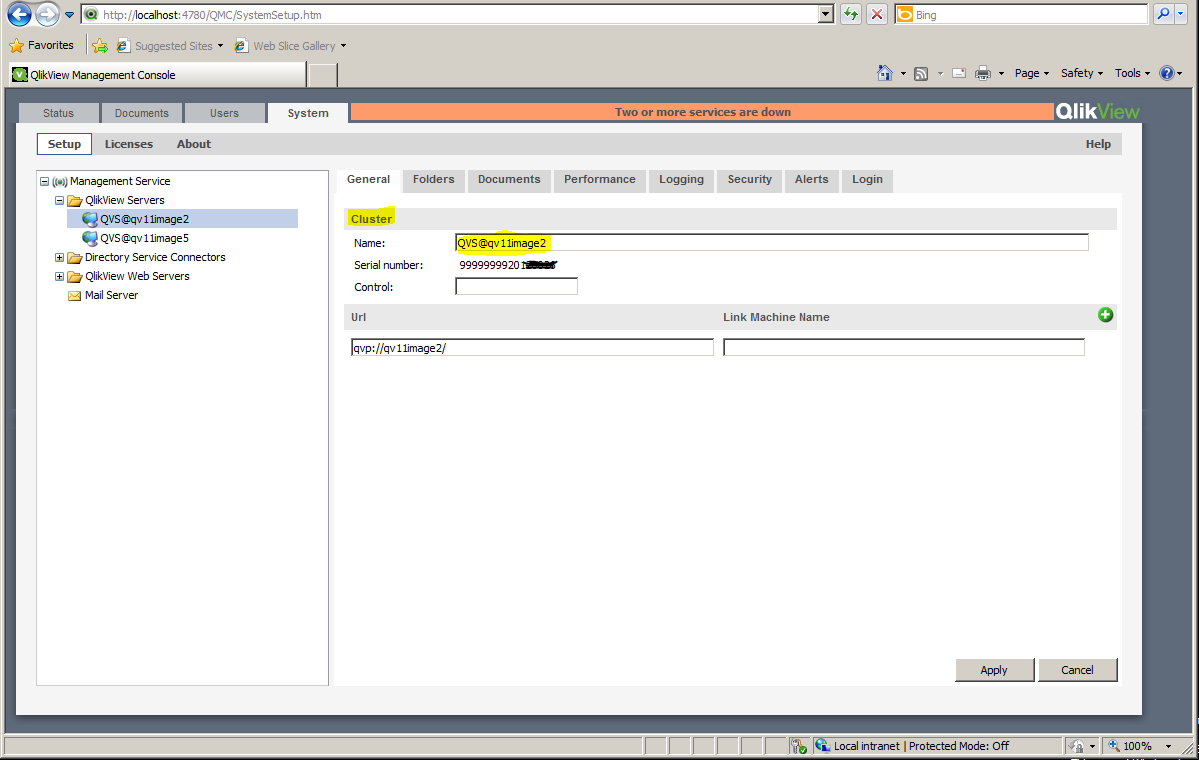
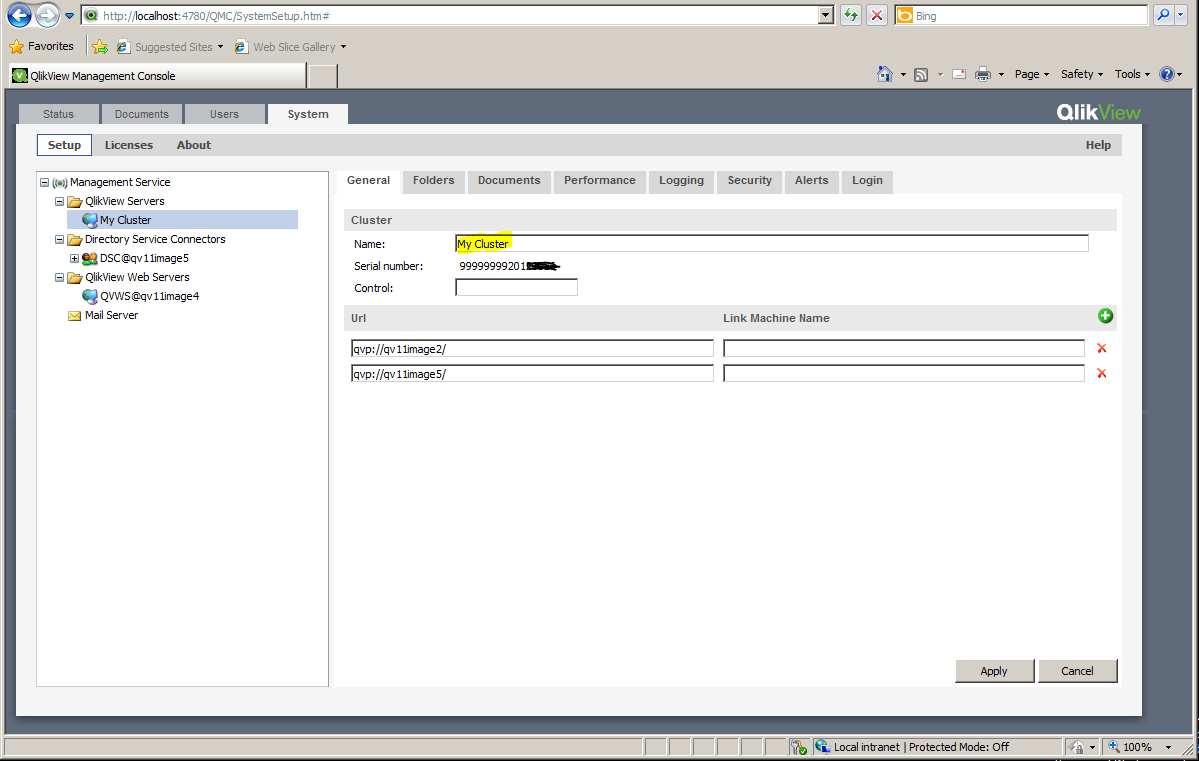
- Open System>Setup in the QMC and select the server. Then go to the General tab and enter the control number for your license and the address to the second QlikView Server in the cluster.
- Rename your cluster to an appropriate name.
- Repeat steps 3 - 5 for the QlikView Server nodes in the cluster.
- Make sure that the cluster is selected in Server Connections in the settings for the AccessPoint.
- The cluster is now configured and ready to use.
Removing a node from a QlikView Server cluster
Do the following:
- Navigate to the System tab in QMC and select QlikView Server.
- Highlighting the QVS Cluster, identify the node that you want to remove and select
 .
. - Enter the license control key and select Apply.
- Restart the QlikView Server Service (QVS).