
Displaying the model
Displaying the model is a good way to see the relationships between the various tables and/or views in your model.
To display the model:
Either click the Display button in the bottom right of the Model panel.
-OR-
Select Display from the drop-down menu in the top right of the Model panel.
The Display Model window opens showing the Diagram tab.
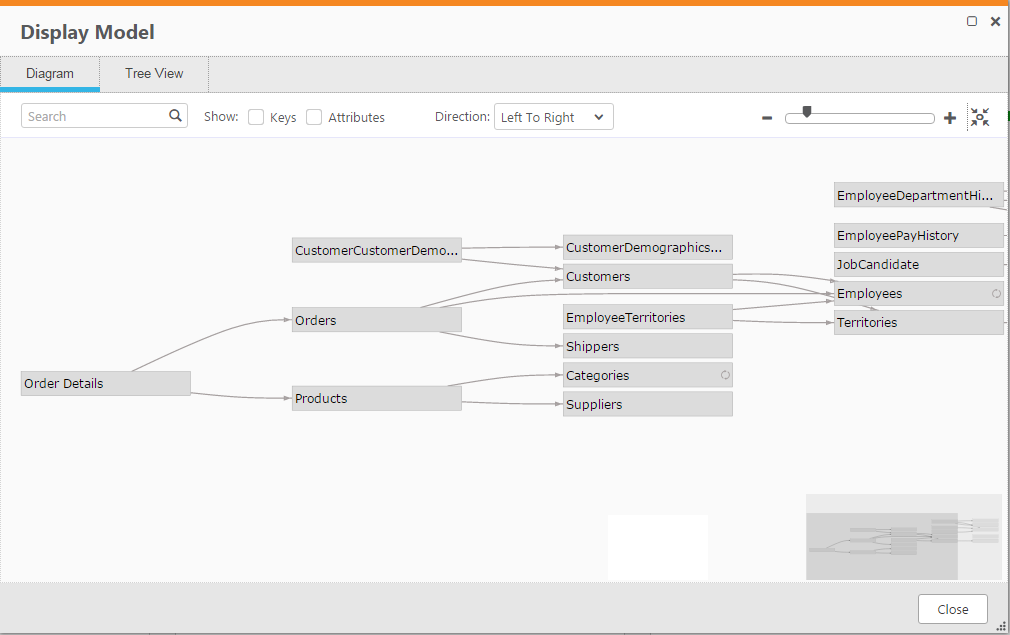
Diagram tab
In the Diagram tab, the following options are available:
You can select multiple entities by clicking them while holding down the [Ctrl] keyboard button.
- Zoom - Increase or decrease the magnification using the slider at the top right of the screen. Click the button to the right of the slider to restore the default size.
-
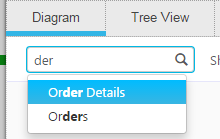
Search - The ability to search for entities is particularly useful in a large model. To search for an entity, type a search string in the Search box. Compose lists the names of entities that match the search string. Select the desired entity.
- Drag the diagram - In addition to zooming, you can also drag the diagram by clicking the space around the diagram and dragging. This is useful for very large diagrams where zooming out would render the text unreadable. The guide at the bottom right of the window shows you which part of the diagram is currently displayed.
- Show/Hide all attributes for a selected entity - Select an entity and then select/clear the Attributes check box in the top left of the window.
- Show/Hide all business keys in the model - Select/Clear the Keys check box in the top left of the window.
- Show/Hide relationship attributes - Right-click an entity and select this option to to show/hide the entity's relationship attributes.
- Show/Hide business keys - Right-click an entity and select this option to to show/hide the entity's business keys.
- Change the Diagram Direction - Select one of the available options from the Direction drop-down list at the top of the window.
- Set as relationship source - See Creating and managing relationships.
- Hide this node - Right-click an entity and select this option to show/hide the entity. To show the entity, click the Hidden Nodes box in the left of the window.
- Hide selected nodes - Right-click an entity and select this option to show/hide selected entities. To show the hidden entities, click the Hidden Nodes box in the left of the window.
- Hide non-selected nodes - Right-click an entity and select this option to show/hide non-selected entities. To show the hidden entities, click the Hidden Nodes box in the left of the window.
- Invert selection - Right-click an entity and select this option to highlight all entities except the selected entity.
- Select all - Right-click an entity and select this option to highlight all entities in the model.
- Select path - To highlight the path to which an entity belongs, either hover your mouse cursor over the entity or right-click the entity and select Select Path.
- Select path and hide all other nodes - Right-click an entity and select this option to highlight the entity’s neighbors.
- Edit - Either double-click the entity or right-click an entity and select the Edit option to edit the entity’s attributes.
- Lineage - Right-click an entity and select this option to show/hide the entity’s lineage. For more information on lineages, see Lineage and impact analysis.
Tree View tab
In the Tree View tab, the following options are available:
-
Search for an entity or attribute - To search for a specific entity or attribute, enter a part of the name in the Search box. Entities that match the search string will be highlighted.
- Expand/Collapse - Click the arrow to the left of a table to see its attributes or related tables. To show or hide all sub-tables and table attributes, click the Expand All/Collapse All buttons at the top of the Tree View tab.
-
Lineage - To see an entity or attribute's lineage, hover your mouse over a table or attribute and then click the
 button that appears to its right.
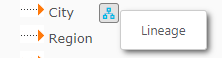
For example, clicking the
button next to the City attribute (shown in the image above) will open the following window: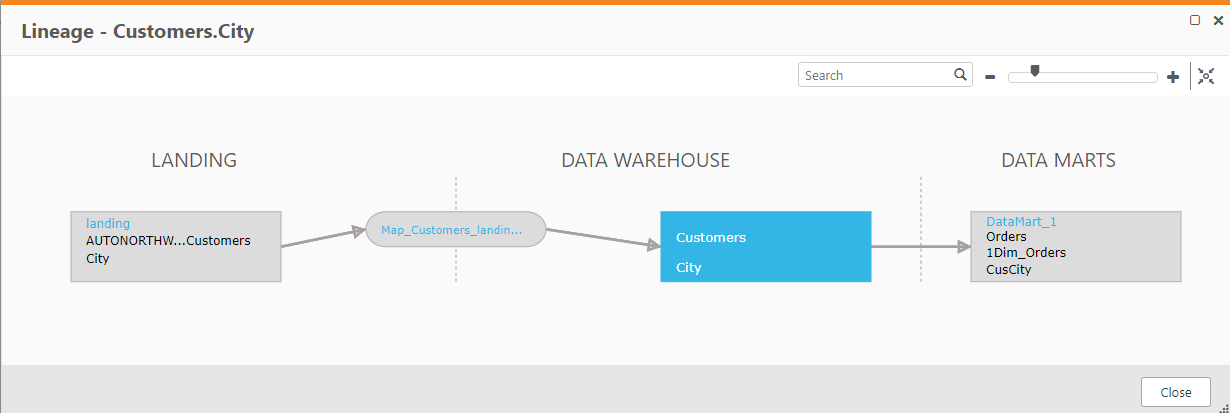
For more information on lineages, see Lineage and impact analysis.