Publish job definition
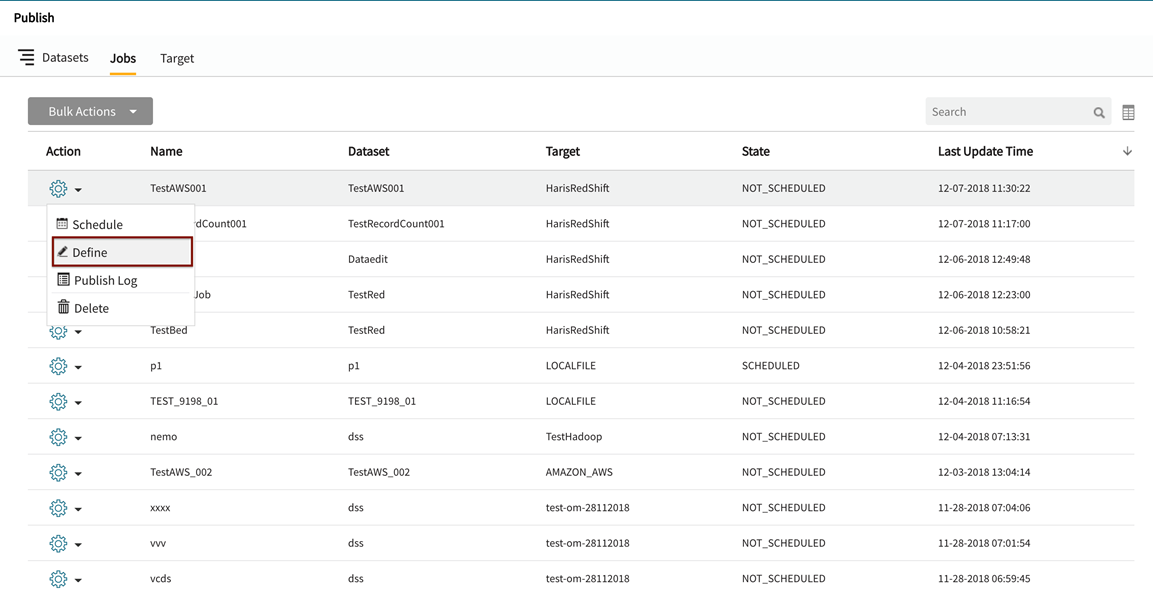
Data publish wizard is initiated by either transitioning to publish in discover (after selecting objects of interest), selecting a predefined dataset in publish, or by selecting Define quicklink from the row dropdown to edit an existing publish job.
Note that Publish to Qlik Cloud Services S3 job and target definition differs from other publish job setups.
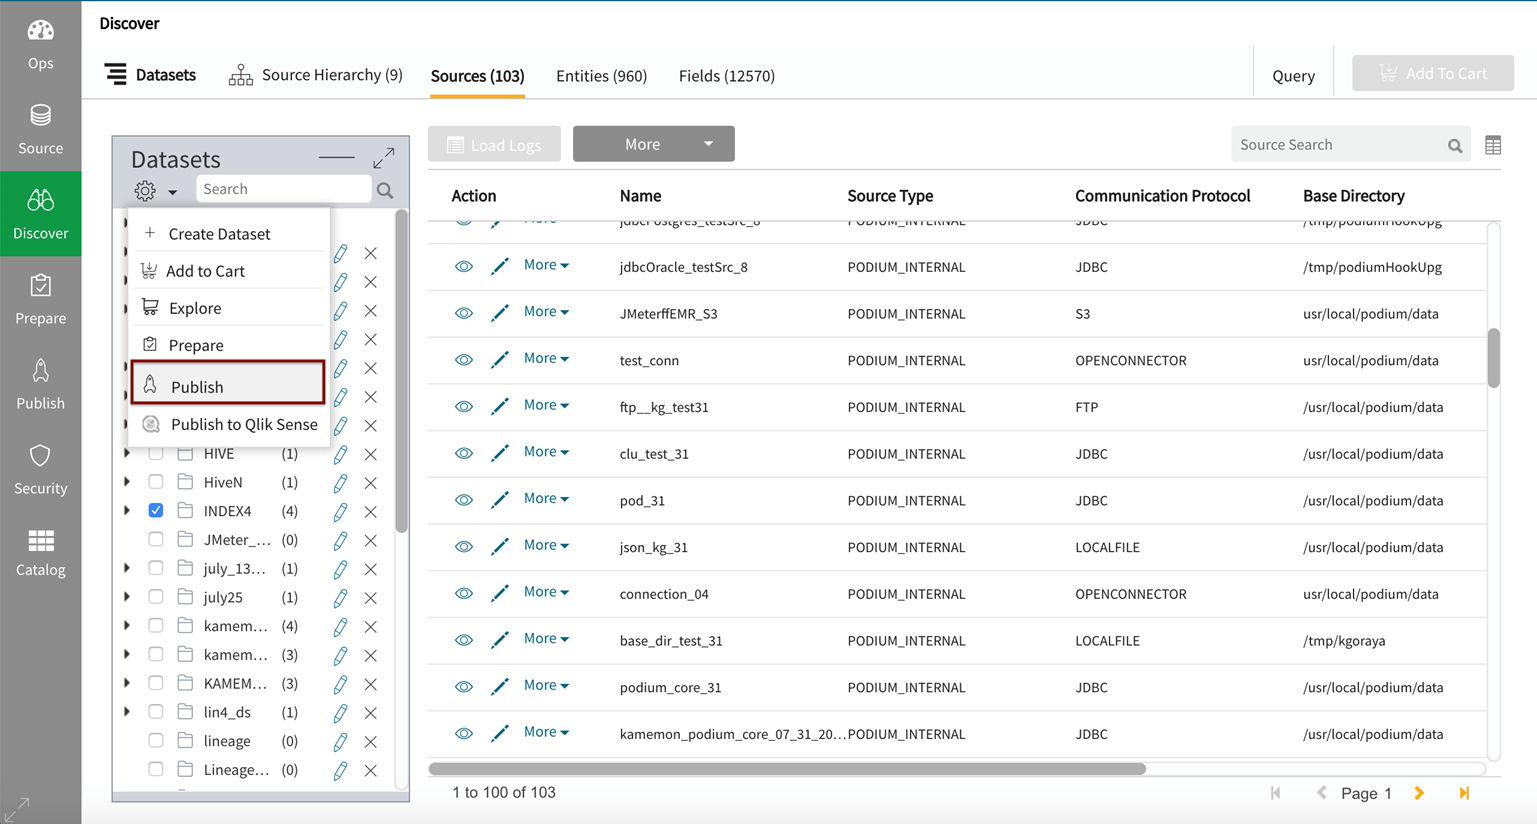
Initiate a publish job by selecting objects in discover into a dataset.
Edit an existing publish job in the publish module by expanding  (actions) dropdown menu on the row for the job and selecting Define.
The data publish wizard opens with a pre-defined Publish Target in place (in the case of an edit) or the publish target can be selected from Target dropdown (displays available targets in the case of a new publish job). Note that selected targets populate associated preset file configuration that can be edited in consequent steps.
1. Target specification for publish job setup
Dataset Name: (required) is populated from discover dataset creation (where publish job was initiated) or from edit of an existing dataset (Name can be modified [SAVE AS] operation).
Publish Job Name: (required) options are 1. Name new publish job after transiting to publish from object selection in Discover, 2. Rename (SAVE AS) to optionally modify an existing publish job or 3. Retain existing publish job name and make any required edits to that job.
Description: (optional) enter any required technical details about connection to target or the publish job.
Target: (required) pre-defined targets display in dropdown (Publish: add target if database connection for this publish job has not yet been defined).
Base Location: (required) destination directory in which to publish dataset(s).
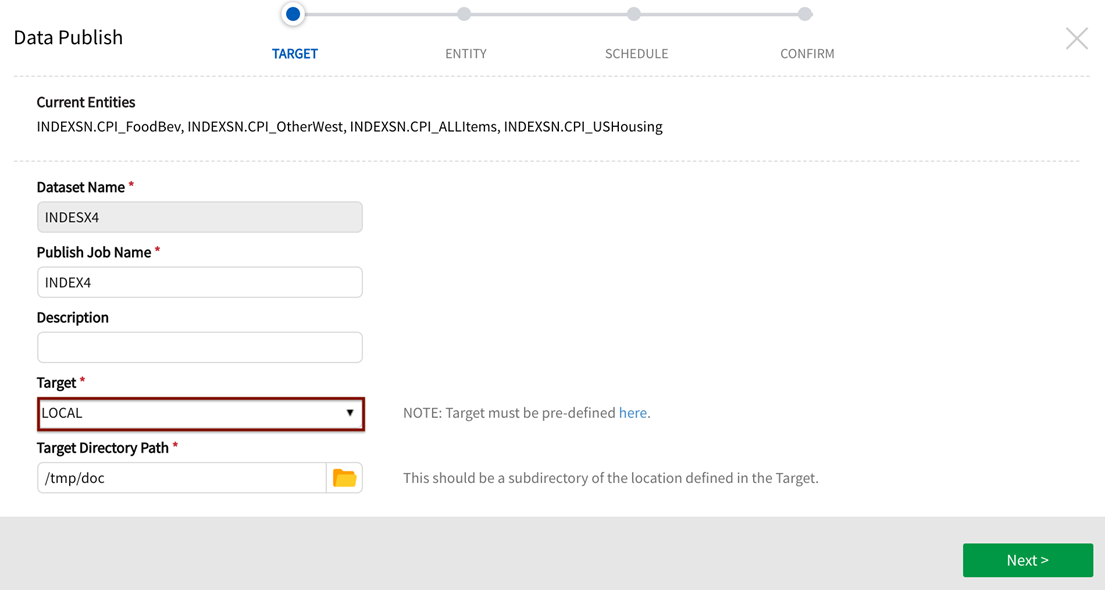
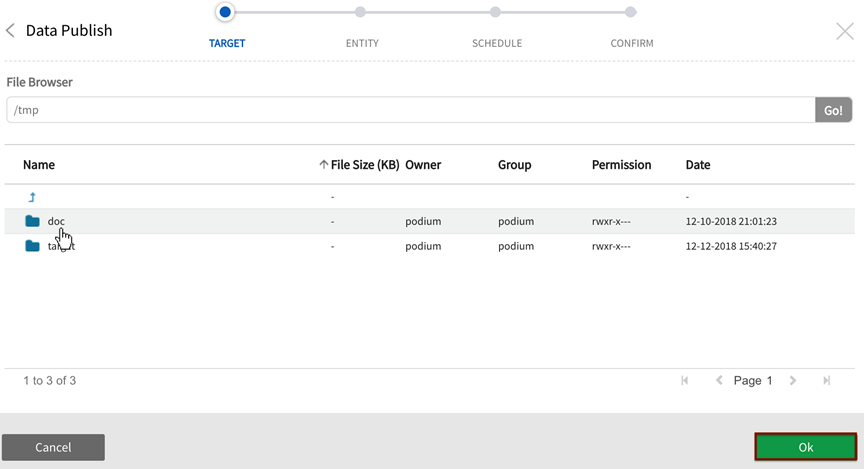
Target Directory Path: File browser functionality is supported to define the filepath for target types: LOCALFILE, HDFS, S3, FTP, SFTP, and ADLS. Browse the server directory to explore available target destinations by clicking on the folder browser icon. Once the destination folder has been identified and selected it will display as Target Directory Path. Users are able to enter and create a new subfolder filepath directory in which to publish the job.
Target directory path for localfile access is specified by core_env property:
This property is used to limit access control over directories on publish targets.
-
Select the Folder Browser

-
Select desired destination folder then "Ok"
-
The chosen destination folder displays as Target Directory Path.

2. Publish: Entity format specification
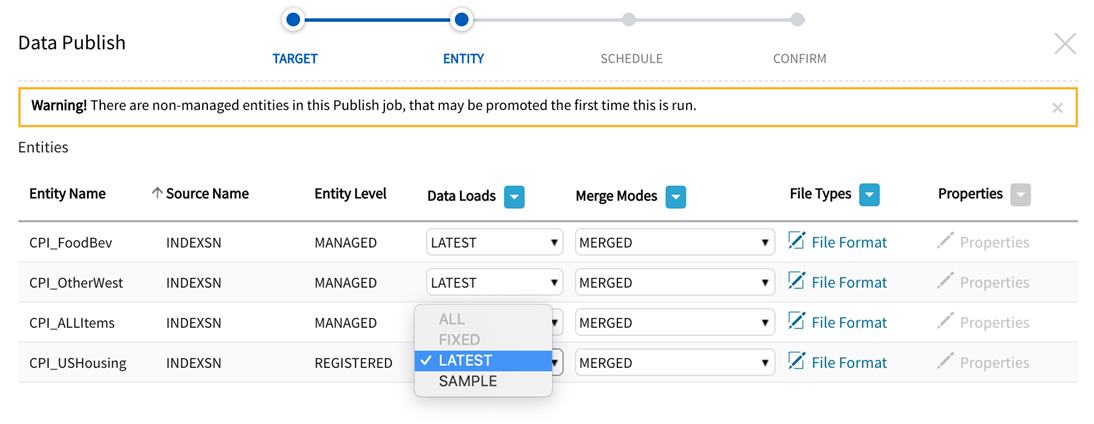
All objects to be published display at the entity level. Entity Name, Source Name, Entity Level (data management) display.
Users are able to configure each individual entity's publish target properties: Data Loads, Merge Modes, File Types (file format), and Properties (Properties are configurable only for OpenConnector and File target types).
2a. Entity format specification: Entity Level + Data Loads
Entity Level + Promotion of Entities
When configuring publish Jobs with Addressed and Registered entities (level can be modified in Admin: System Settings or Source grids), a warning will display indicating that the job includes non-managed entities that may be promoted during the first Publish run:
-
The warning message will always display for Addressed entities
-
The warning message will display for Registered entities when LATEST Data Load is selected (Registered Entities use existing SAMPLE data)
-
Only LATEST and SAMPLE dataload options are enabled from Data Load dropdown for Addressed or Registered entities (as there is only one dataload executed and available upon promotion or existing in Sample directory)
For Managed entities, users can select whether individual target entities (or the entire dataset) can be published with the following load types:
ALL: (Incremental) This load type will publish all Incremental loads.
FIXED: (one or more specific dataloads) of either base type (Incremental or Snapshot).
LATEST: (Snapshot) A full Snapshot of the Entity will be published to the publish target.
SAMPLE: (per record.sampling.probability =.01 [default] set in core_env, source or entity-level property).

- When publishing a sample of Snapshot Entity Base Type, the sample is always sourced from the LATEST load.
- When publishing a sample of Incremental Entity Base Typee, the sample is sourced from ALL loads.
- Any Merge Mode can still be configured despite Entity Base Type (Snapshot or Incremental).
When publishing a sample of incremental entity base type, the sample is sourced from all loads. Any Merge Mode can still be configured despite Entity Base Type (snapshot or incremental).
2b. Publish Entity: Select Merge Mode
For each entity, users can select Merge Mode by retaining, over-riding, or specifying Merge Mode depending on whether the job is being created or edited.
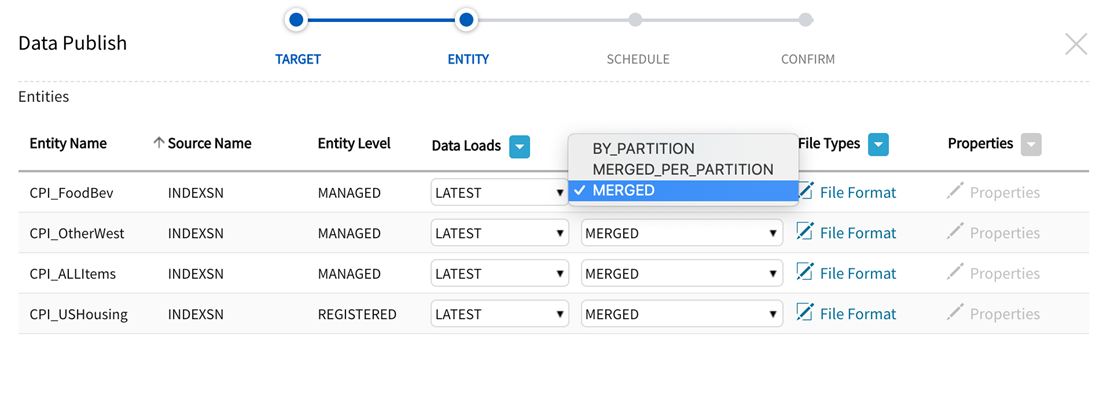
For each entity (or apply to all Entities), select Merge Mode to manage how partitions (dateTimeStamp) for the entity load(s) are handled:
BY_PARTITION: (multiple files per partition) Each partition folder contains a separate file per mapper. no merge. (Default for Hadoop publish jobs)
MERGED_PER_PARTITION: (single file per partition ) Each partition creates a single file of merged mapper files. (Default for file-based publish jobs)
MERGED: (single file for all data) All partitions are merged into one file for all data.
2c. Publish Entity: File Types, select File Format specifications
Select, retain, or over-ride All File Formats or individual entity file specifications:
|
Entity File Format |
Options: TEXTFILE: Flat file containing only printable characters (usually from ASCII char set) PARQUET: Columnar data format where data is stored and grouped in columns normally resulting in higher and more efficient compression ratios QVD: QlikView Data target format. Non-QVD entities can be converted and published as QVDs with this option. Note that if QVD file format is selected, the merge mode is restricted to merged. This option is available for all but Hadoop - HDFS and Hive and Amazon - S3 and Redshift target types. |
|
Field Delimiter |
Options*: (default) tab (\t) comma (,) pipe (|) semi-colon (;) colon (:) CTRL+A (\x01) space (\x20) double pipe (||) pipe tilde (|~)
|
|
Record Delimiter/Terminator |
Options: default (/n) newline
|
|
Header |
Yes|No |
| Use Business Name for Header |
Yes|No (Header setting must also be checked to set Business Name as header.) |
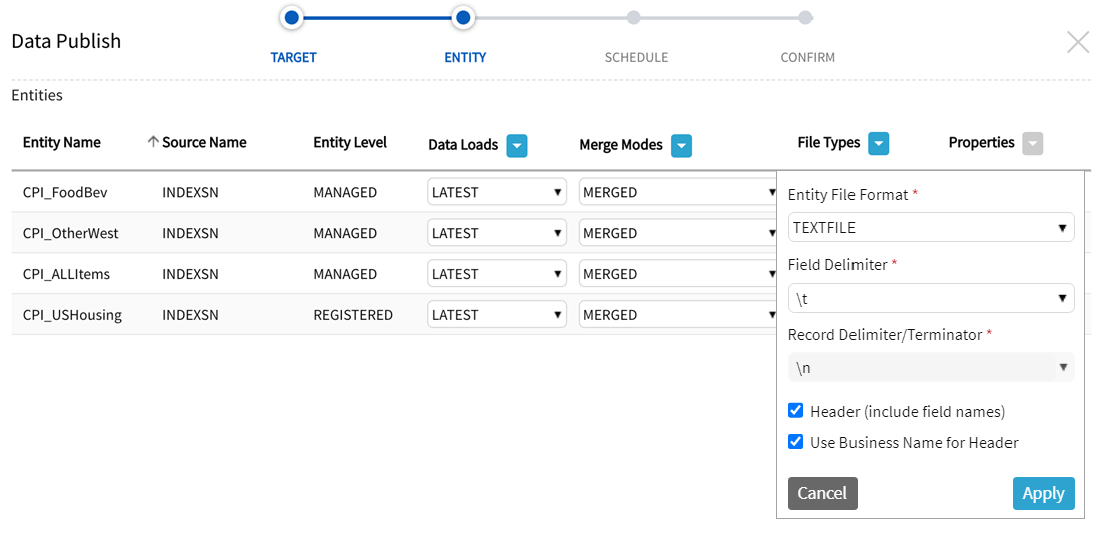
Example: Modified publish output if Header and Use Business Name for Header settings are checked.

2d. Publish Entity: Properties
Publish properties can be configured for Open Connector/RDBMS and File target types. File target type includes File on ADLS Storage, File on FTP Server, File on HDFS Storage, File on Qlik Catalog Server, File on S3 Server, File on SFTP Server, File on WASB Storage, and File on WASBS Storage.
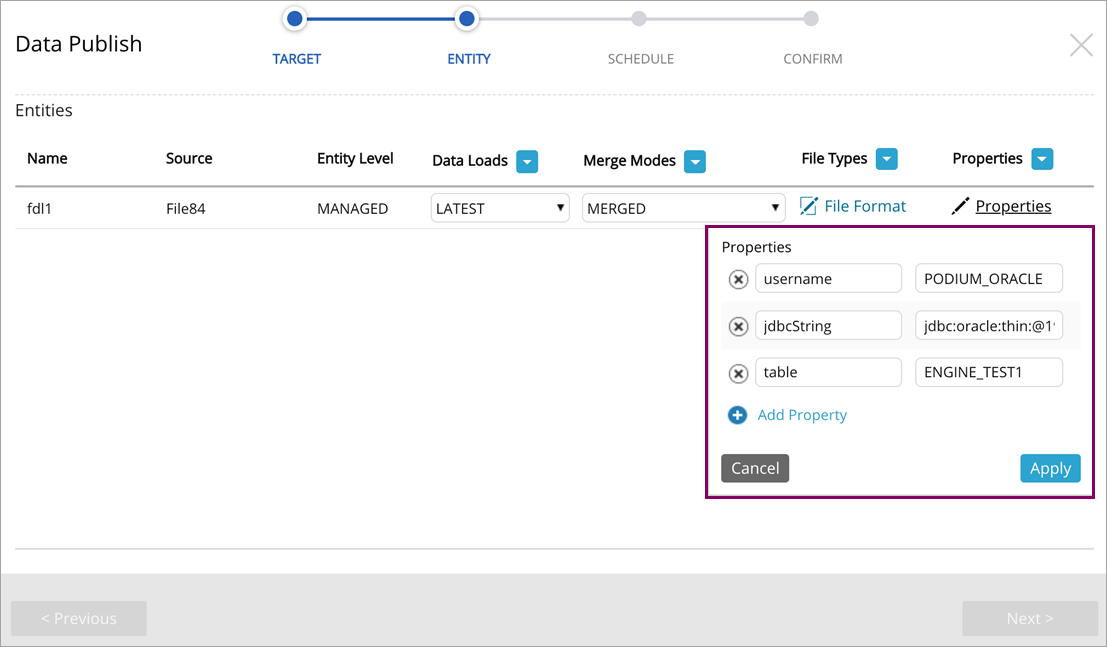
Open Connector/RDBMS properties
Open Connector utilizes the Sqoop CLI tool for transferring data between relational databases and other structured datastores. This step provides properties for create, edit, and over-ride options for Sqoop key/value pair properties.
File properties
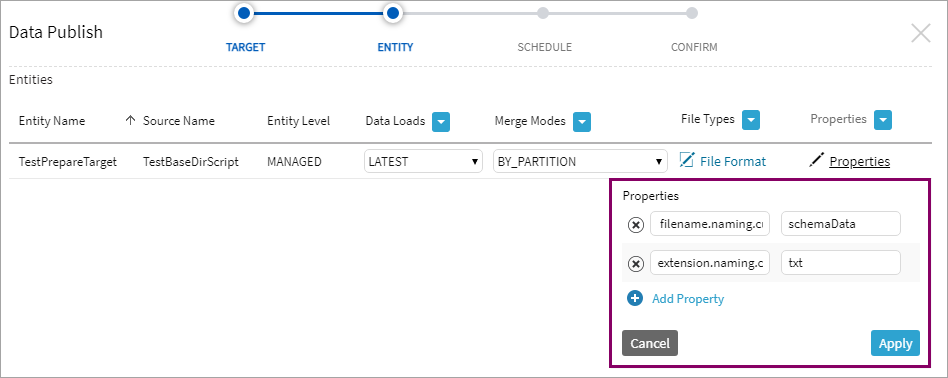
Properties can be configured to alter the name and extension of published files for file formats PARQUET and TEXTFILE. Files using format QVD are already named using the entity name and have an extension of qvd – in this case, setting the properties will have no effect. The following properties apply to publish targets of type File (e.g., File on S3 Storage).
The name and extension of published files can be modified from the default of publish-r-00000, publish-r-00001, etc. File names eligible for change include those beginning with publish-m, publish-r, and those beginning with six digits (e.g., 000000_0, seen on multi-node installations).
Two properties can be added to a Publish Job definition: filename.naming.custom.prop and extension.naming.custom.prop. For example, if filename.naming.custom.prop is set to schemaData and extension.naming.custom.prop is set to txt, the resulting published file is named schemaData-00000.txt.
Each property has a special value that will alter its behavior:
If filename.naming.custom.prop is set to attr.entity.name, then the entity name will be used as the new name.
If extension.naming.custom.prop is set to auto, then the extension is automatically determined when format TEXTFILE is chosen:
- csv will be used for comma-delimited data
- tsv will be used for tab-delimited data
- txt will be used for all other TEXTFILE data
Note that files of format PARQUET already have the parquet extension – the extension property, if set, will be ignored.
3. Publish: Schedule
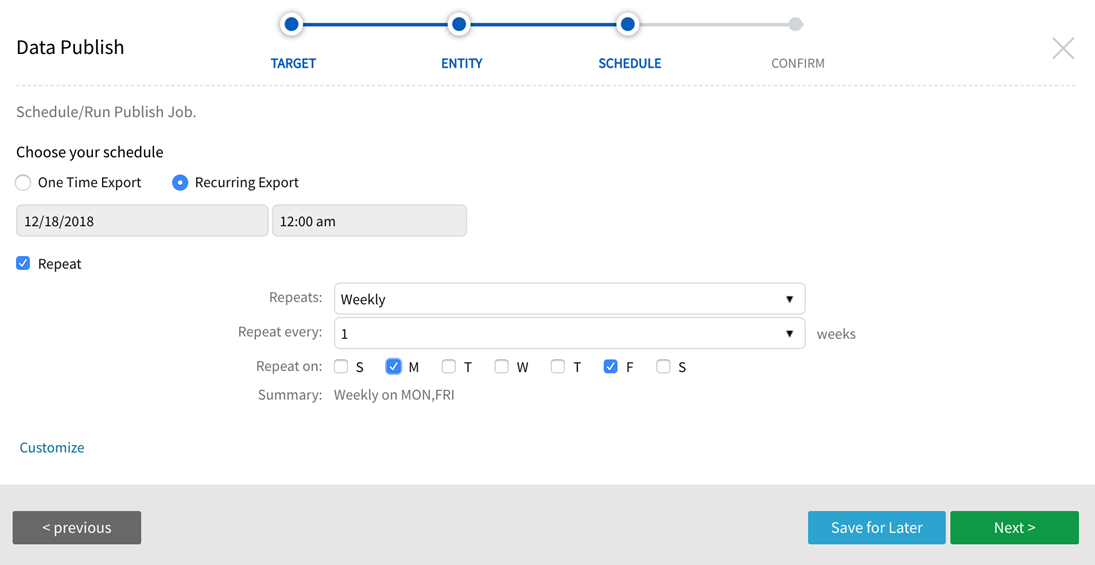
One Time Export takes place one time immediately. Note that upon configuration, a job that executes one-time immediately will be saved as unscheduled without a recurrent or future schedule defined.
Users have the option to set up Recurring Export by selecting the calendar scheduler or entering a Quartz cron expression describing schedule details separated by a space (example, '0 15 10 ? * MON-FRI'). To use a Quartz cron expression to create an automated schedule, choose Recurring Export, then Customize. Complete the scheduler fields and enter the Quartz cron expression. Refer to the following link for guidelines to create a Quartz cron expression:
http://www.quartz-scheduler.org/documentation/quartz-2.3.0/tutorials/crontrigger.html
Users can select from the calendar scheduler or enter a Quartz cron expression for custom recurring export schedules.
4. Publish: Confirm
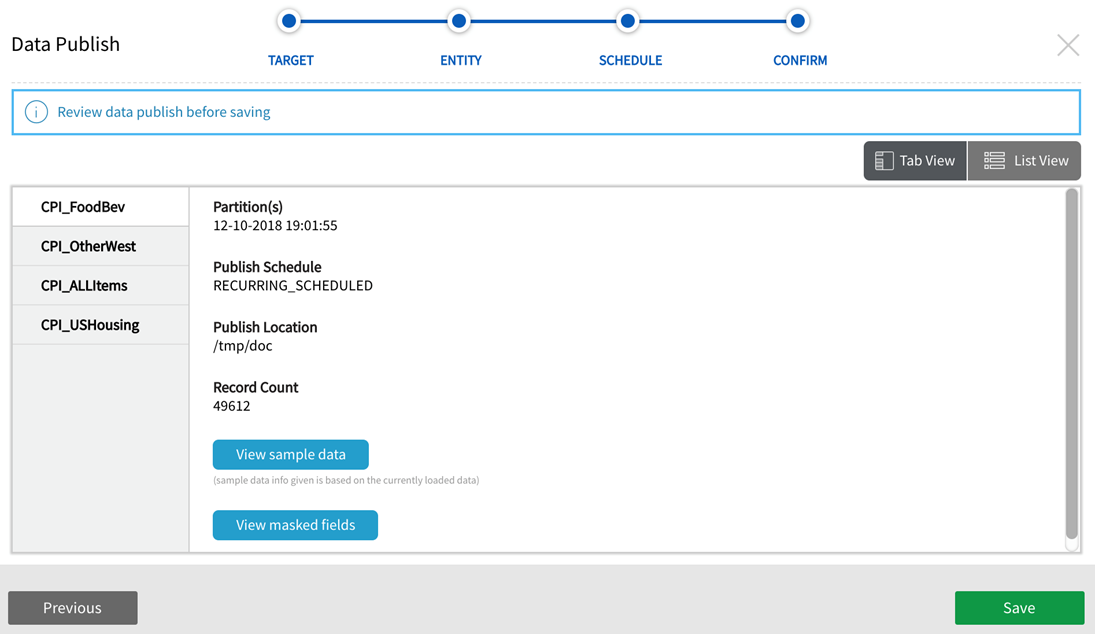
Review publish job configuration. Details of the publish job display in Tab View or List View.
Details include Partitions, Publish Schedule status, Publish Location, and Record Count.
Save Publish Job changes.
(See below for viewing Sample Data and Masked Fields.)
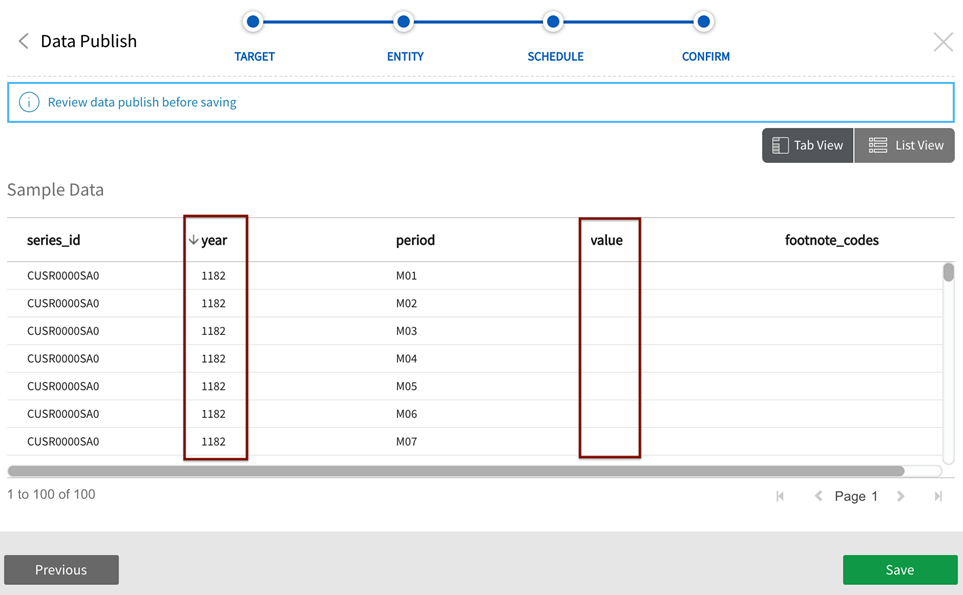
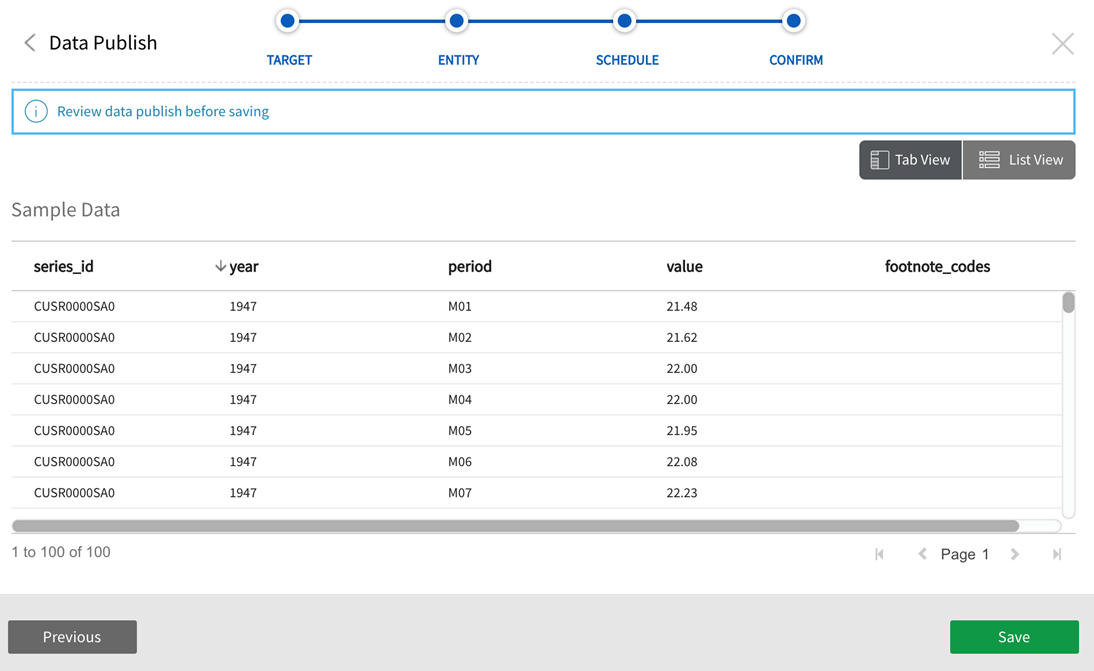
Select Sample Data to view a representative subset of entity data. Note that if Sample is selected in Step 2, View sample data will show file sample data from the sample table, otherwise View sample data will display from the Good directory.
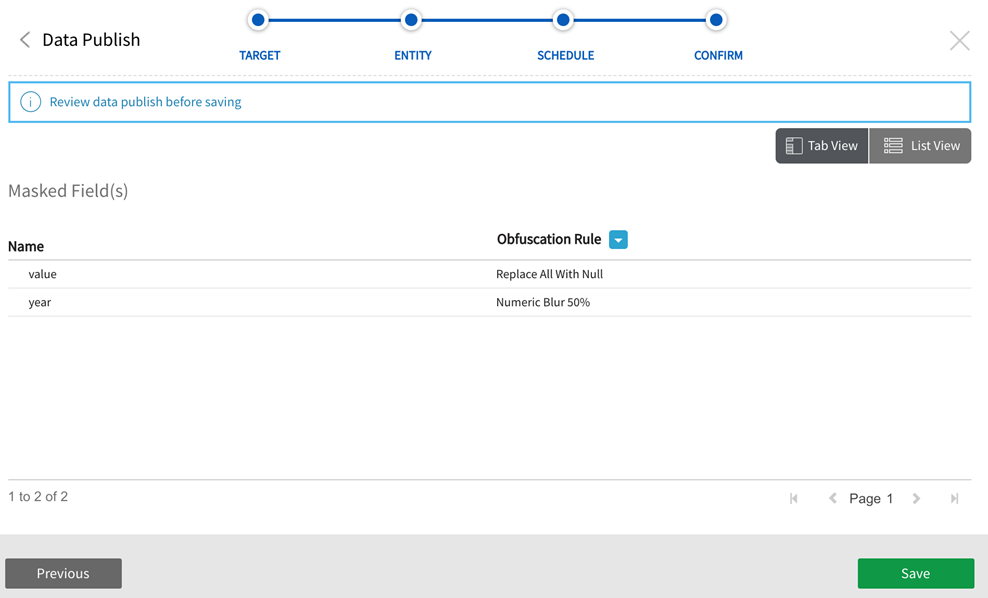
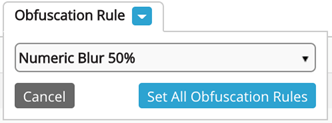
Masked or obfuscated data that has been designated as sensitive with a masking rule display with the rule that has been applied when users select View masked fields. Users can also expand the Obfuscation Rule dropdown to view and select available rules, Upon selection of one rule, all masking rules that have been applied will be overridden and obfuscated by the new method. Be sure to Save edits.
