
Publish to Hadoop (Hive-HDFS) and Redshift-S3 target types: Job definition
There are a few notable differences in how publish jobs are configured for Hadoop-HDFS and Hive and Amazon-S3 and Redshift targets.
Table URI (for Hive and Redshift distribution engines) and File System URI (for HDFS and S3 File Systems) are specified for these target types. Hadoop-HDFS and Hive target type requires Target Entity Location: HDFS Target URI and HIVE Target URI. Amazon-S3 and Redshift target type requires Target Entity Location S3 Target URI and Redshift Target URI.
Hadoop publish target definition — Hadoop-HDFS and Hive

AWS publish target definition — Amazon-S3 and Redshift

When publishing to these target types users must provide directory filepaths to the file system target destination.
When publishing to these target types users also must provide a prefix that combined with the source name (prefix + SourceName) becomes the TableName in the case of Amazon-S3 and Redshift or the SchemaName in the case of Hadoop-HDFS and Hive.
The following example details definition of an Amazon-S3 and Redshift publish job using the target as defined in the picture above (the target name is "Demo_RedShiftS3").
1. TARGET definition
Select a Dataset Name to publish.
Publish Job Name: Name the publish job.
Target: Choose a pre-defined Amazon-S3 and Redshift target.
Target Directory Path: Enter an existing directory or create a new one. This value should be an existing subdirectory of location defined in the target or a new directory folder. For this example, the newly created directory is "demo2".
Redshift Database Prefix: Enter a prefix, this will become the prefix of the table name. For this example, the prefix is "prefix3".

2. ENTITY, SCHEDULE, CONFIRM screens
Stage through screens to configure the publish target. Save and execute the job.
ENTITY definition screen


3.AWS Target Confirmation + Redshift View
In S3 section of AWS console, identify the bucket that will be the S3 Target URI from the defined Amazon-S3 and Redshift target. For this example it is "test.nvsvpn.com" bucket.
Select the bucket to see the new folder that was defined in Target Directory Path ("demo2").

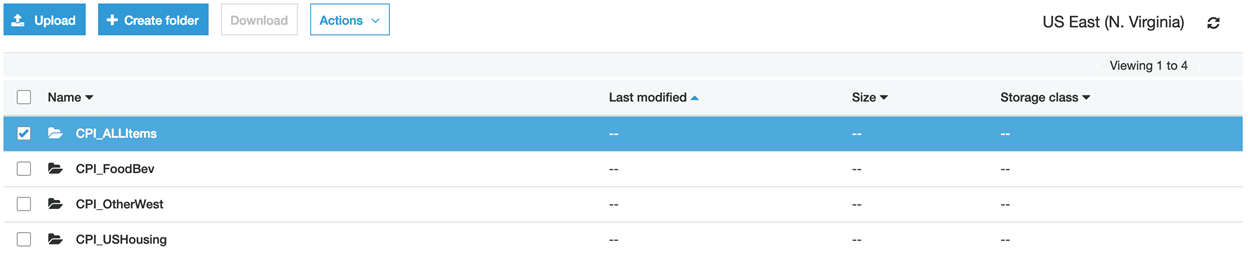
Select the folder that was created by the publish job.

The name of the source(s) that were published (for this example, "INDEXSN") will display. Select the source name to view the published tables.

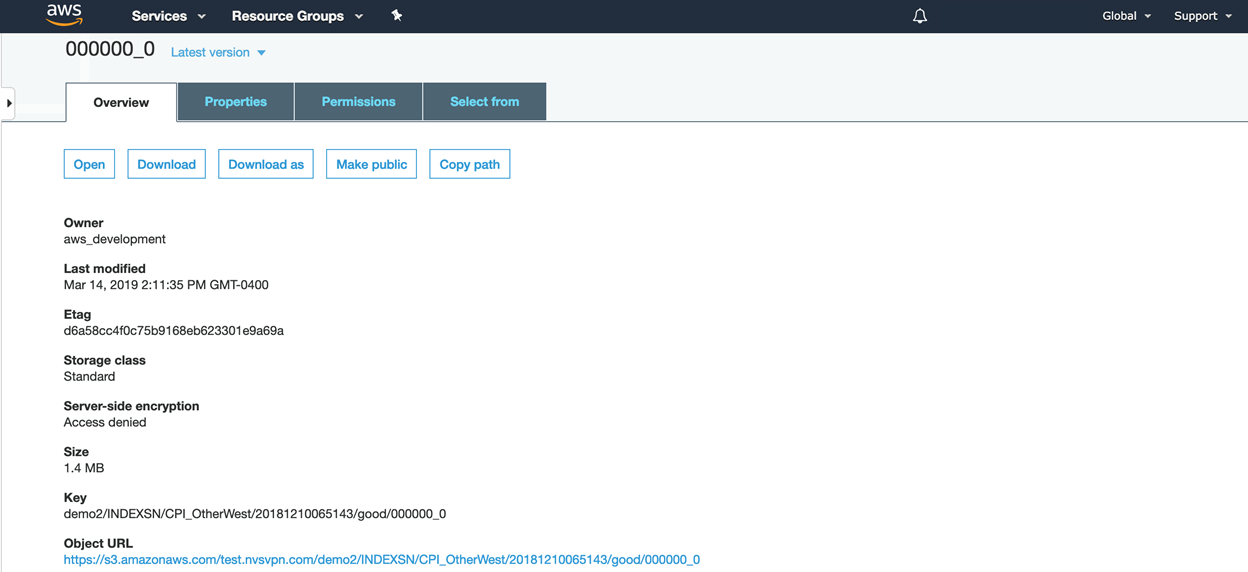
Drill in to view the partition (example: demo2/INDEXSN/CPI_OtherWest/20181210065143/good/000000_0)
Partition view provides the following information: Owner, Last modified, Etag, Storage class, Server side encryption, Size, Key, and Object URL.
The Redshift table view on top of S3 database is a similar construct to viewing Hive table views on top of HDFS.
Navigate to the Redshift service in AWS, choose the schema name (created from "Redshift Database Prefix_SourceName" naming convention).
Select the  (view) icon on any table of interest to auto-generate a query that will produce a table view that can be saved and downloaded. The query window provides a list of tables to query, query editor, and query results.
AWS Query window
