Skip to main content Skip to complementary content

Configuring Role Mapping

Last updated: 9/10/2026
This section describes the settings necessary to configure role mapping. The role mapping feature enables to map the application project types and the user roles with those defined in Keycloak identity provider system.

Before you begin

Make sure the Use Role Mapping field in Configuration > SSO is set to true. See the step 2 in Configuring Talend Administration Center in IdP-initiated mode with Keycloak.

Procedure

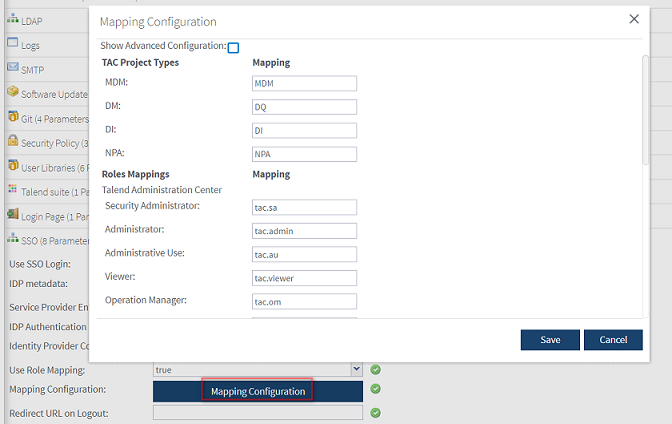
  1. Open the Mapping Configuration and set the values for:
    • project types
    • roles mapping
    Mapping Configuration page.
  2. Go to the Keycloak admin console.
  3. Create a new user with the default attributes: firstName, lastName, and email.
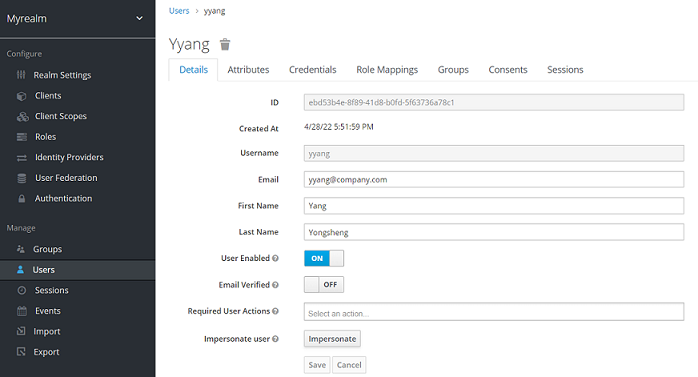
    Creation of a new user in the Keycloak admin console.
  4. Add other attributes for the user manually, such as tacProjectType and tacRole.
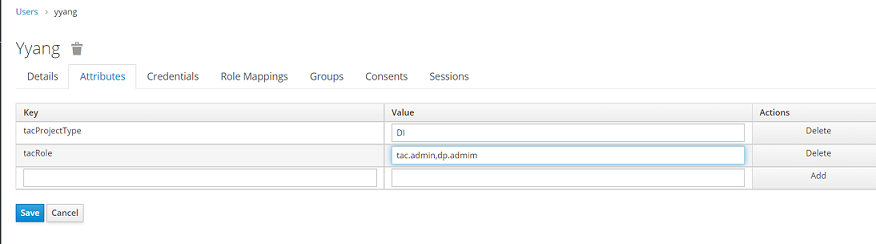
    Creation of new attributes in the Attributes tab.
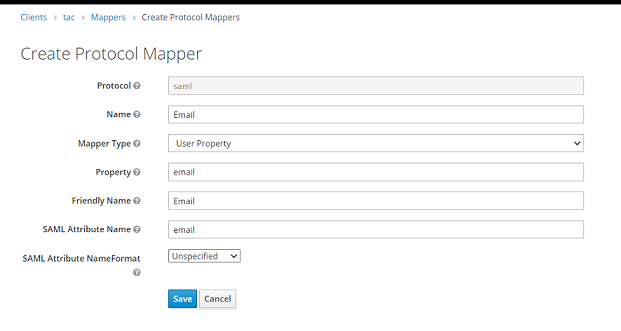
  5. Add the following attributes mapping to the Talend Administration Center Client, then save your changes.
    • For example, Email as User Property
      Email added as user property from the Create Protocol Mapper page.
    • For example, TAC project type as User Attribute
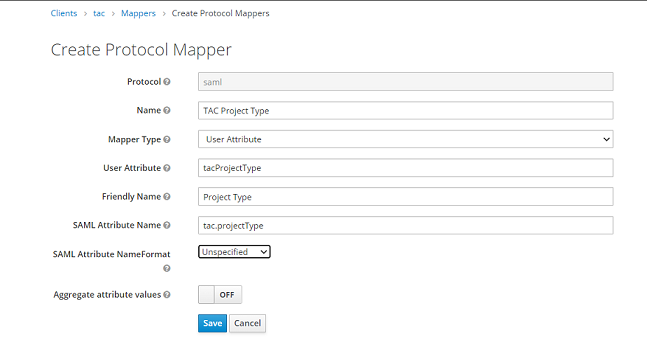
      TAC project type added as user attribute from the Create Protocol Mapper page.
    • For example, TAC role as User Attribute
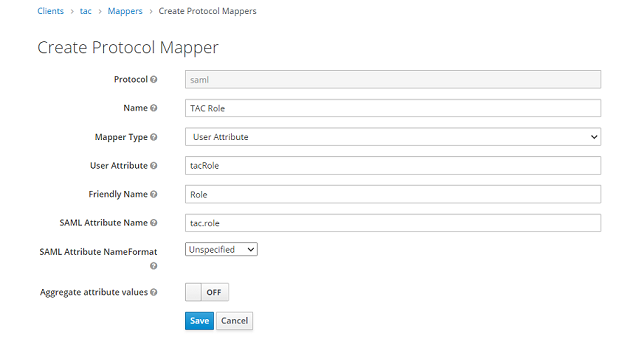
      TAC Role added as user attribute from the Create Protocol Mapper page.
    From the Mappers tab, you can see the list of all attribute mappings.
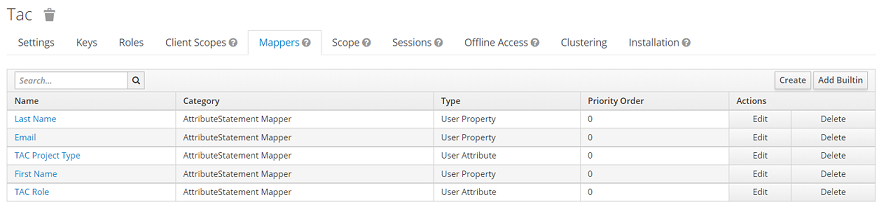
    List of all attribute mappings in the Mappers tab.
  6. Go to Keycloak account console page: http://<host>:<port>/auth/realms/myrealm/account/.
  7. Sign in with the newly created user and click the Talend Administration Center application.

Results

Talend Administration Center page opens with the roles defined for the user.

Did this page help you?

If you find any issues with this page or its content – a typo, a missing step, or a technical error – please let us know!