Skip to main content Skip to complementary content

Recreating email addresses before uploading them to a marketing solution

The Marketing leads dataset represents a file you received from a marketing campaign but the email addresses are missing.

In order for this file to be uploaded into your marketing solution, you have to create those email addresses. You will guess them from the name and the company of the prospects, and from the email format usually used by those companies.

Download the files: marketing_leads.zip and emails_reference.zip.

Adding a preparation for the Marketing leads dataset

Add a preparation to start preparing and cleansing your data.

You can create a preparation from a dataset already available in Talend Data Preparation or one of your local files. When you add a preparation with the corresponding button, it will be created in the folder in which you are currently working. Furthermore, your preparation will be automatically saved in the preparations list, and all the changes you make are also saved automatically.

Before you begin

You have created the marketing_leads dataset in Talend Cloud Data Preparation using the previously downloaded file.

Procedure

  1. From the homepage, click Preparations to open the list of preparations.
  2. Click the Add Preparation button.
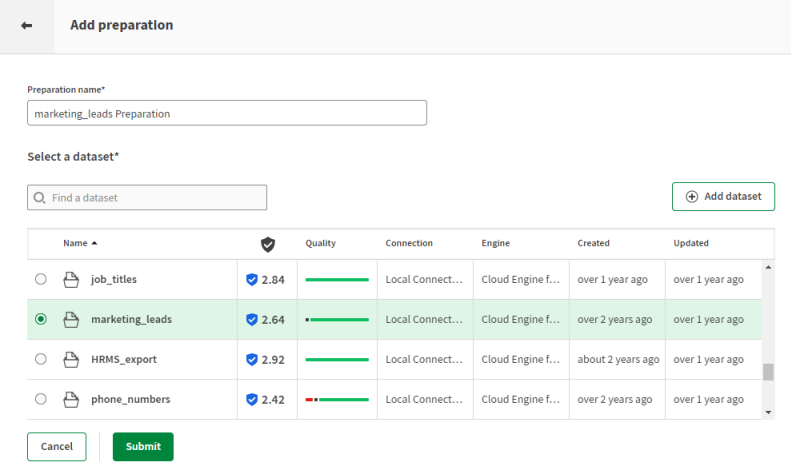
  3. From the list of Datasets, select marketing_leads to use it as source material.
    Add a preparation window with a list of datasets available to create a preparation, including marketing_leads.
    The Preparation name field is automatically filled in but you can change the preparation name.
  4. Click Submit.

Results

Your dataset opens with an empty recipe, and you can start adding preparation steps. All your changes are automatically saved.

Removing empty records from the dataset

The grey part of the quality bar indicates that a column contains empty records. You may want to remove the rows containing these empty records.

Some columns in the grid with their quality bar showing some empty cells.

In the quality bar, data that matches the column type is shown in green, while red shows invalid data that does not match the column type.

Procedure

  1. In the first_name column, click the grey part of the quality bar.
  2. Click Delete the rows with empty cell to remove the rows with missing data.

    You can perform this action for any given column, but there is a simpler way to remove all the empty rows from your dataset.

  3. In the top left of the grid, click the menu icon and select Display rows with empty values.

    This action applies a filter on all the empty entries from the dataset.

    A rows with empty values filter is applied on the dataset.
  4. In the functions panel, on the top right of your screen, type Delete these filtered rows and click the result to execute the associated function.

    The remaining rows containing empty cells are removed from the dataset.

  5. Click the bin icon in the filter bar to clear the filter and display the whole dataset again.

Results

All the rows containing empty records are removed from the dataset and the quality bar under each column is now fully green.

Removing blank spaces from prospects names

Blank spaces can be present before and after the content from each cell.

They are more likely to be present in columns containing data manually entered by someone, such as a name or a phone number. These spaces are shown as grey squares.

You can see that the first_name and last_namecolumns contain some entries with blank spaces.

Data containing blank spaces.

Procedure

  1. Select the first_name column.
  2. While keeping the Ctrl button pressed, click the header of the last_name column.

    The two columns are now selected, and you can apply a function to both columns in one action.

  3. In the functions panel, type Remove trailing and leading characters and click the result to open the options for the associated function.
  4. In the Padding character drop-down list, select Whitespace and click Submit.

    You have the possibility to output the result of this function in a new column by selecting the Create new column check box.

Results

Blank spaces are removed from the selected columns.

Duplicating columns

If you want to have a copy of a given column, you may want to duplicate that column.

You will duplicate two columns and use them as a base for recreating the email addresses.

Procedure

  1. Click the column you want to duplicate, first_name in this example.
  2. Click the menu icon or right-click the column to open the contextual menu.
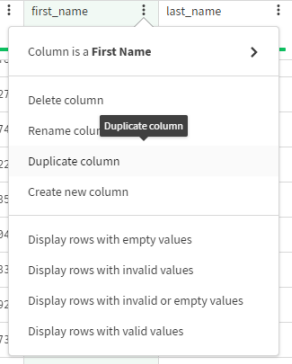
  3. Click Duplicate column.
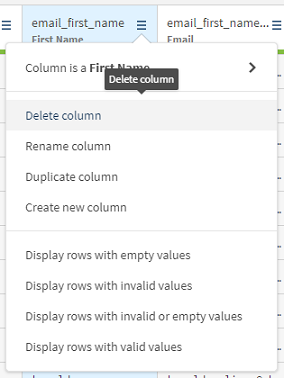
    The First Name column menu is opened, with the Duplicate column option selected.

    A copy of the column, first_name_copy, is created with the same data as the original.

  4. Repeat these actions to duplicate the last_name column.

Results

The two columns are duplicated. The information contained in those two columns will be used to create the local part of the email addresses you want to create.

Renaming columns

In order to better identify a column, you can rename it.

You will rename the two columns previously created and give them a meaningful name. Those new columns will be used to create the local part of the email addresses.

Procedure

  1. Click the column you want to rename, first_name_copy in this example.
  2. Use the Rename column option in the column contextual menu.
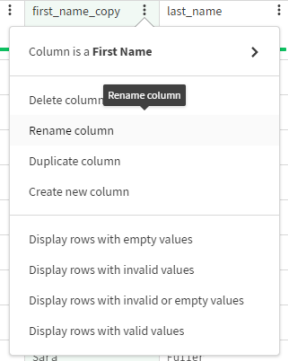
    The first_name_copy column menu is opened, with the Rename column option selected.
  3. Enter email_first_name as new column name and press Enter to apply it.
  4. Repeat these steps to rename the last_name_copy column as email_last_name.

Results

The selected columns are renamed.

Putting the names in lower case

Sometimes, you may need to change the case of some text to lower case. This can be useful if you want to append this text to some other text.

The data contained in the two renamed columns starts with an upper case. You will put the all the text in lower case, in order to merge the two columns.
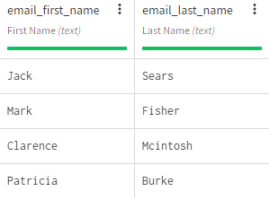
Two columns containing names in upper case.

Procedure

  1. Select the column containing text you want to change to lower case, email_first_name in this example.
  2. In the functions panel, type Change to lower case and click the result to execute the associated function.

    You have the possibility to output the result of this function in a new column by selecting the Create new column check box.

  3. Repeat these steps to put the email_last_name column in lower case.

Results

The text contained in the two columns is now in lower case.
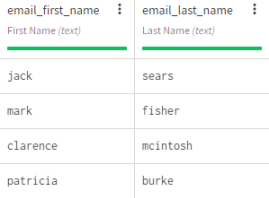
Two columns containing names in lower case.

Using the email domains from another dataset

The lookup feature matches data from the current dataset with its counterpart in a reference dataset.

On the one hand, you have the marketing_leads dataset, that you are currently working on, that contains information about the company where the listed customers are working. On the other hand, the emails_reference contains a list of companies, and the email domain that they are using.

You are going to do a lookup on the emails_reference dataset, and extract the information about email domains to match them with the companies from the marketing_leads dataset.

Before you begin

To perform the lookup on the emails_reference, you need to import it by using the Add dataset button in the Datasets view of the homepage.

The Emails reference dataset visible in the Datasets view.

Procedure

  1. Open the marketing_leads preparation.
  2. Click the lookup button in the upper right part of the screen to open the lookup panel.
    Mouse pointing over the Lookup button.
  3. Click Select dataset to select an existing dataset.
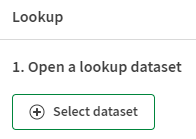
    First step of the lookup configuration menu.
  4. Select the dataset you want to use to perform the lookup, the emails_reference dataset in this example.
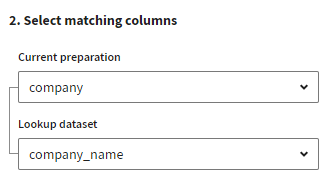
  5. From the Current preparation and Lookup dataset drop-down list, select the columns matching in your main preparation and your reference dataset, the company and company_name columns in this example.
    In order to perform a lookup, at least one column with matching data must be present in the preparation and dataset that you want to blend.
    Second step of the lookup configuration menu.
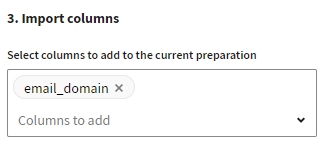
  6. From the Columns to add drop-down list, select the column containing the email addresses to add it to the current dataset, the email_domain column in this example.
    Third step of the lookup configuration menu.
  7. Choose to apply those changes only on the filtered rows or on all of the rows.
  8. Click Submit to apply the changes.

Results

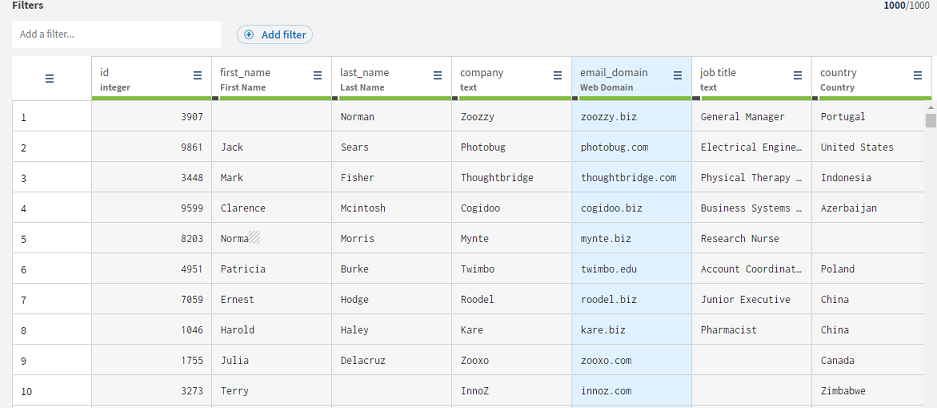
The email_domain column is added to the marketing_leads dataset, next to the company column.
Grid view of the dataset that includes the email_domain column.

This information about email domains will be added to the first names and last names from the duplicated column to create the complete email addresses.

Merging the content of several columns

In some cases, the data you want to use is split in several columns. You can group these columns using a concatenation.

All the information you need to create the email addresses is now ready, and you only need to assemble it. You will merge the three columns that you have created since the beginning of this scenario.
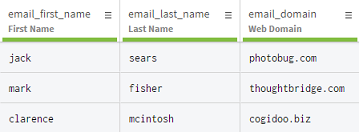
The three columns to merge

Procedure

  1. Select the email_first_name column.
    When merging several columns together, the one that you select at the beginning, email_first_name in this case, will be the first part of the merged column that will be created.
  2. In the functions panel, type Concatenate with and click the result to display the options of the associated function.
  3. Configure the function as follows:
    • Select the Create new column check box.
    • Leave the Prefix field empty.
    • In the Use with field, select Other column.
    • In the Column field, select email_last_name.
    • In the Separator field, enter ..
    • In the Add separator field, select Both values not empty.

    You can only concatenate two columns at a time, so you will begin by merging the email_first_name column with the email_last_name, with . as separator.

  4. Click the Submit button to apply the function.

    A new column with the merged content from the two columns is created.

  5. Proceed the same way to merge the column you just created with the email_domain column, but using @ as separator this time.

Results

The content of the three columns has been merged. You have created a column containing valid email addresses, based on first names, last names and a web domain for each company.

The resulting column with the newly created email addresses.

Deleting the duplicated column

If you want to remove a column you do not need, you can delete a column.

Now that you have used the columns for the concatenation, you can delete them and only keep the result.

Procedure

  1. Click the column you want to delete, email_first_name for example.
  2. Click the menu icon or right-click the column to open the contextual menu.
  3. Click Delete column.
    The email_first_name column menu is opened, with the Delete column option selected.
  4. Proceed the same way to delete the email_last_name column and the email_domain column.

Results

The selected columns are deleted.

Exporting the prepared email addresses

Once your preparation is complete, you may want to export the data you have cleansed.

You have managed to prepare your dataset to recreate the information that was originally missing, the customers email addresses in this case.

Procedure

  1. Click the Export button.
  2. Choose the file format you want to use when exporting your data:
    • If you choose Local CSV file, select which field delimiter, text enclosure and escape characters to use and enter a name for the file to export.
    • If you choose Local XLSX file, choose a name for the file to export.
    • If you choose Amazon S3, enter your credentials and other information to store your file on Amazon S3.

Results

The data you cleansed using your preparation is exported to a local file.

Did this page help you?

If you find any issues with this page or its content – a typo, a missing step, or a technical error – please let us know!