You can replace a snapshot of a visualization on a slide. This is useful when you want to use another snapshot of the visualization, for example when new data is loaded into the app, if the visualization is changed or if new selections are made.
Do the following:
-
In storytelling view, select a snapshot on a slide and click
.
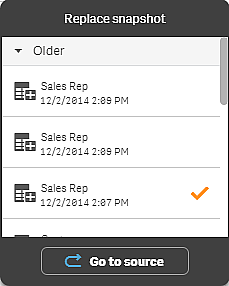
The Replace snapshot dialog is opened and displays all snapshots of the originating visualization. The snapshot in use is marked with m. The date stamp and any annotations helps you to distinguish between your snapshots.
Replace snapshot view with Sales Rep snapshots. Tip noteYou can navigate to the sheet and visualization which the snapshot originated from, by clicking ÛGo to source. By doing this you get access to the live data of the snapshot, where you can make new selections and take new snapshots.
 -
Select the snapshot you want to use.
The snapshot is updated and adapts to the size of the previous snapshot, using free resize which causes the visualization to use progressive disclosure.
The snapshot is replaced on the slide.
Did this page help you?
If you find any issues with this page or its content – a typo, a missing step, or a technical error – let us know how we can improve!
