
Creating apps on the fly
Learn how to create apps on the fly using the sessionApp and sessionAppFromApp methods with Qlik Sense Desktop.
Creating session apps
This example creates a session app with a basic visualization on the fly, using the qlik.sessionApp method.
-
Create the container
Create a folder named sessionApp to contain your assets:
C:\Users\<UserName>\Documents\Qlik\Sense\Extensions\sessionApp
-
Create the container files
Create an HTML file and name it index.html if you want to make a new web page. You can also open an existing HTML page where the chart should be.
Create a JavaScript file and call it sessionApp.js.
Reference the JavaScript file in the <head> section of your web page:
<script src="sessionApp.js"></script>Create a QEXT file and name it sessionApp.qext.
It should look something like the following:
{ "type": "mashup", "name": "sessionApp", "description": "Basic responsive mashup template", "version": "1.0.0", "author": "", "homepage": "", "keywords": "qlik-sense, visualization, mashup", "license": "", "repository": "", "dependencies": { "qlik-sense": ">=3.0.x" } } -
Include Qlik Sense into your web page
Reference the Qlik Sense implementation of RequireJS and a CSS file to ensure the visualizations are styled as expected. Include the CSS reference in the <head> section of your web page:
<link rel="stylesheet" href="../../resources/autogenerated/qlik-styles.css">Include the RequireJS reference before the JavaScript file reference in the <head> section of your web page:
<script src="../../resources/assets/external/requirejs/require.js"></script>Add some internal styling inside the head of the HTML file to format the presentation of the chart.
<style> div.qvobject { flex: 1 1 auto; height: 400px; width: 800px; margin: 45px 0 0 45px; } </style>Place the Qlik Sense objects that have been defined in the JavaScript file inside div tags inside the body of the HTML file.
<div id="QV01" class="qvobject"></div> -
Configure the host connection
In the JavaScript file, configure the connection to the host running Qlik Sense Desktop.
var prefix = window.location.pathname.substr( 0, window.location.pathname.toLowerCase().lastIndexOf( "/extensions" ) + 1 ); var config = { host: window.location.hostname, prefix: prefix, port: window.location.port, isSecure: window.location.protocol === "https:" }; require.config( { baseUrl: ( config.isSecure ? "https://" : "http://" ) + config.host + (config.port ? ":" + config.port : "") + config.prefix + "resources"}); -
Create the session app
The qlik object is an instance of the Root API. After you configure your connection to the server, you can open an app or like in this case, create a new app on the fly using the sessionApp method:
var app = qlik.sessionApp(config);This returns an app JavaScript object with some app methods, so you can now work with your app that uses the App API.
-
Load data into the session app and create a chart on the fly
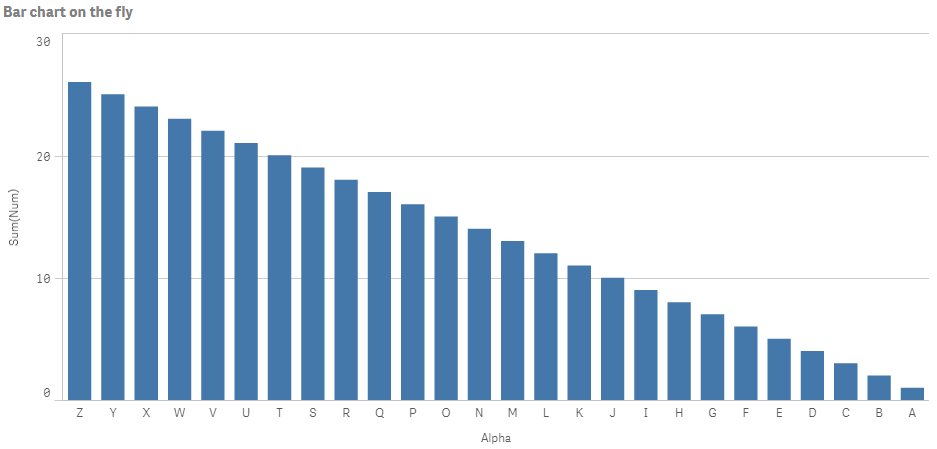
var script = "Load Chr(RecNo()+Ord('A')-1) as Alpha, RecNo() as Num autogenerate 26;" app.setScript(script).then(function(result){ app.doReload().then(function(){ app.visualization.create('barchart',["Alpha","=Sum([Num])"],{title:"Bar chart on the fly"}).then(function(bar){bar.show('QV01');}); }); console.log(result); });The app.setScript method sets the data load script of the session app. It also validates the script syntax and returns any syntax error that may exist.
This example loads the data and creates a basic bar chart based on the data loaded.
-
Complete the code
A require () function is needed to load the Qlik APIs so that they can be accessed by the mashup. The complete JavaScript code for this example is shown below. Notice that the creation and data loading of the session app, and creation of the chart are included within the scope of the require () function.
var prefix = window.location.pathname.substr( 0, window.location.pathname.toLowerCase().lastIndexOf( "/extensions" ) + 1 ); var config = { host: window.location.hostname, prefix: prefix, port: window.location.port, isSecure: window.location.protocol === "https:" }; require.config( { baseUrl: ( config.isSecure ? "https://" : "http://" ) + config.host + (config.port ? ":" + config.port : "") + config.prefix + "resources"}); require( ["js/qlik"], function ( qlik ) { var app = qlik.sessionApp(config); var script = "Load Chr(RecNo()+Ord('A')-1) as Alpha, RecNo() as Num autogenerate 26;" app.setScript(script).then( function(result){ app.doReload().then(function(){ app.visualization.create('barchart',["Alpha","=Sum([Num])"],{title:"Bar chart on the fly"}).then(function(bar){bar.show('QV01');}); }); console.log(result); }); });
Result
Test your mashup at http://localhost:4848/extensions/sessionApp/index.html.
Creating session apps from existing apps
This example creates a session app from an existing app using the qlik.sessionAppFromApp method. It also displays an existing visualization from that app.
-
Create the container
Create a folder named sessionApp to contain your assets:
C:\Users\<UserName>\Documents\Qlik\Sense\Extensions\sessionApp
-
Create the container files
Create an HTML file and name it index.html if you want to make a new web page. You can also open an existing HTML page where the chart should be.
Create a JavaScript file and call it sessionApp.js.
Reference the JavaScript file in the HTML file:
<script src="sessionApp.js"></script>Create a QEXT file and name it sessionApp.qext.
It should look something like the following:
{ "type": "mashup", "name": "sessionApp", "description": "Basic responsive mashup template", "version": "1.0.0", "author": "", "homepage": "", "keywords": "qlik-sense, visualization, mashup", "license": "", "repository": "", "dependencies": { "qlik-sense": ">=3.0.x" } } -
Include Qlik Sense into your web page
Reference the Qlik Sense implementation of RequireJS and a CSS file to ensure the visualizations are styled as expected. Include the CSS reference in the <head> section of your web page:
<link rel="stylesheet" href="../../resources/autogenerated/qlik-styles.css">Include the RequireJS reference before the closing </body> tag:
<script src="../../resources/assets/external/requirejs/require.js"></script>Add some internal styling inside the head of the HTML file to format the presentation of the chart.
<style> div.qvobject { flex: 1 1 auto; height: 400px; width: 800px; margin: 45px 0 0 45px; } </style>Place the Qlik Sense objects that have been defined in the JavaScript file inside div tags inside the body of the HTML file.
<div id="QV01" class="qvobject"></div> -
Configure the host connection
In the JavaScript file, configure the connection to the host running Qlik Sense Desktop.
var prefix = window.location.pathname.substr( 0, window.location.pathname.toLowerCase().lastIndexOf( "/extensions" ) + 1 ); var config = { host: window.location.hostname, prefix: prefix, port: window.location.port, isSecure: window.location.protocol === "https:" }; require.config( { baseUrl: ( config.isSecure ? "https://" : "http://" ) + config.host + (config.port ? ":" + config.port : "") + config.prefix + "resources"}); -
Create the session app
The qlik object is an instance of the Root API. After you configure your connection to the server, you can open an app or like in this case, create a new app on the fly using the sessionAppFromApp method:
var sessionAppFromApp = qlik.sessionAppFromApp("C:\\Users\\<UserName>\\Documents\\Qlik\\Sense\\Apps\\<AppName>.qvf", config);This returns an app JavaScript object with some app methods, so you can now work with your app that uses the App API.
-
Reload the data and display an existing visualization
Reload the data. If the data loads successfully, display a visualization with ID HrZsPG in a HTML element with ID QV01.
sessionAppFromApp.doReload().then(function(result){ if( result ){ sessionAppFromApp.getObject('QV01', 'HrZsPG'); } else { console.log('Reload failed'); } }); -
Complete the code
A require () function is needed to load the Qlik APIs so that they can be accessed by the mashup. The complete JavaScript code for this example is shown below. Notice that the creation and data loading of the session app, and display of the chart are included within the scope of the require () function.
var prefix = window.location.pathname.substr( 0, window.location.pathname.toLowerCase().lastIndexOf( "/extensions" ) + 1 ); var config = { host: window.location.hostname, prefix: prefix, port: window.location.port, isSecure: window.location.protocol === "https:" }; require.config( { baseUrl: ( config.isSecure ? "https://" : "http://" ) + config.host + (config.port ? ":" + config.port : "") + config.prefix + "resources"}); require( ["js/qlik"], function ( qlik ) { var sessionAppFromApp = qlik.sessionAppFromApp("C:\\Users\\<UserName>\\Documents\\Qlik\\Sense\\Apps\\<AppName>.qvf", config); sessionAppFromApp.doReload().then(function(result){ if( result ){ sessionAppFromApp.getObject('QV01', 'HrZsPG'); } else { console.log('Reload failed'); } }); });
Result
Test your mashup at http://localhost:4848/extensions/sessionApp/index.html.